SMTP configuration example
This documentation shows an example of configuring SMTP on AWS. Setting up SMTP is not mandatory for Manager to work, but allows Manager to send emails when creating users, resetting passwords, and so on.
Create an Email Group
- Start by creating an email group and adding users to it. This group will allow you to access inbox emails. You might need admin support for this step. Ensure that the email group name matches the one you’ll use for SMTP.
SES Configuration
- Navigate to Amazon SES and go to Identities.
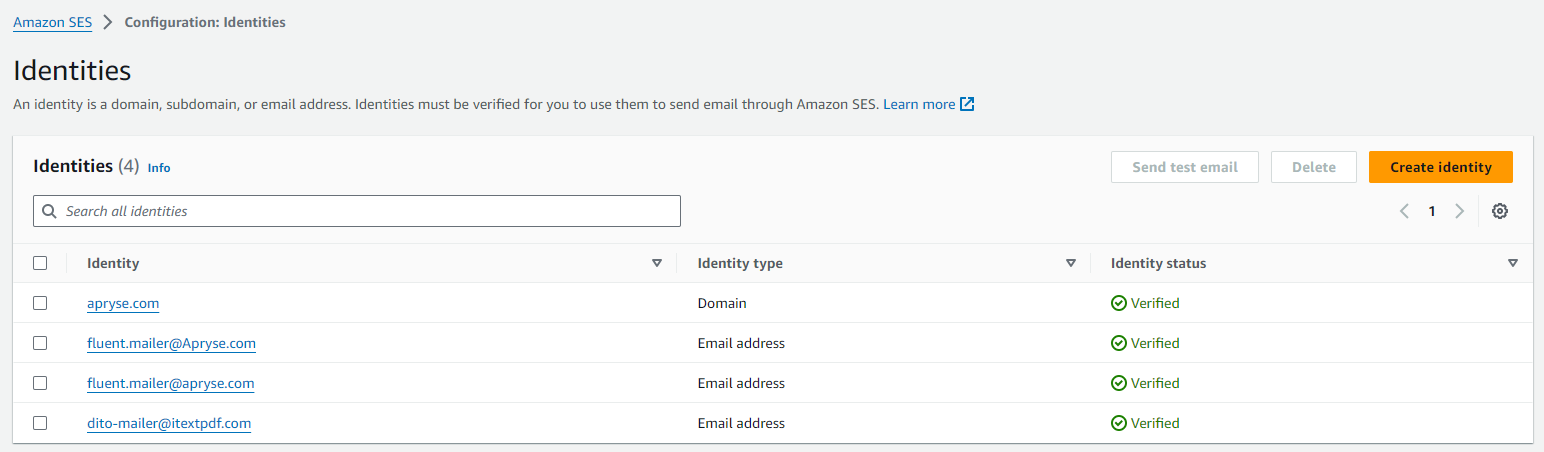
- Create an identity email address. This email will be used for sending emails from your application.
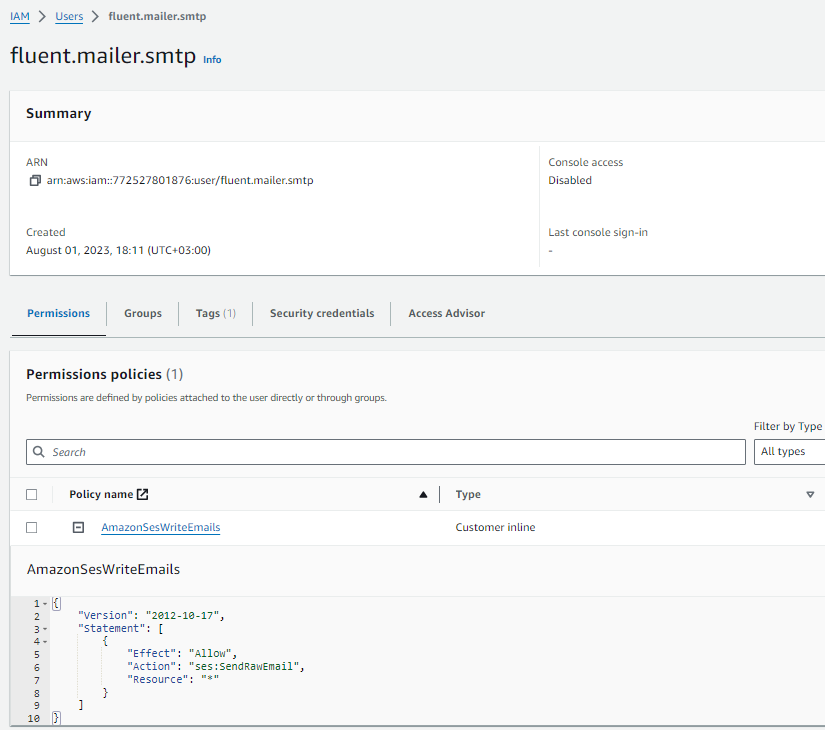
Provide IAM User Permissions:
- Create an IAM policy named AmazonSesSendingAccess with the following JSON content:
{
  "Version": "2012-10-17",
  "Statement": [
    {
      "Sid": "VisualEditor0",
      "Effect": "Allow",
      "Action": "ses:SendRawEmail",
      "Resource": "*"
    }
  ]
}
This policy allows the IAM user to send emails via SMTP.
- Next, create an IAM user (or use an existing one) and assign the AmazonSesSendingAccess policy to this user.
Checking result:
- After completing the above steps, your configuration should resemble the screenshot below:
- At this point, emails can be sent by the application and received by users. However, they might be marked as spam. To avoid this, we need to "validate" the email with DKIM and SPF.
SPF Configuration:
- Add a new TXT record to the apryse.com domain with the following content:
v=spf1 include:amazonses.comDKIM Configuration:
- DKIM configuration is done at the domain level. It involves CNAME records with public keys to the domain so that email certificates can be verified. There are two ways:
easy DKIMandBYODEKIM - Easy DKIM:
- In the Identity type field, choose Easy DKIM.
- In the DKIM signing key length, select either RSA_2048_BIT or RSA_1024_BIT.
- If your domain is hosted through Amazon Route 53, you have the option to let SES publish the associated CNAME records at the time of creation by leaving the Enabled checkbox checked. If you prefer to publish these records later, clear the checkbox.
- Keep in mind that it might take up to 72 hours for the changes to propagate.
- BYODKIM (Bring Your Own DKIM):
- For BYODKIM configuration, please refer to the official AWS documentation.
- DKIM configuration is done at the domain level. It involves CNAME records with public keys to the domain so that email certificates can be verified. There are two ways:
Now let’s configure the environment variables to make SMTP reachable for your application. Ensure that the following variables are correctly set in your .env file:
FLUENT_MANAGER_MAILING_ENABLE=trueFLUENT_MANAGER_SMTP_AUTH=trueFLUENT_MANAGER_SMTP_FROM="email address you created in SES"FLUENT_MANAGER_SMTP_HOST="SMTP endpoint"FLUENT_MANAGER_SMTP_PASSWORD="password of the user previously created in IAM"FLUENT_MANAGER_SMTP_USERNAME="access key of the user previously created in IAM"FLUENT_MANAGER_SMTP_TLS_ENABLE=trueFLUENT_MANAGER_SMTP_PORT=587 (this is a default one if you use AWS)
Restart your application to apply the environment variables.
Remember to follow these steps carefully to ensure smooth email delivery and prevent emails from being marked as spam. If you encounter any issues, refer to the Set-up email sending with Amazon SES documentation.