Fluent Manager Data Source Files
When designing and managing templates, you'll often need to connect them to external data sources (like XML or JSON files) and structure schemas (like XSD files). Fluent Manager allows you to link templates directly to local files, ensuring your document generation is both flexible and secure.
This guide explains how to upload, manage, and test your data and schema files.
Ways to Upload a Data Source File
There are two primary ways to upload your local data or schema files into the system, depending on where you are in your workflow.
Method A: During Template Import
If a template is designed to use a local data file, the system detects this automatically. When you import the template, the UI will actively prompt you to upload the necessary data or schema files right then and there to complete the connection.
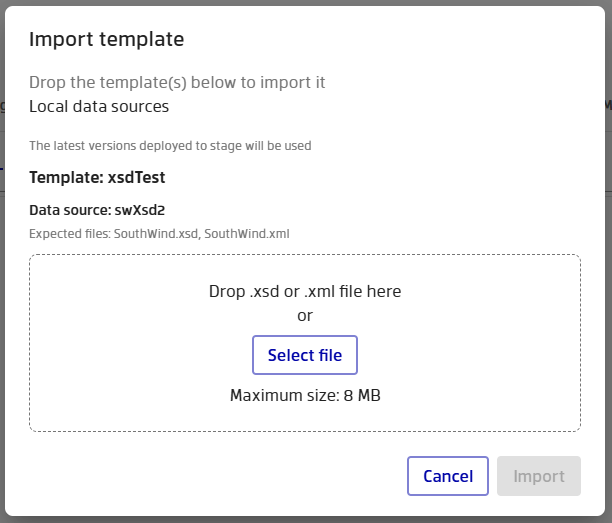
This template is expecting a .xml file and a .xsd file
Method B: From the Data Source View
If you skipped the upload during import, or need to add a file later, you can do so directly from the Data Source management screen.
- Navigate to the Data tab
- Select the data source you want to upload a file to
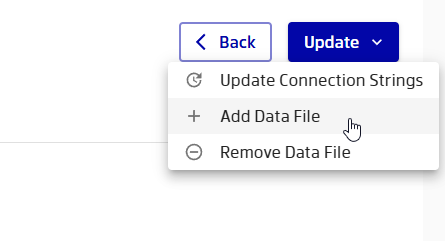
- Click on the Update dropdown menu.
- Select Add Data file and choose the file from your computer.
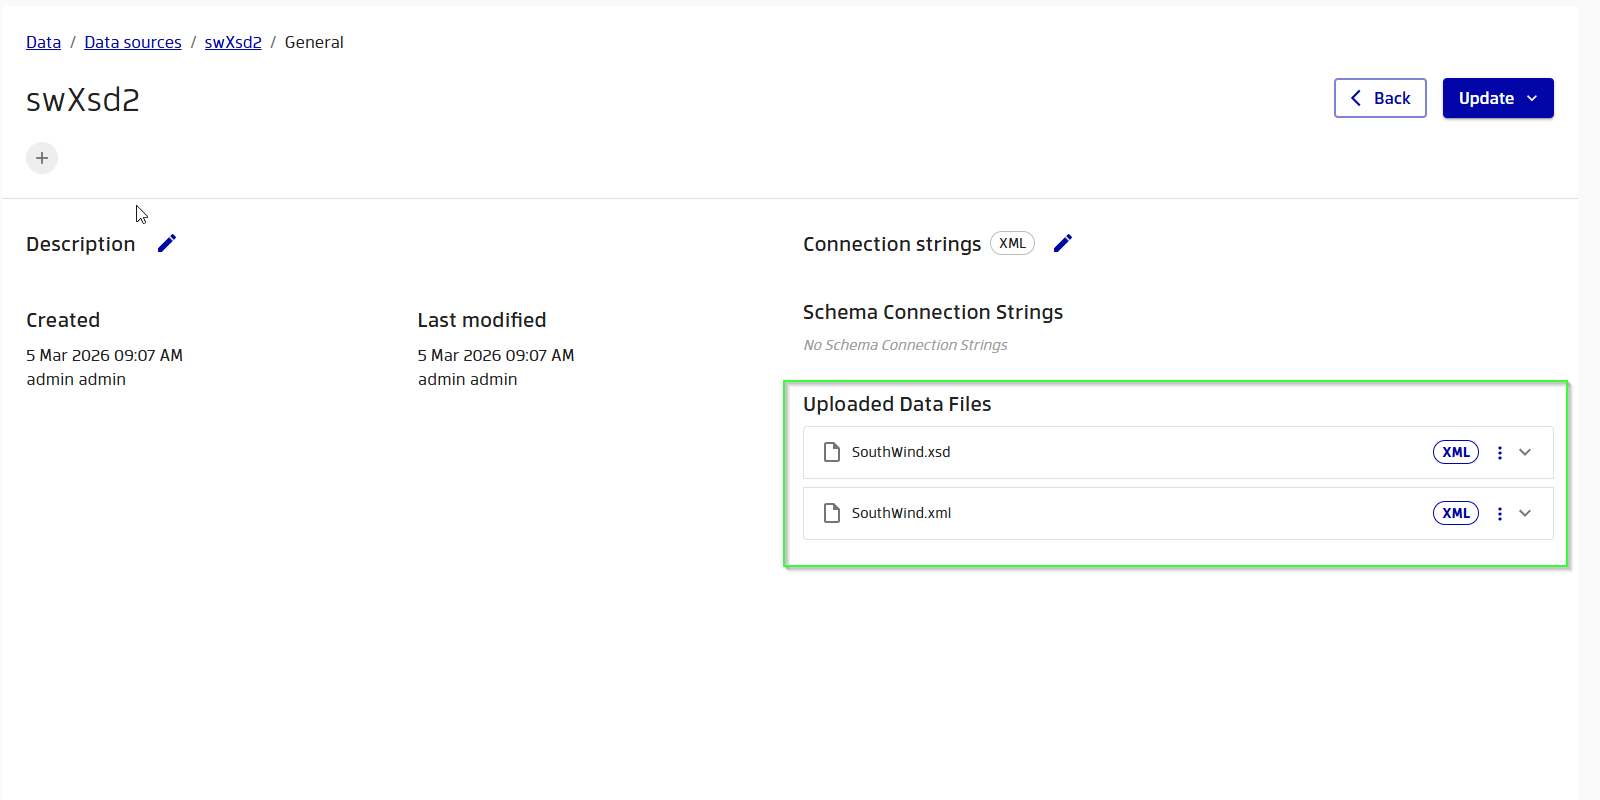
Once you have data files associated with your data source, they will show up here:
How File Matching Works (The Upload Process)
Whether uploading during import or via the Data Source view, the system uses a smart matching process to link your uploaded documents to the ones the template is expecting.
Here is how the system decides which file goes where:
- Exact Name Match (Recommended): The system first looks for an uploaded file with the exact same name as the file referenced in the template (e.g.,
sales_data.xml). - Extension Fallback: If you renamed your file before uploading (e.g.,
sales_v2_final.xml), the system will automatically check the file extensions. If it finds an uploaded file with the matching.xmlor.xsdextension, it will smartly map it to the expected file. - Missing Files: If no uploaded file matches the exact name or the required extension, the system will flag the expected file as "missing."
Schemas vs. Data Files
A single data source can require both actual data and a structural schema. If you upload both, the system automatically sorts them based on their file extensions:
- Schema Files (
.xsd): Automatically applied to the schema configuration of your data source. - Data Files (
.xml,.json): Automatically applied as the primary data content.
Managing Your Uploaded Files
Once your files are successfully attached to a data source, Fluent Manager provides several tools to manage and verify them directly from the Data Source view.
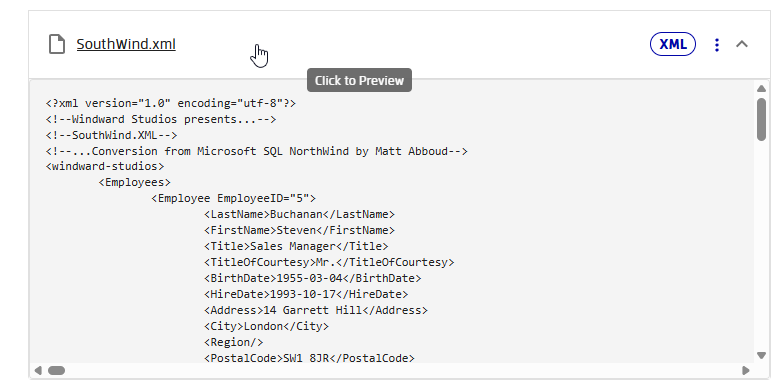
- Preview 100 Lines: Need a quick sanity check? You can preview the first 100 lines of your uploaded data or schema file directly in the browser without needing to open external tools.
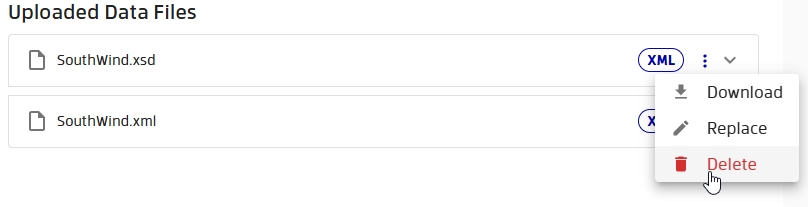
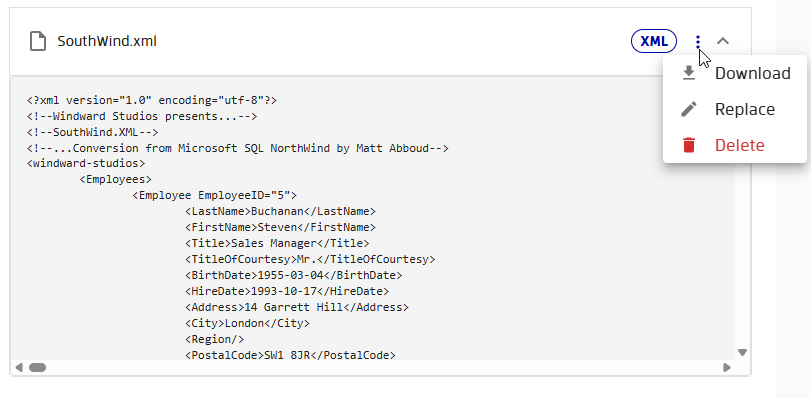
If you open the context menu on a specific file, you will find the Download and Replace buttons:
- Download File: You can download the currently attached file to your local machine at any time for full review or offline editing.
- Replace File: If your baseline data changes or your schema updates, you can easily swap out the old file. Use the Replace feature to upload a new version, which will seamlessly overwrite the existing file for that data source.
Deleting a Data Source File
There are two ways to delete files from a data source, depending on whether you need to manage multiple files globally or just remove a single file quickly:
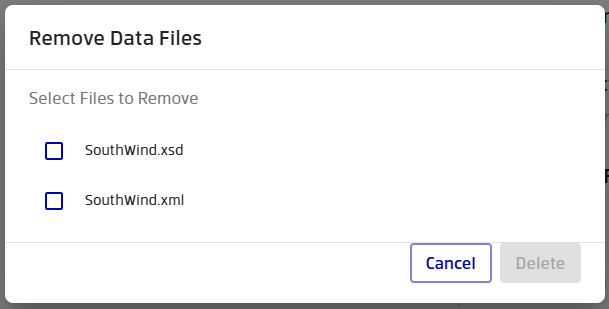
1. Deleting Multiple Files (Global Edit)
- Navigate to the Update menu.
- This will open a dialog box where you can view your files.
- Select multiple files you wish to delete. This acts as a global edit directly on the data source, allowing for bulk removals.
2. Deleting a Specific File (Row Level)
- Locate the specific file's row within the accordion menu.
- Open the context menu for that individual row.
- Select the option to remove that specific file.