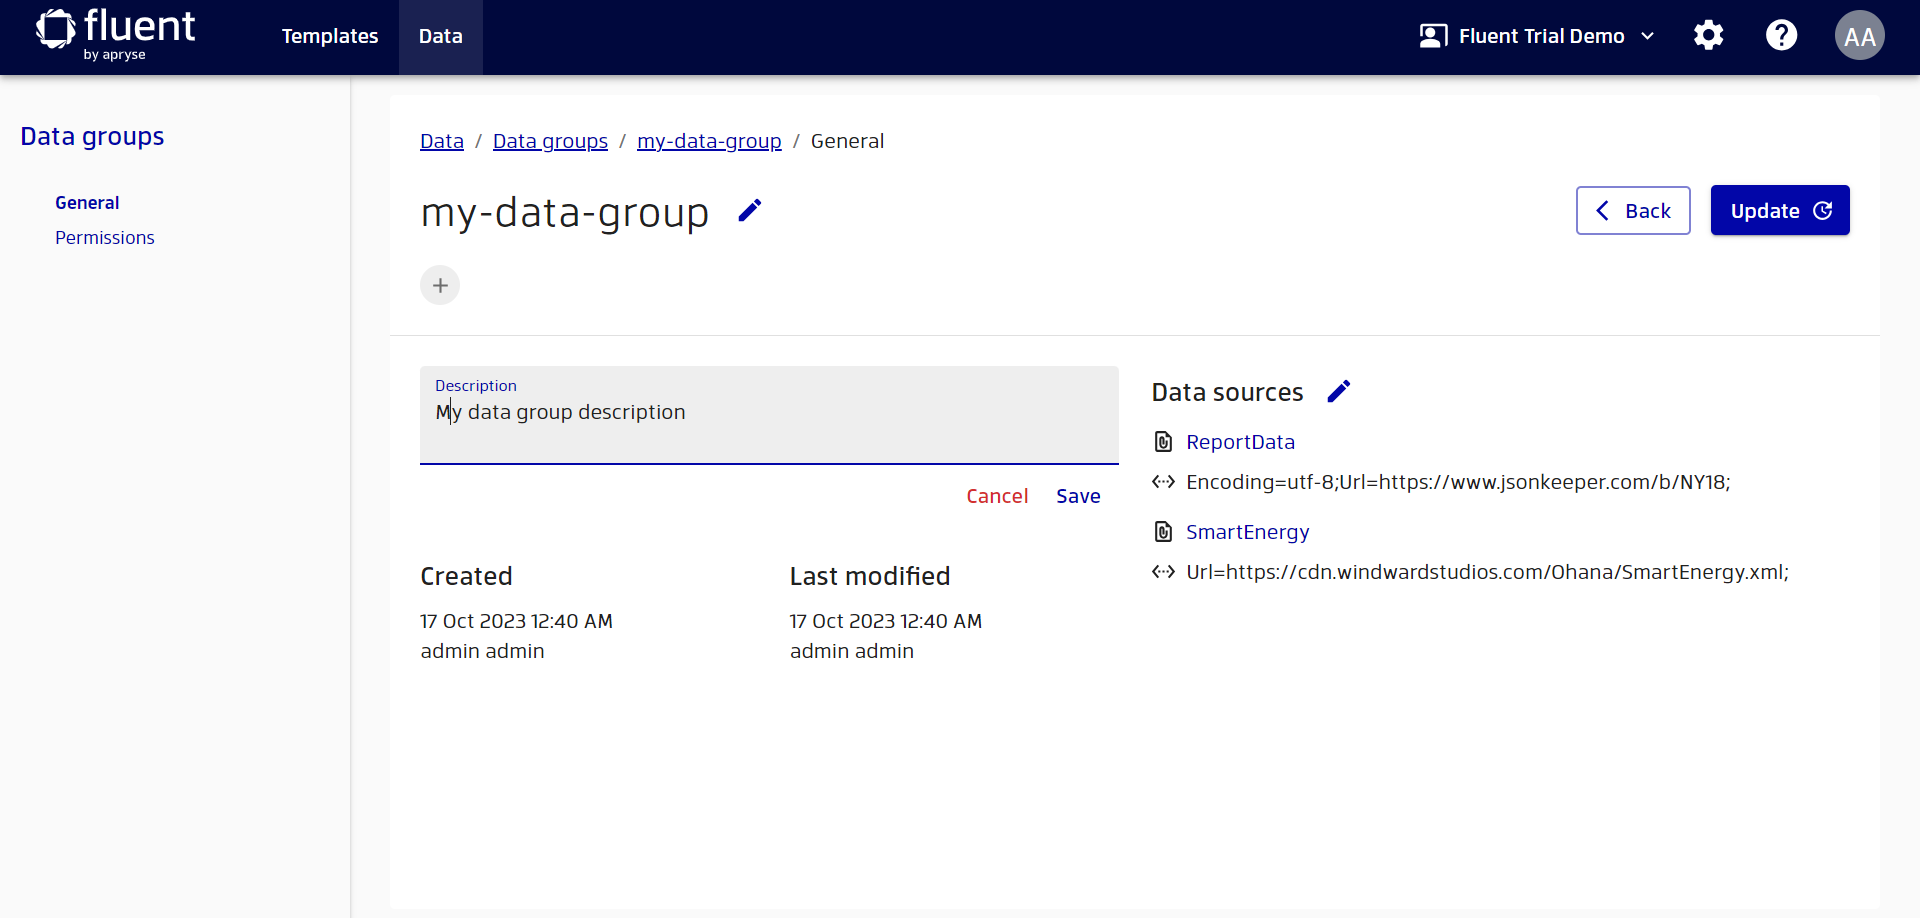
Fluent Manager Data Groups
A data group is a way of creating an association of data sources with certain connection strings to group them according to some attribute, such as origin, type, or other attributes.
For example, you can create a data group named “US Customers” that maps the data source “Customers” to the connection string pointing to US customer data.
Another example is when you have multiple data sources that contain different connection strings referring to test and real data. You can group the connection strings by type by creating two data groups: “Development Data“ and “Production Data“. Each data group will link the data sources with the appropriate connection strings for test or real data.
When you preview a template, you can choose which data group or groups to use. The data sources from the template will then be populated with the connection strings that belong to the selected data groups. This can help you to preview templates with different data sets and help avoid the manual and repetitive process of selecting connection strings.
For instance, if you have a template that displays customer names and addresses, you can use the data group “US Customers” to preview the template with US customer data. If you want to see how the template looks with UK customer data, you can use the data group “UK Customers”.
Data groups are useful for several reasons:
- They save you time and effort by allowing you to switch between different data sets easily.
- They help you to organize your data sources and connection strings in a logical way.
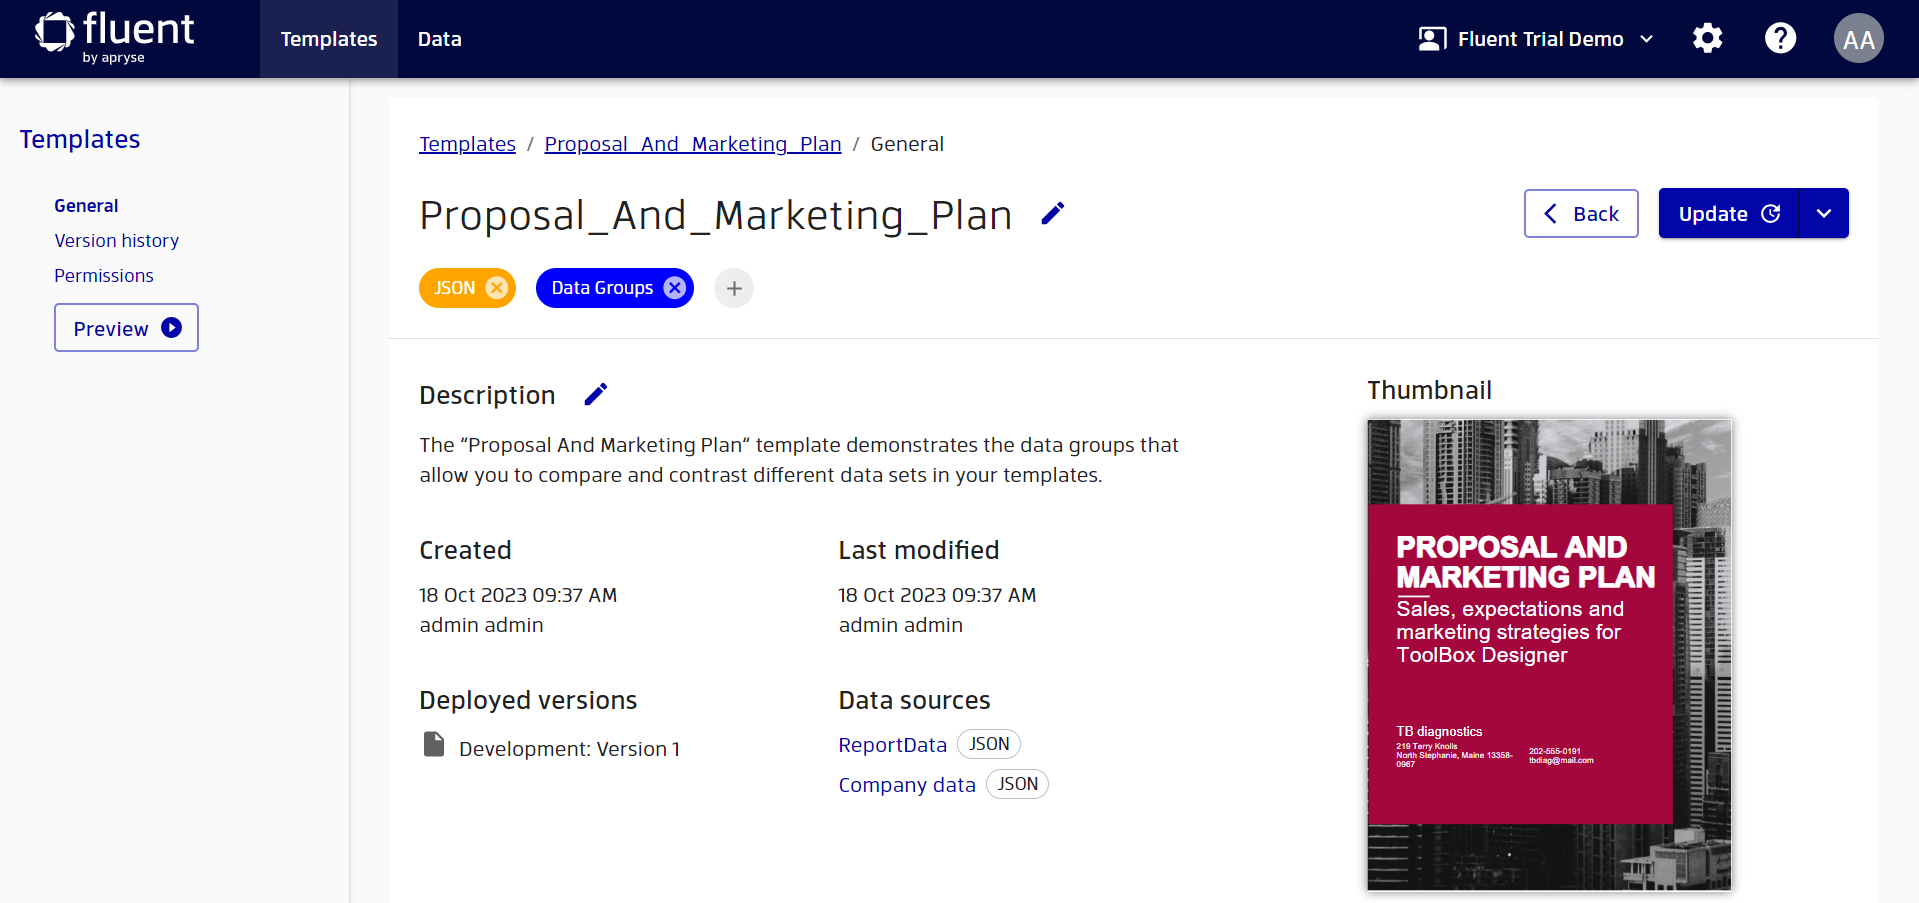
- They enable you to compare and contrast different data sets in your templates.
Data group creation and editing
A user should have Create new data groups permissions to be able to add data groups. To edit metadata and connection strings, the user must have Edit the metadata of data groups and Edit data group sources permissions.
To create a data group, follow these steps:
- Go to the
Data managementtab and click on theAdd data groupbutton. This will open a wizard to guide you through the process.
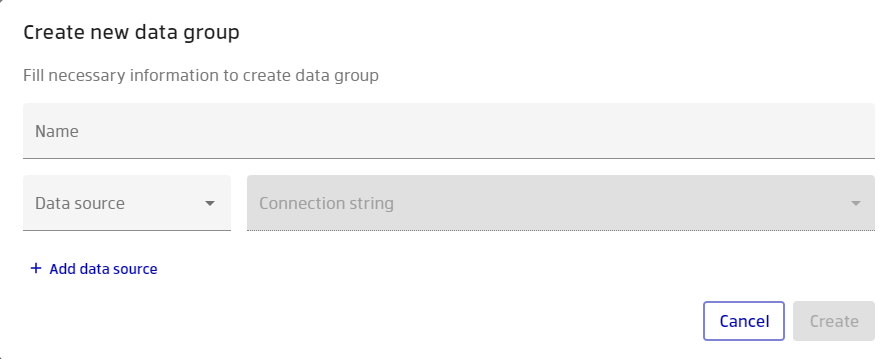
- Enter a name for the data group.
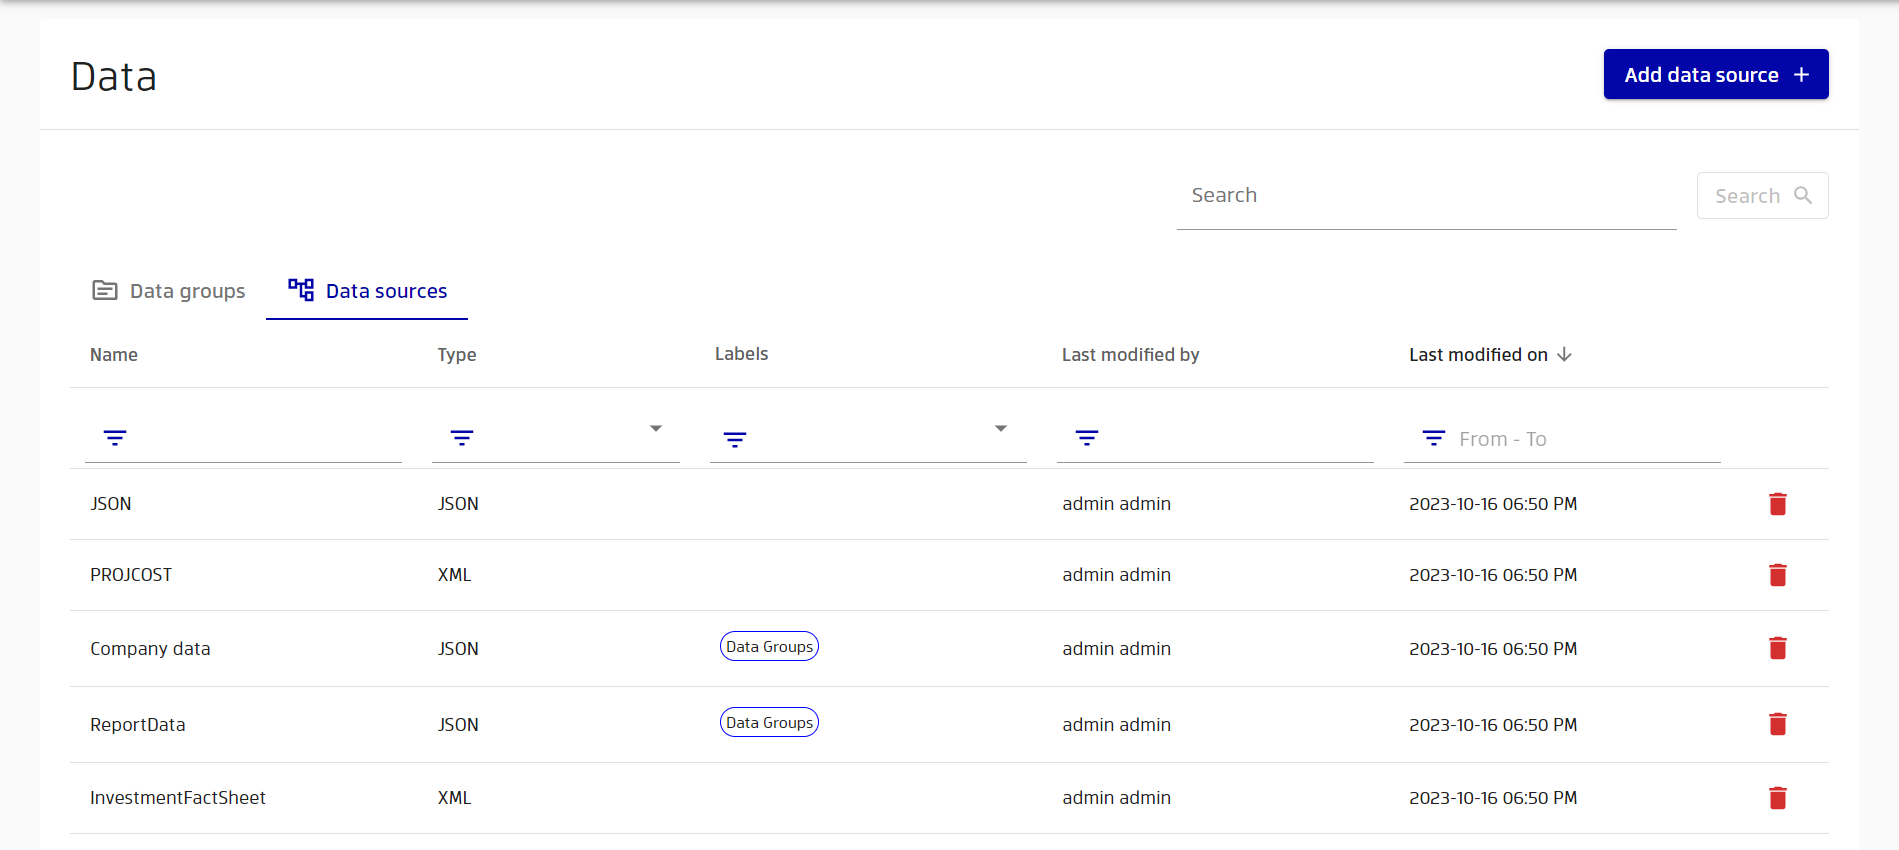
- Select a connection string from one of the data sources stored in Fluent Manager. If you don’t have any data sources yet, see Data source creation steps to learn how to create them.
- To add more data sources to the data group, click on the
Add data sourceoption.
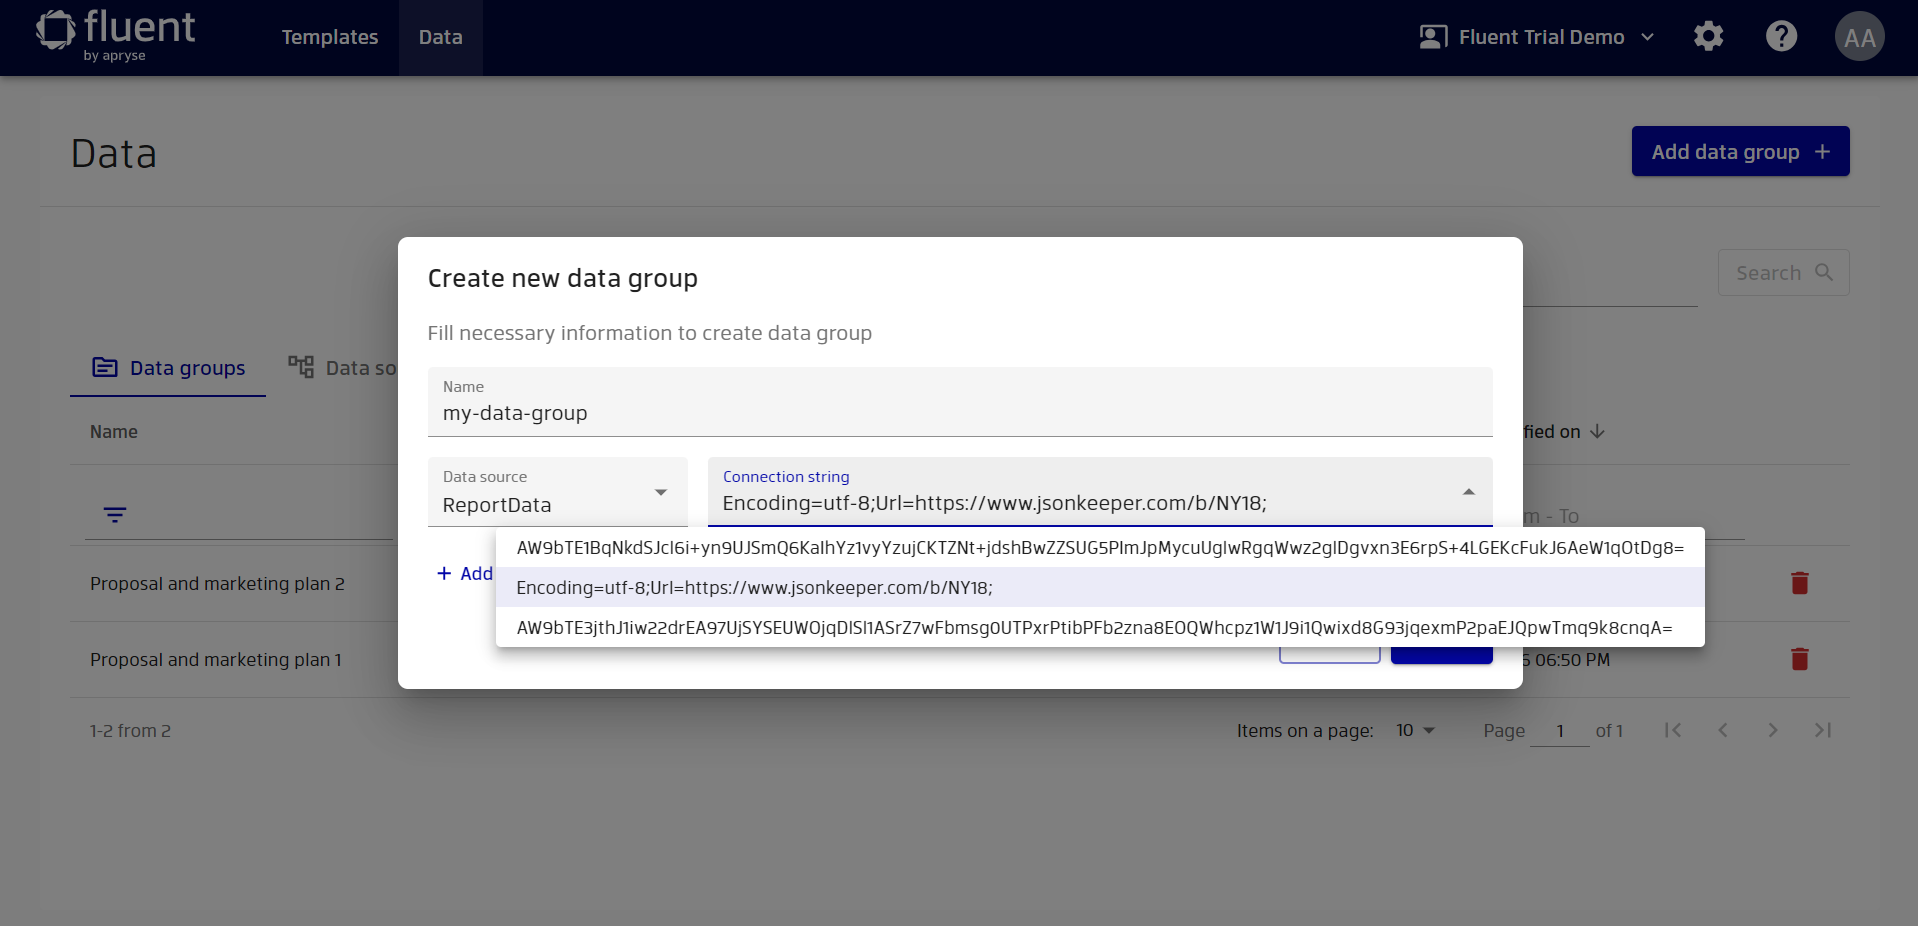
- Click on the
Createbutton to finish creating the data group. You will be redirected to the data group details page.

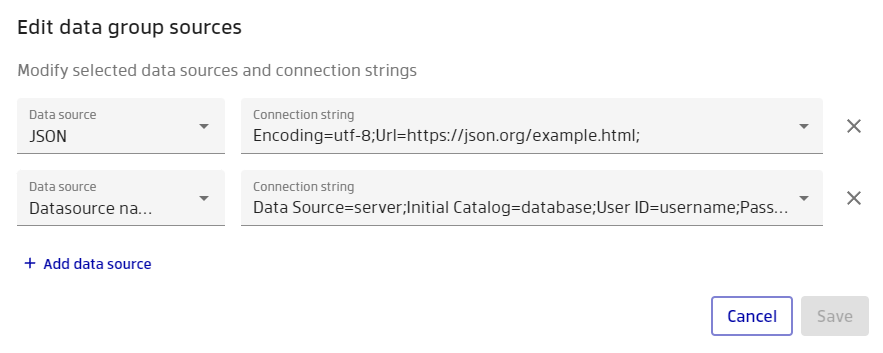
To edit a data group, you can do the following:
- Click on the
Updatebutton or the pencil icon next toData sourceson the data group page to change data source mapping. - Click on the pencil icon next to the description or name to modify them.
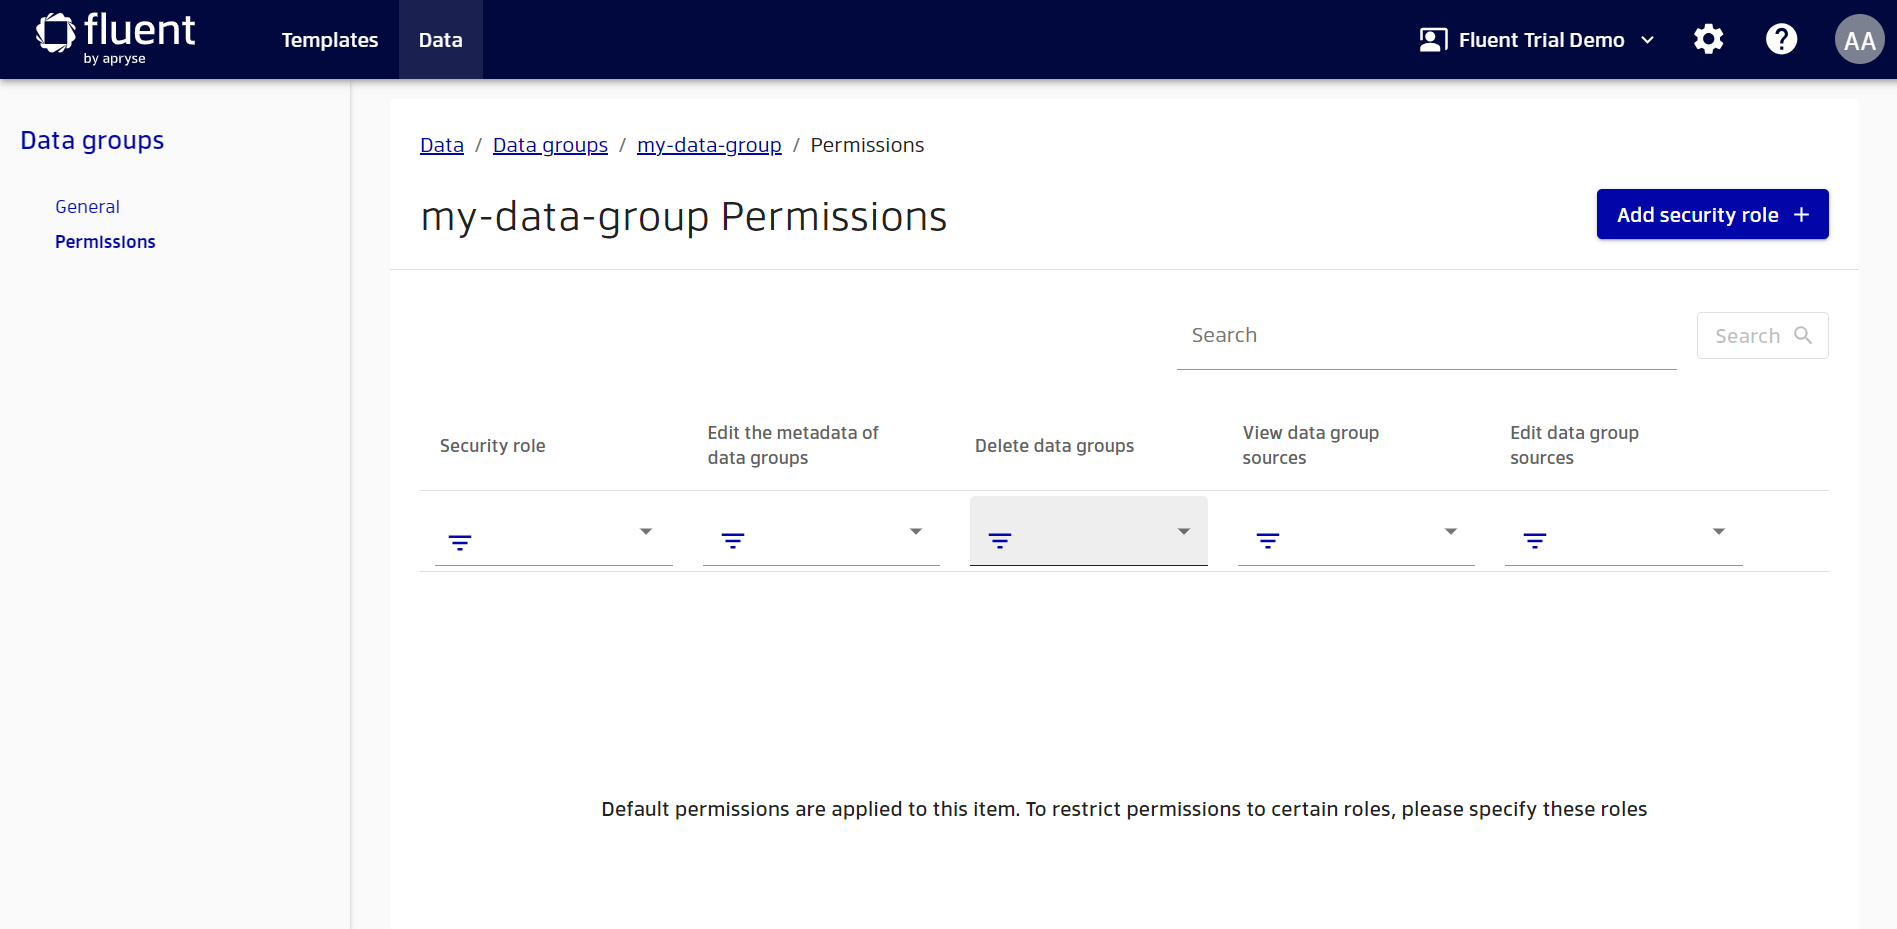
Data group permissions
You can configure the following permissions for data groups:
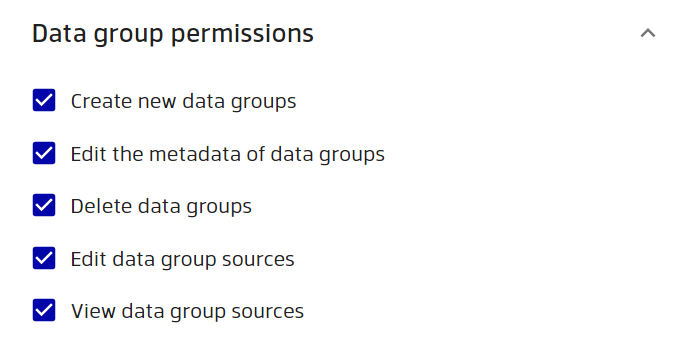
In addition to global application permissions, each data group can have its own set of permissions. For example, you can restrict a role which can modify all connection strings for all data groups by default, to only access some data groups. This can enhance security and prevent unauthorized changes. In addition, you can give a role more rights by explicitly adding the necessary rights for specific groups. For instance, you can allow users of a certain role to edit a specific data group that they normally cannot. Permissions can be set individually for each data group, giving you more flexibility and control over who can do what.
Using data groups for preview
By default, Fluent Manager uses the connection strings from the template for preview. If you have a data group with data sources used in the template, then you can apply it to the preview. Note that you can also apply multiple groups. In this case, if the data groups contain the same data source, then the connection string will be selected from the data group, which comes first in order. Also, once you have selected a data group or groups, you can still change the connection string for any data source if you desire.
To preview a template with data groups, follow these steps:
- Open the template you'd like to preview:
- Click on the preview button.
- Choose the data groups you'd like to use:
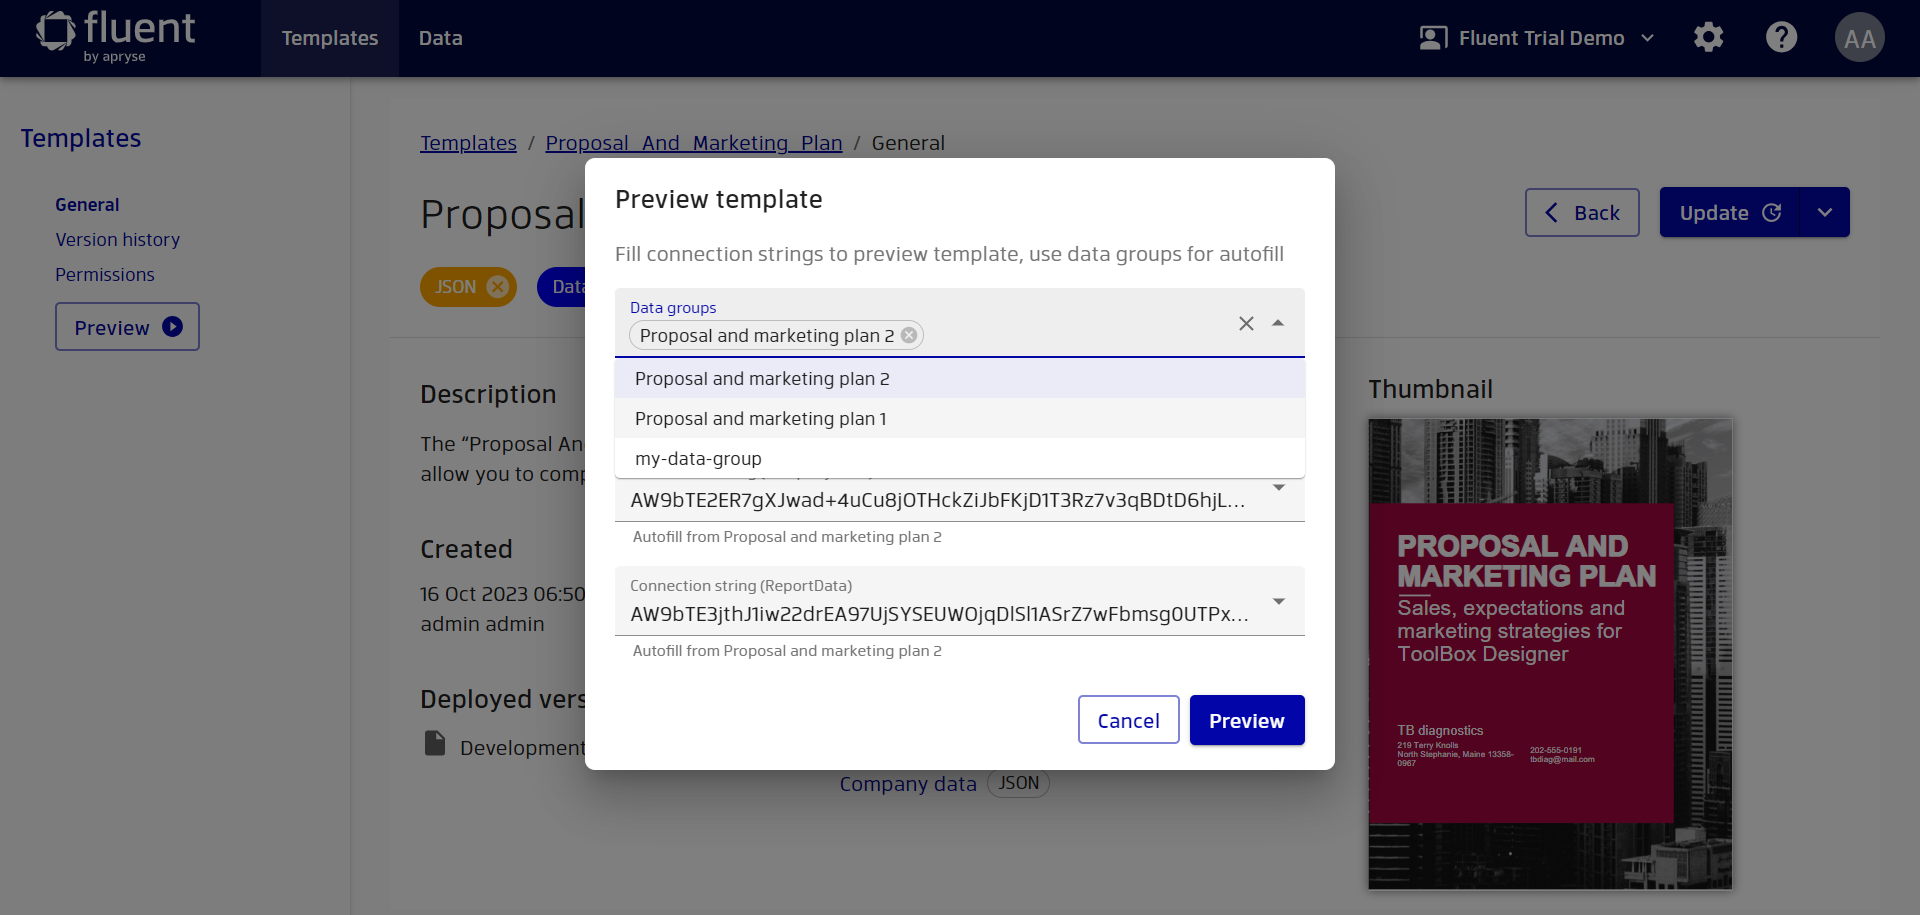
- Click the
Previewbutton to see the results.