Getting started with Fluent Manager
Getting Started
This documentation assumes that either you or your administrator have already deployed the Manager application and initialized the workspace according to the instructions. If you do not have a deployed application, you can either deploy it or fill out the trial form and get a read-only workspace to get started with Fluent. If you fill out the form, please refer to the "Getting Started for Trial Users" section.
Welcome to Fluent Manager, the solution for managing and distributing templates created with Fluent Designer. Fluent Manager is a central repository where you can store and update your templates and data sources. You can also control your users, security roles, Engine instances, and more. This article will help you learn the basics of using Fluent Manager. For more information, you can follow the links to other pages that provide more details.
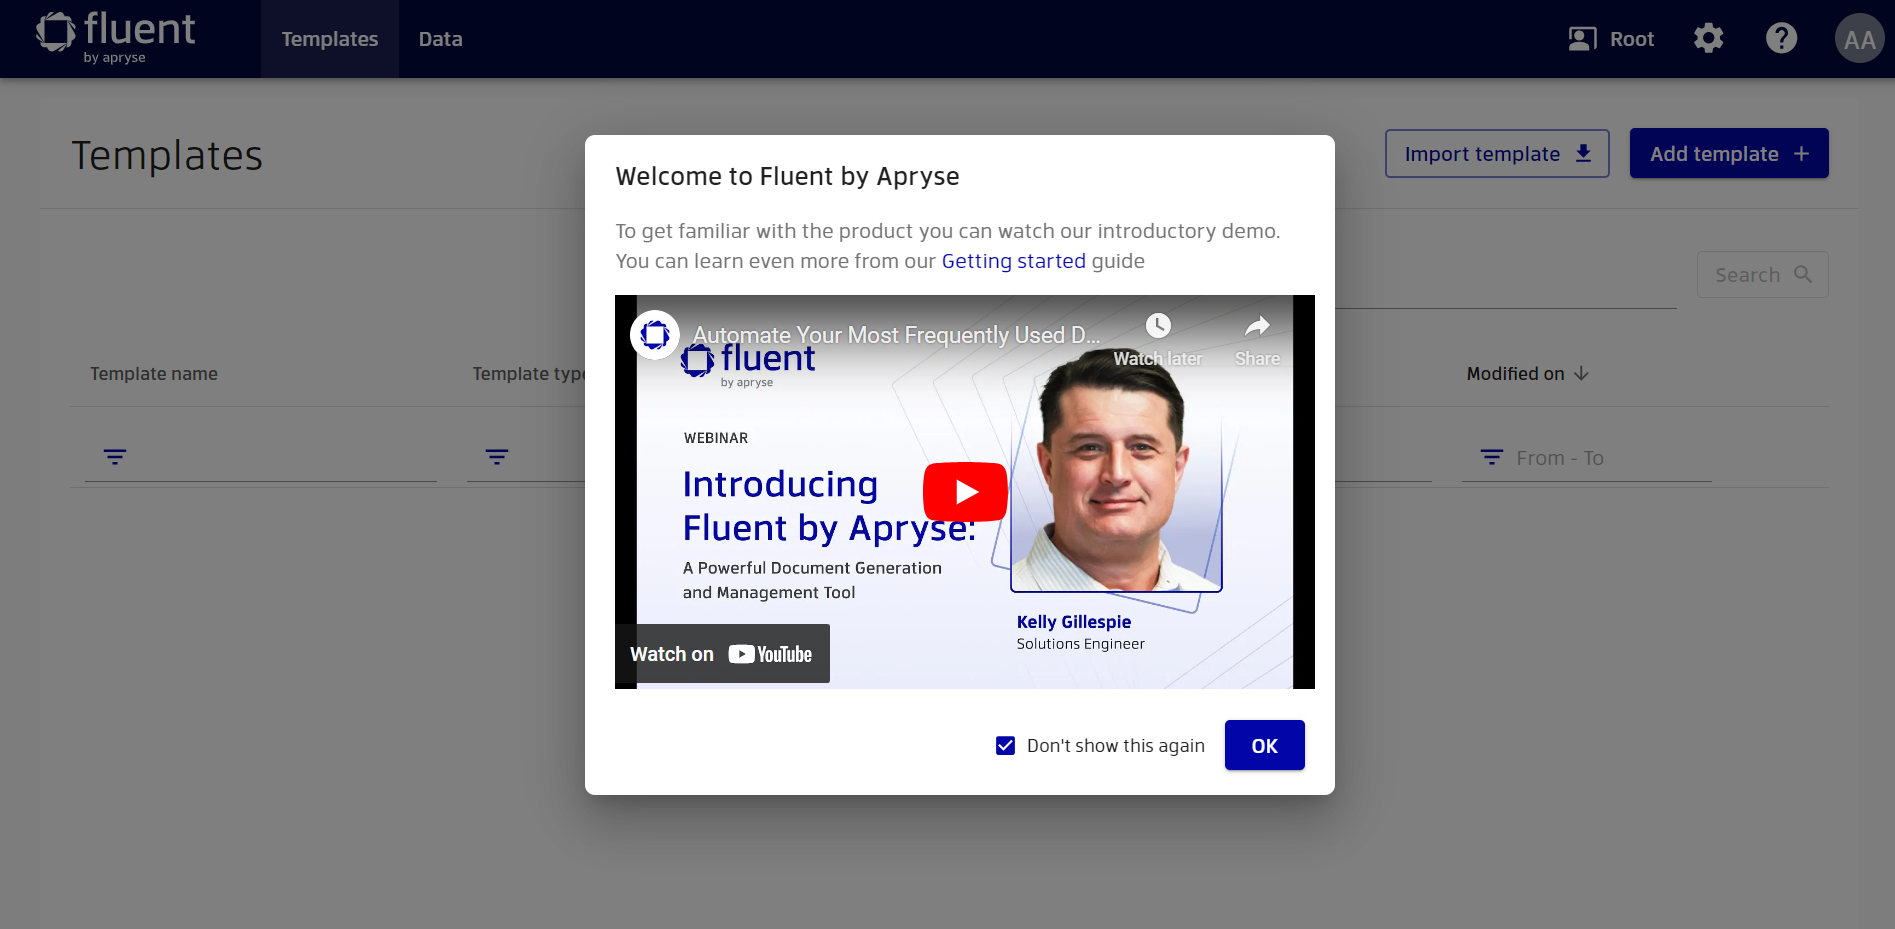
Also, before starting to explore this guide, we recommend that you watch the following video, which will give you an overview of Fluent as a whole.
Login to Manager
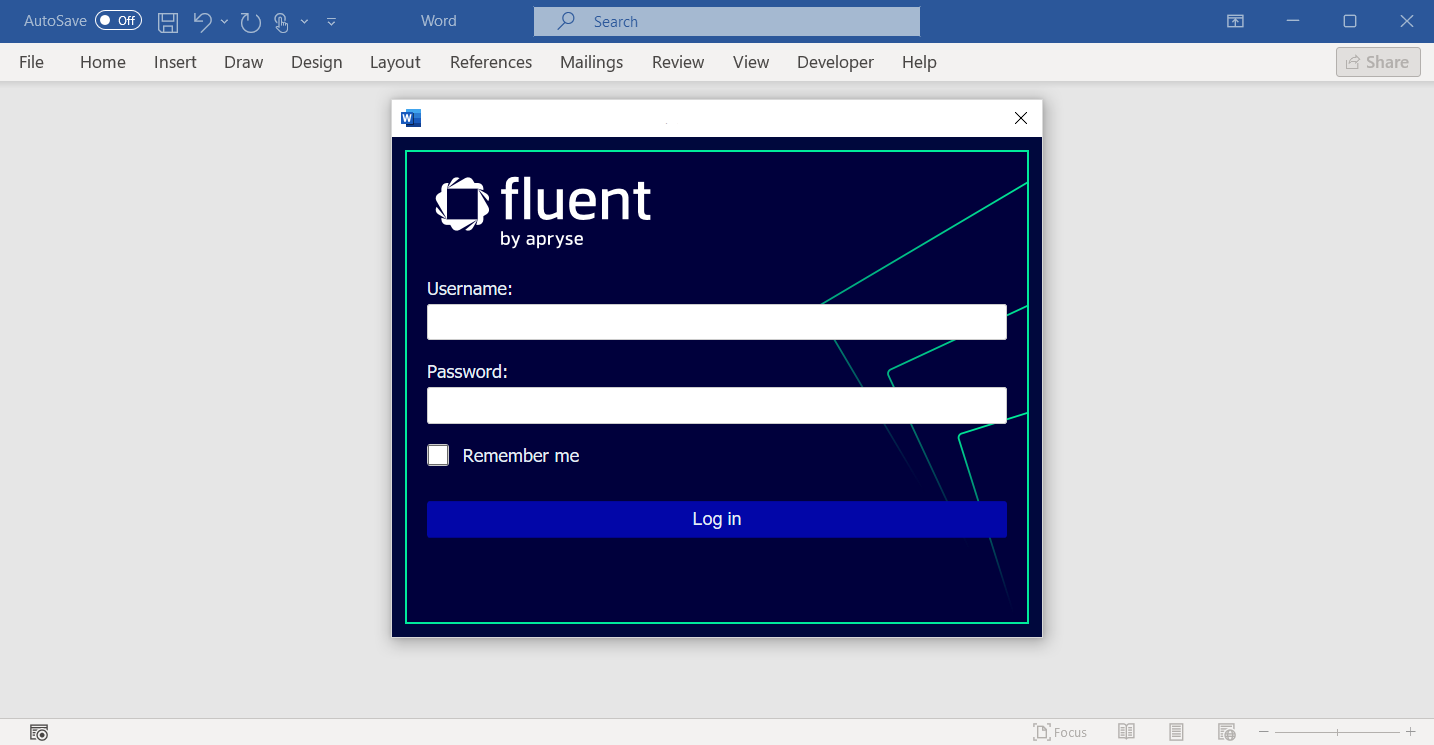
The first thing you'll see when opening Fluent Manager is the login screen.

The content on this screen is pretty flexible, and the workspace administrator can add custom colors, logos, and text according to your team's preferences.
Let's log in to our workspace by entering username and password and clicking the "Login" button.
Create your first template
After a successful login, you will see a welcome dialog with a "Getting started guide" and an introduction video.
After closing this dialog, you will be able to inspect the templates in your workspace.
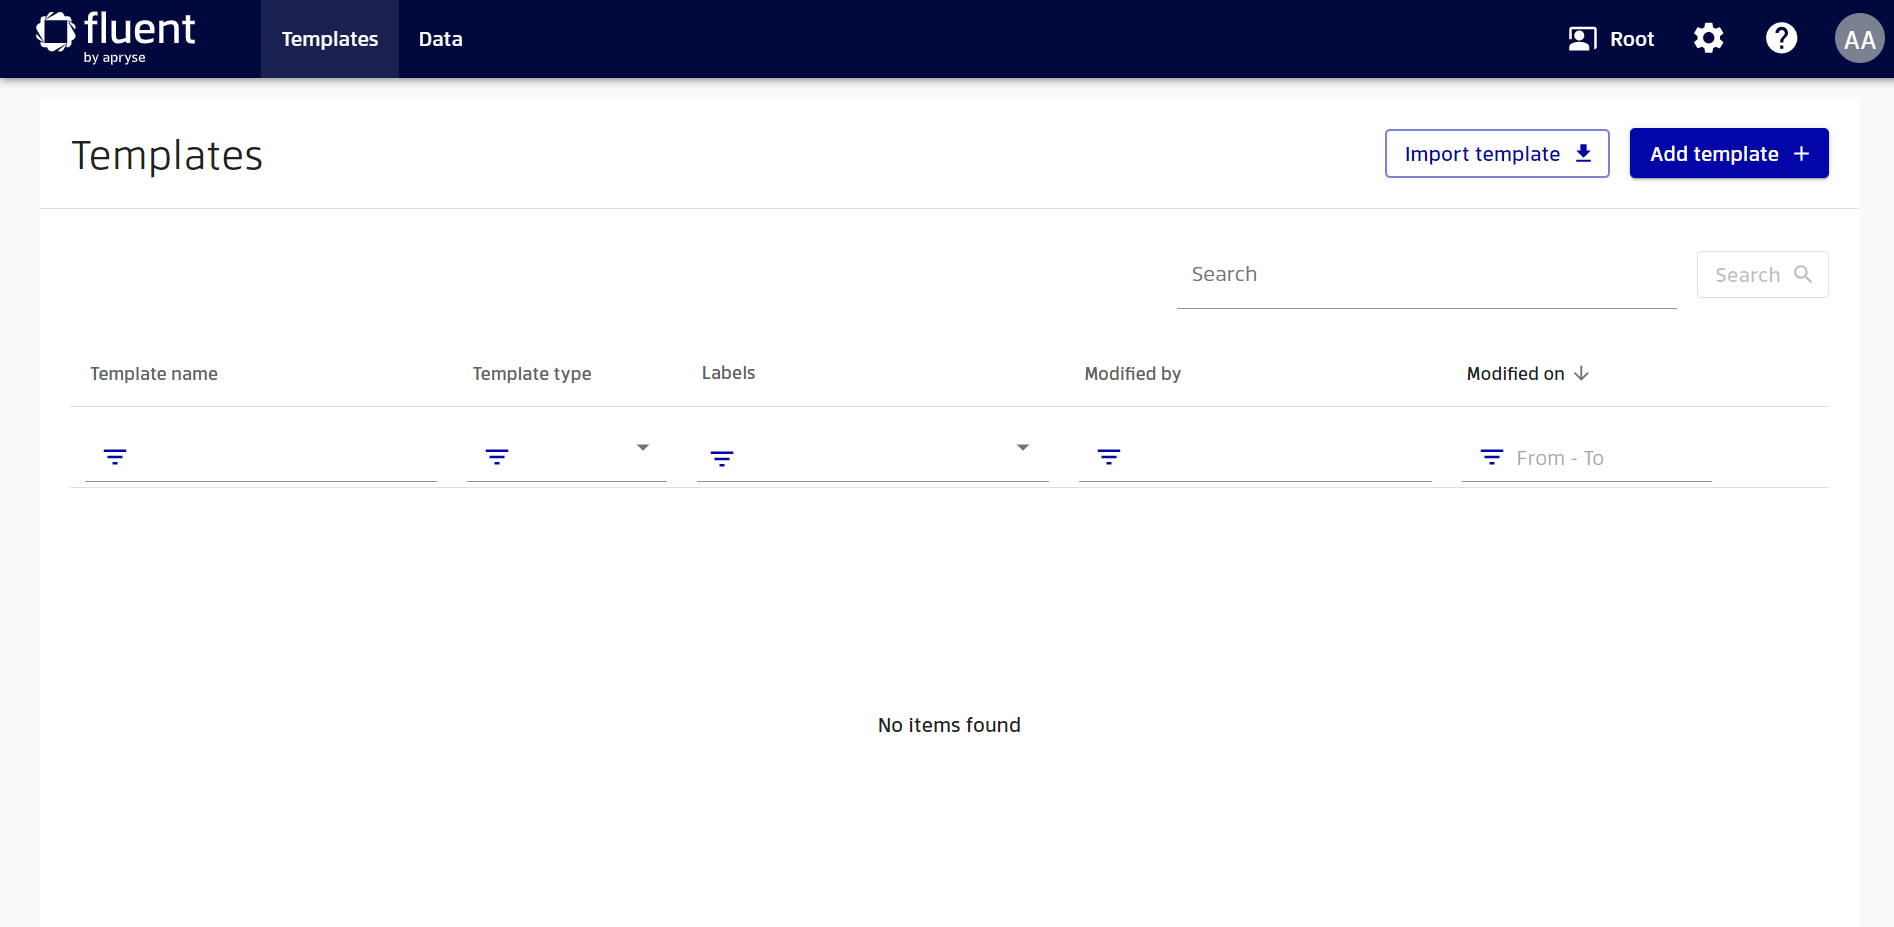
Whether your workspace is empty or full of templates created by other users, you can create a new one to understand how it works. Don’t worry, this won’t affect any existing templates.
To create a template, you need to have the appropriate permissions. If you are an administrator, then you will definitely have them. However, if you have a custom role with limited permissions, but still want to create your first template, please contact your administrator.
To create a template, click the "Add template" button. This will open the wizard to specify the name and type of the new template. Let's choose some name and choose the most common template type - Document. Note, however, that you can also create a Presentation or Spreadsheet by selecting the appropriate type.
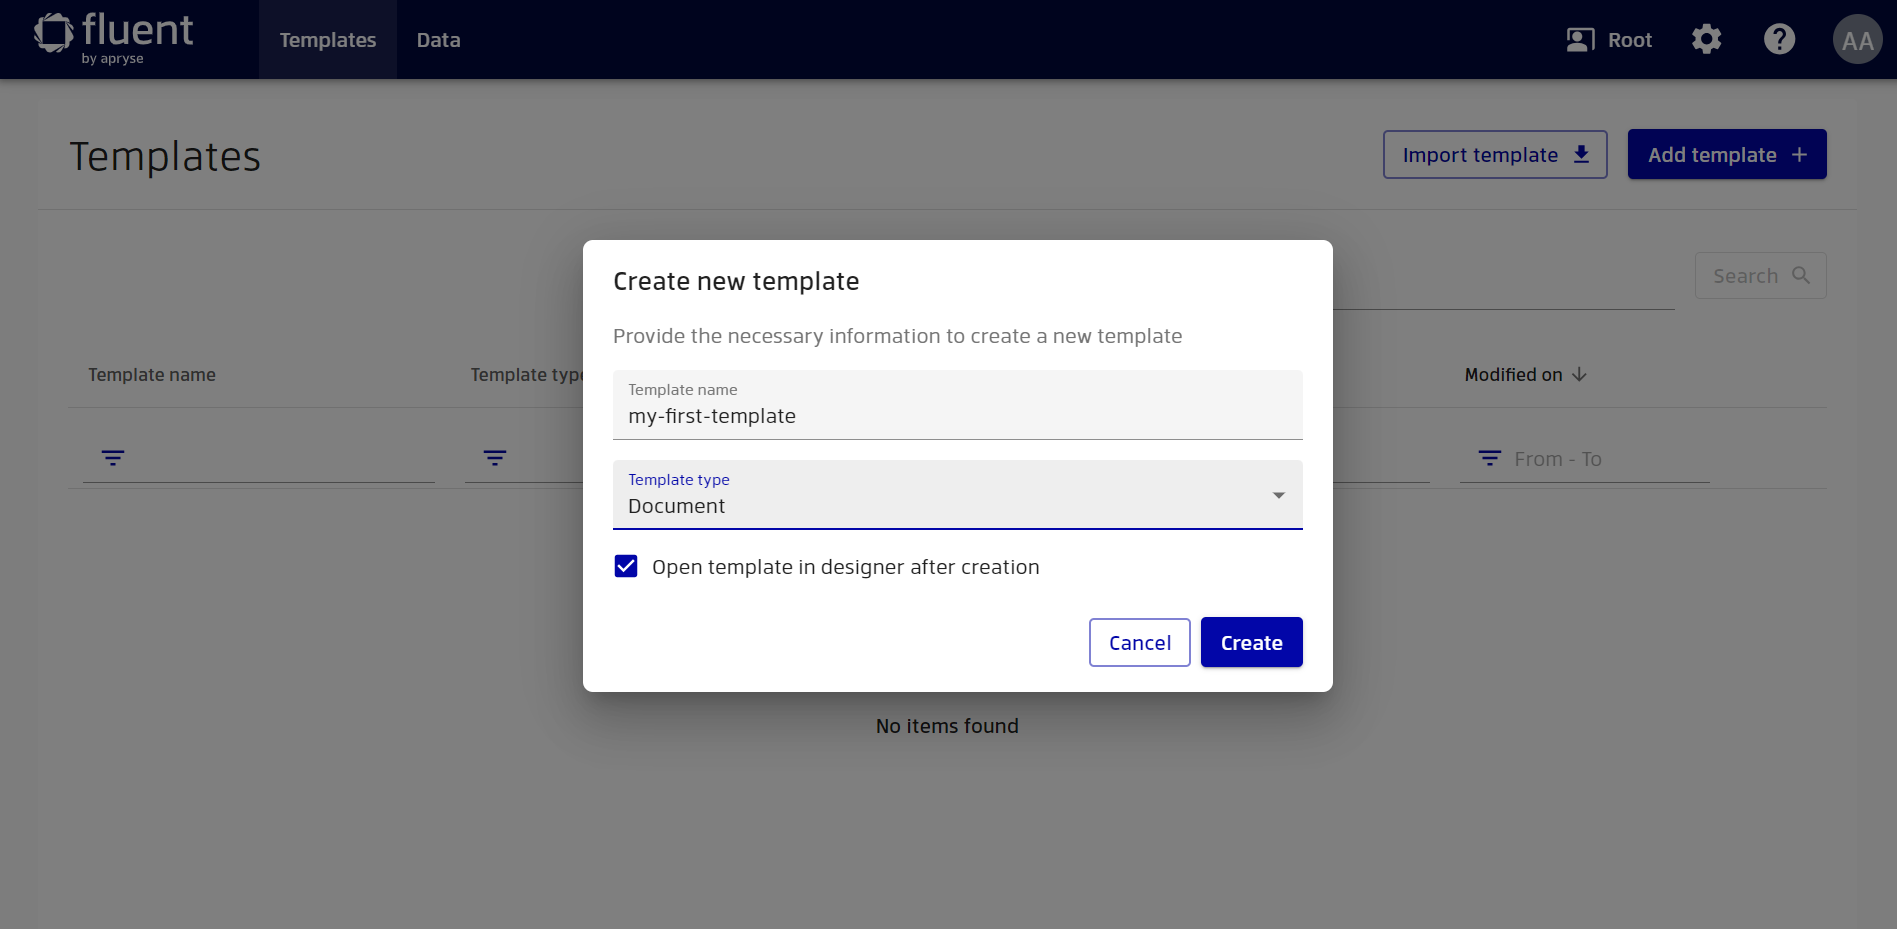
Also make sure the option "Open template in designer after creation" is enabled. With this option, the Manager will redirect us to the appropriate desktop Office Application. In case of Document type, it is Word.
Now, click "Create" button. When trying to create a template for the first time, Manager will prompt that you also need to have the Fluent Designer add-in installed.
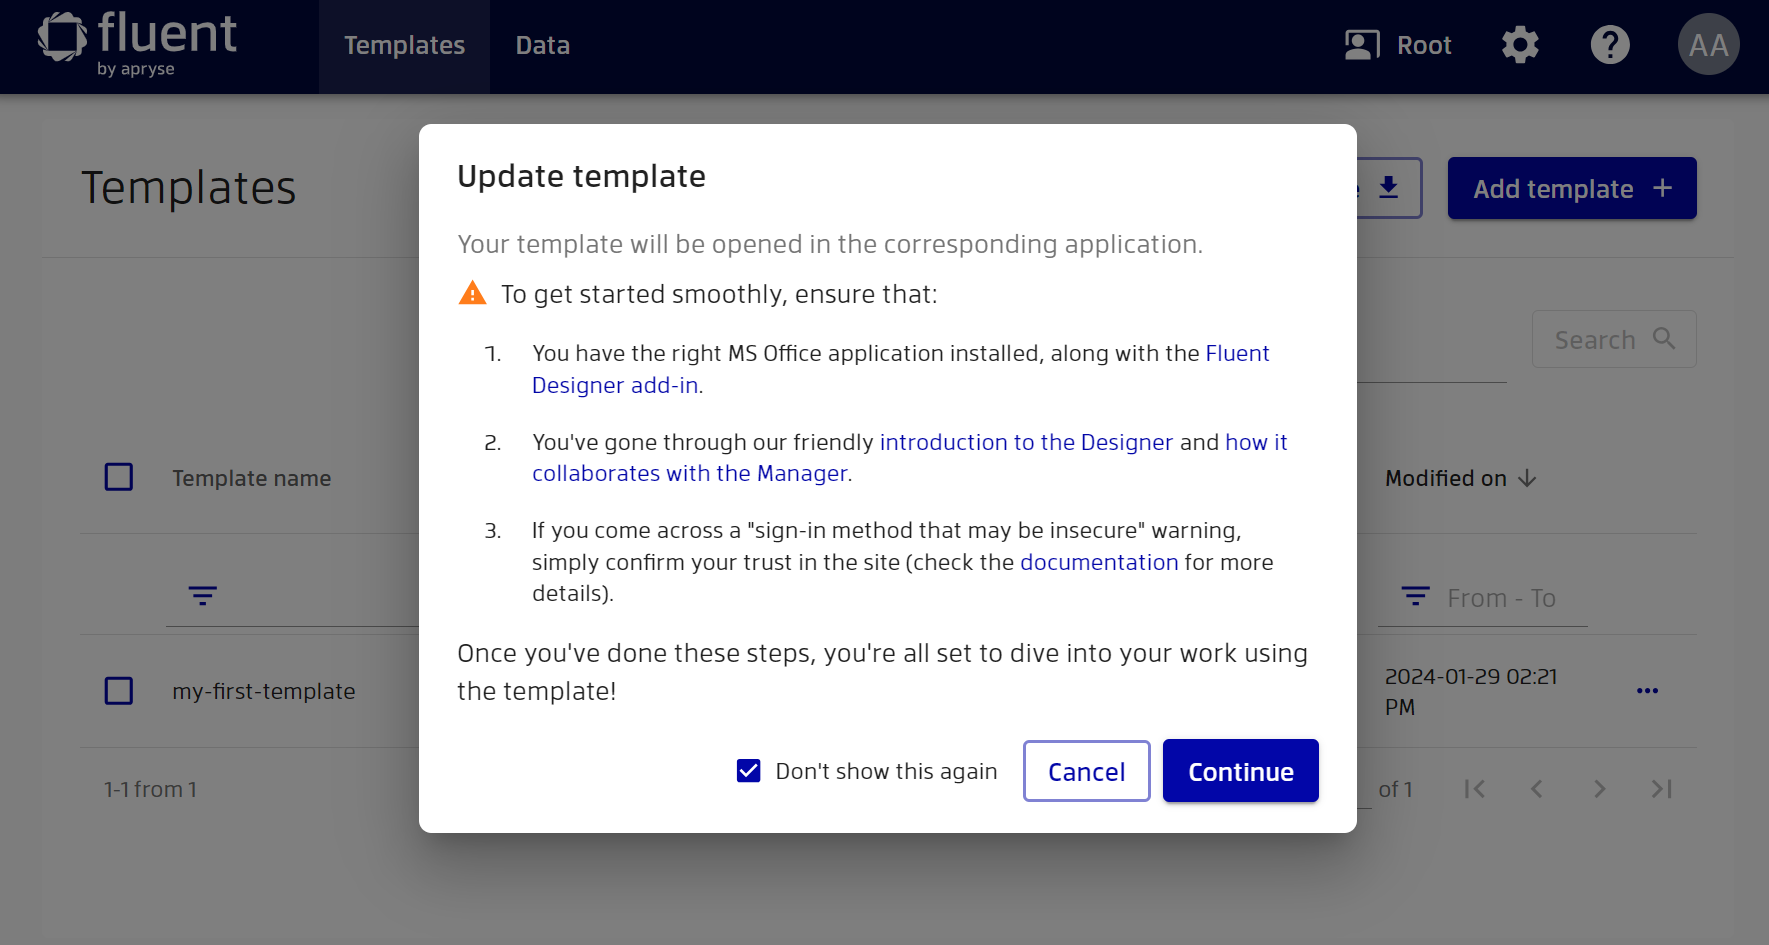
If you don't have Fluent Designer yet, you can download it here. You can also select the "Don't show this again" option to no longer show this reminder.
Finally, press "Continue" to open the template in the Designer.
Designer can request permission to use the forms-based login method that is used to gain access to the Manager. For more information on how to grant permission to the Designer for form based authorization, go to the documentation on interacting with the Designer
The template that you open in Word is not stored on your computer, but is stored in the Manager. This template is secure, so you'll also need to provide your Manager credentials in order for Word to retrieve it. Enter your username and password and click "Remember me" if you want to avoid entering these details again.
Congratulations, you've made it pretty far. Now you can start creating your first template with Fluent Designer. You can find documentation on creating your first template in the "The Five Steps of Fluent Designer" documentation. Try to create a simple template with some data source following this documentation.

Once your template is ready, you can save your template, and it will be automatically saved in Manager.
Note that when you click the save button, you are creating a new version of the template. In the future, if you wish, you can roll back to a previous version of the template. For more information about rollback, see the "Templates" documentation.
Exploring the template
Great, after saving the template, close your Word application and go back to the Manager.
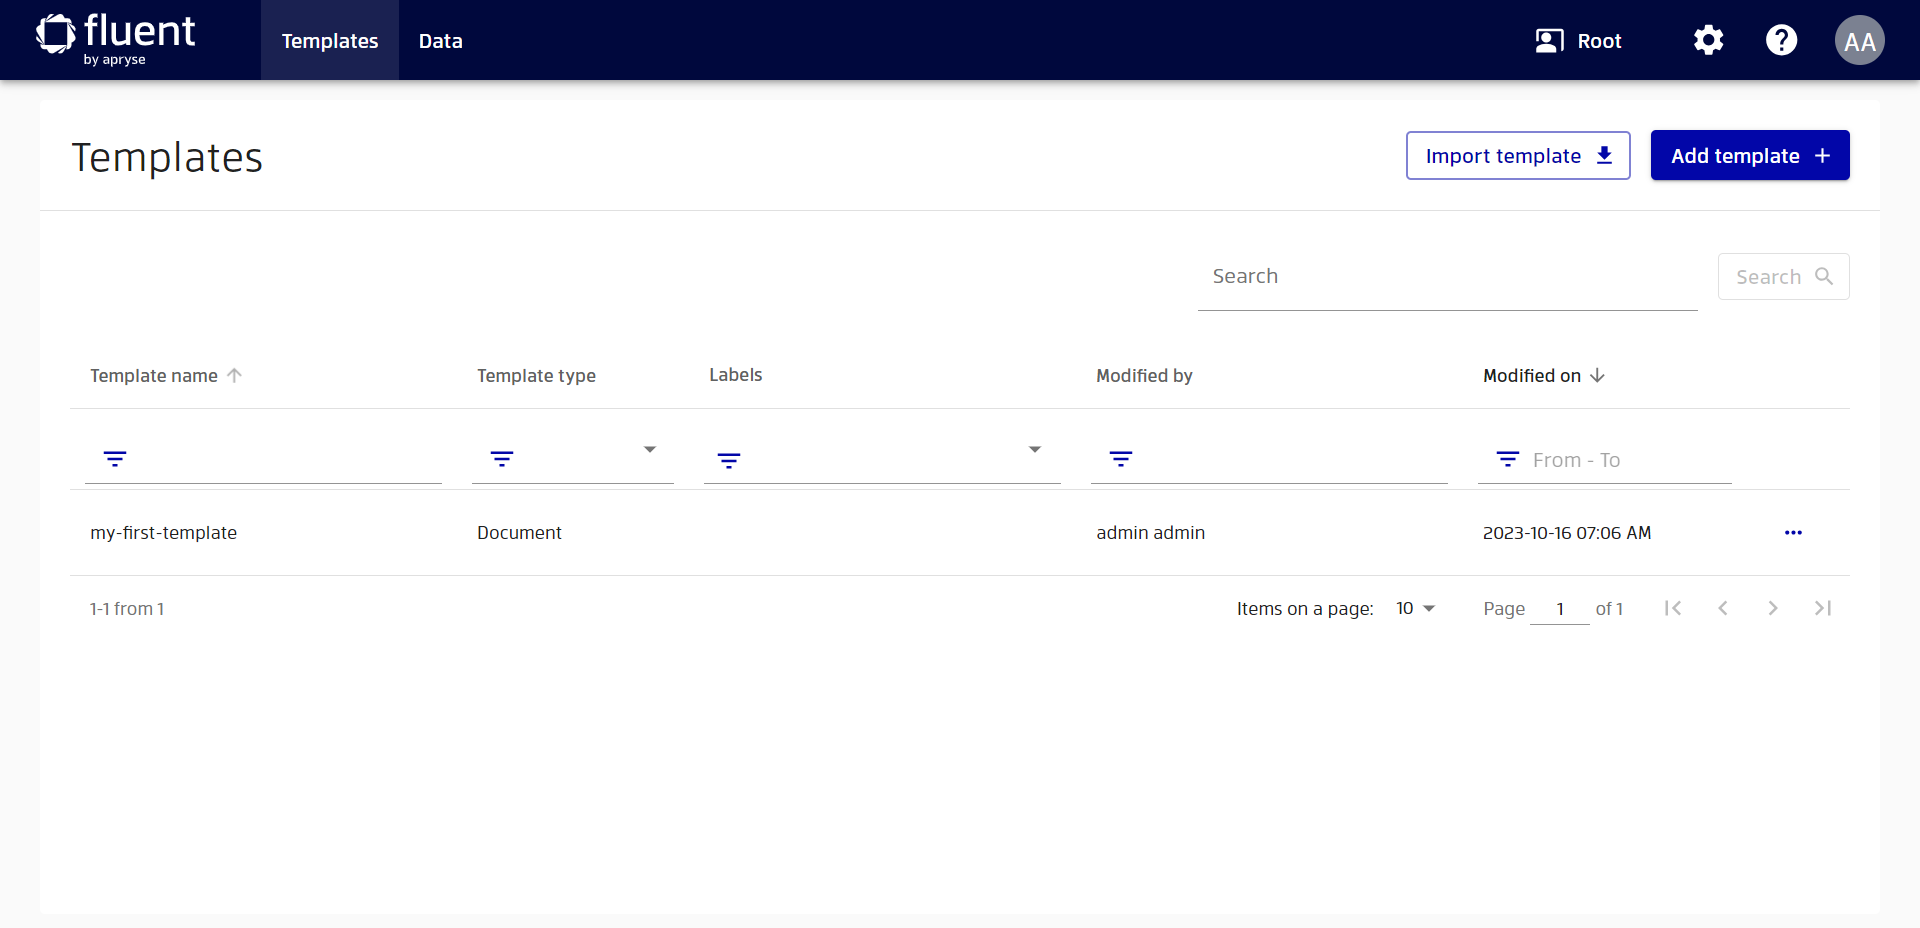
You have probably already noticed that your template has appeared in the Manager. If your workspace is full of other templates, you can find your template by typing the name of your template into the filter. Or you can use other filters by template type, author, and so on.
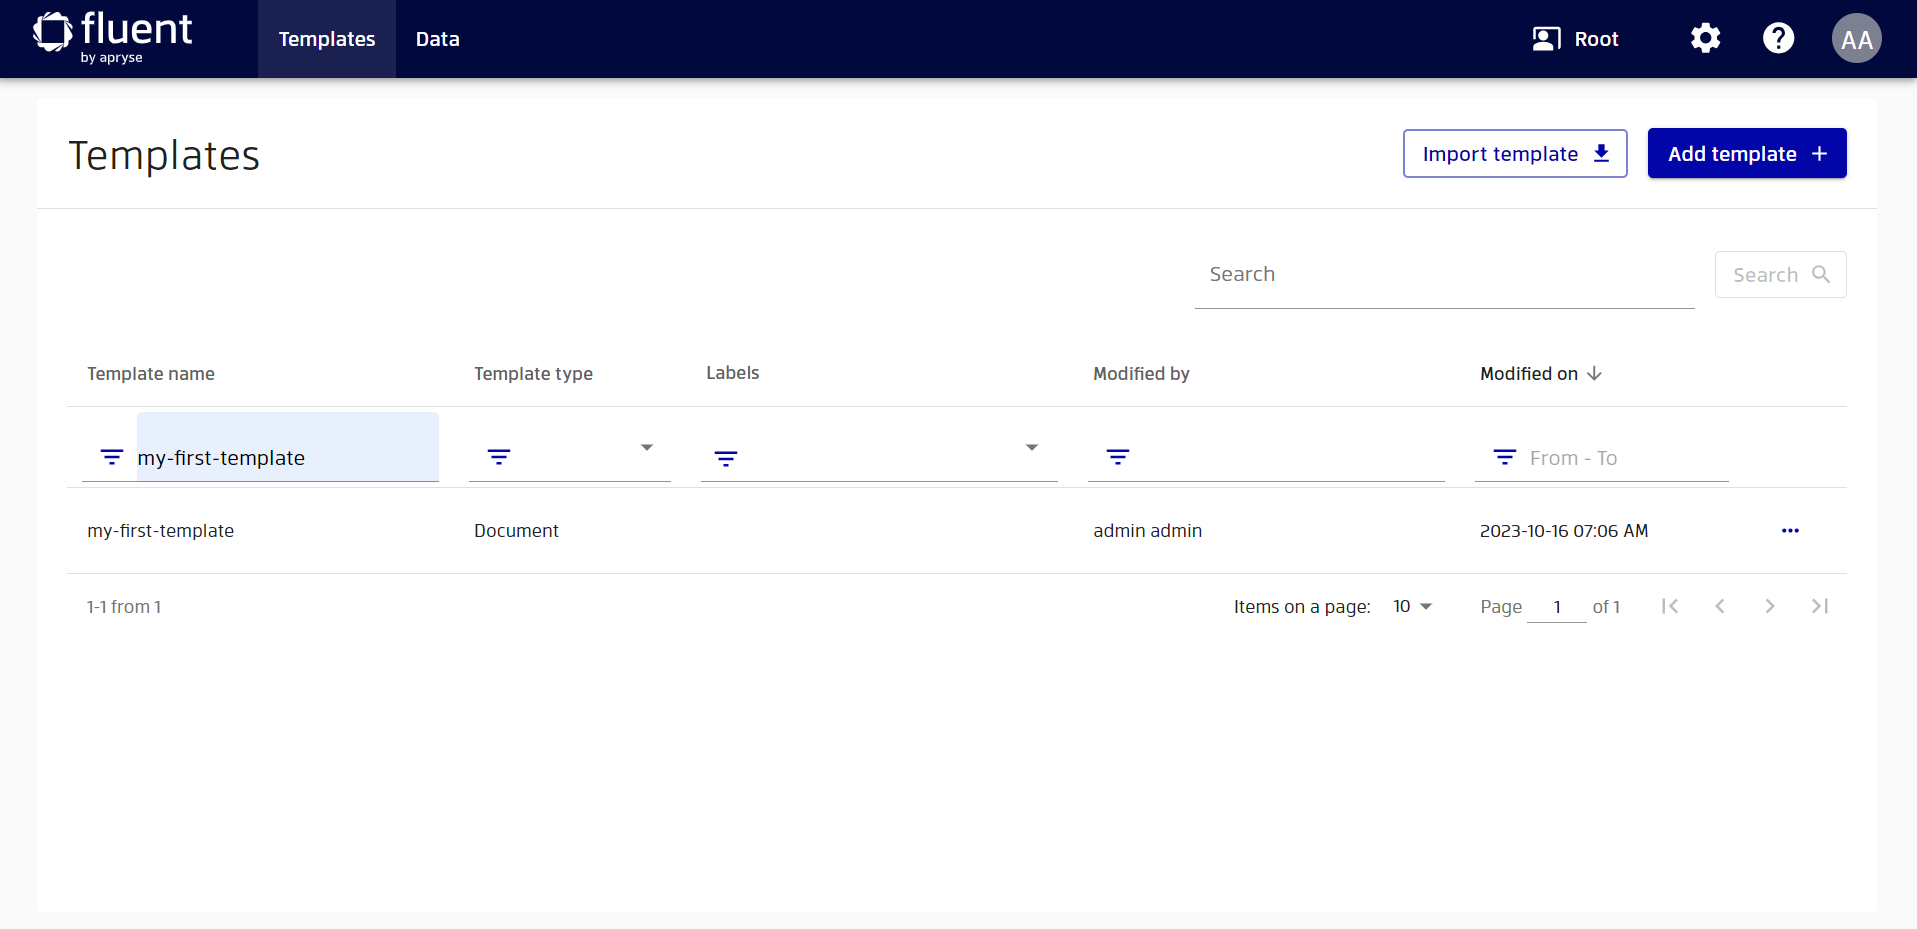
Let's open the details of this template to learn more about it. To open the details, click on the template name.
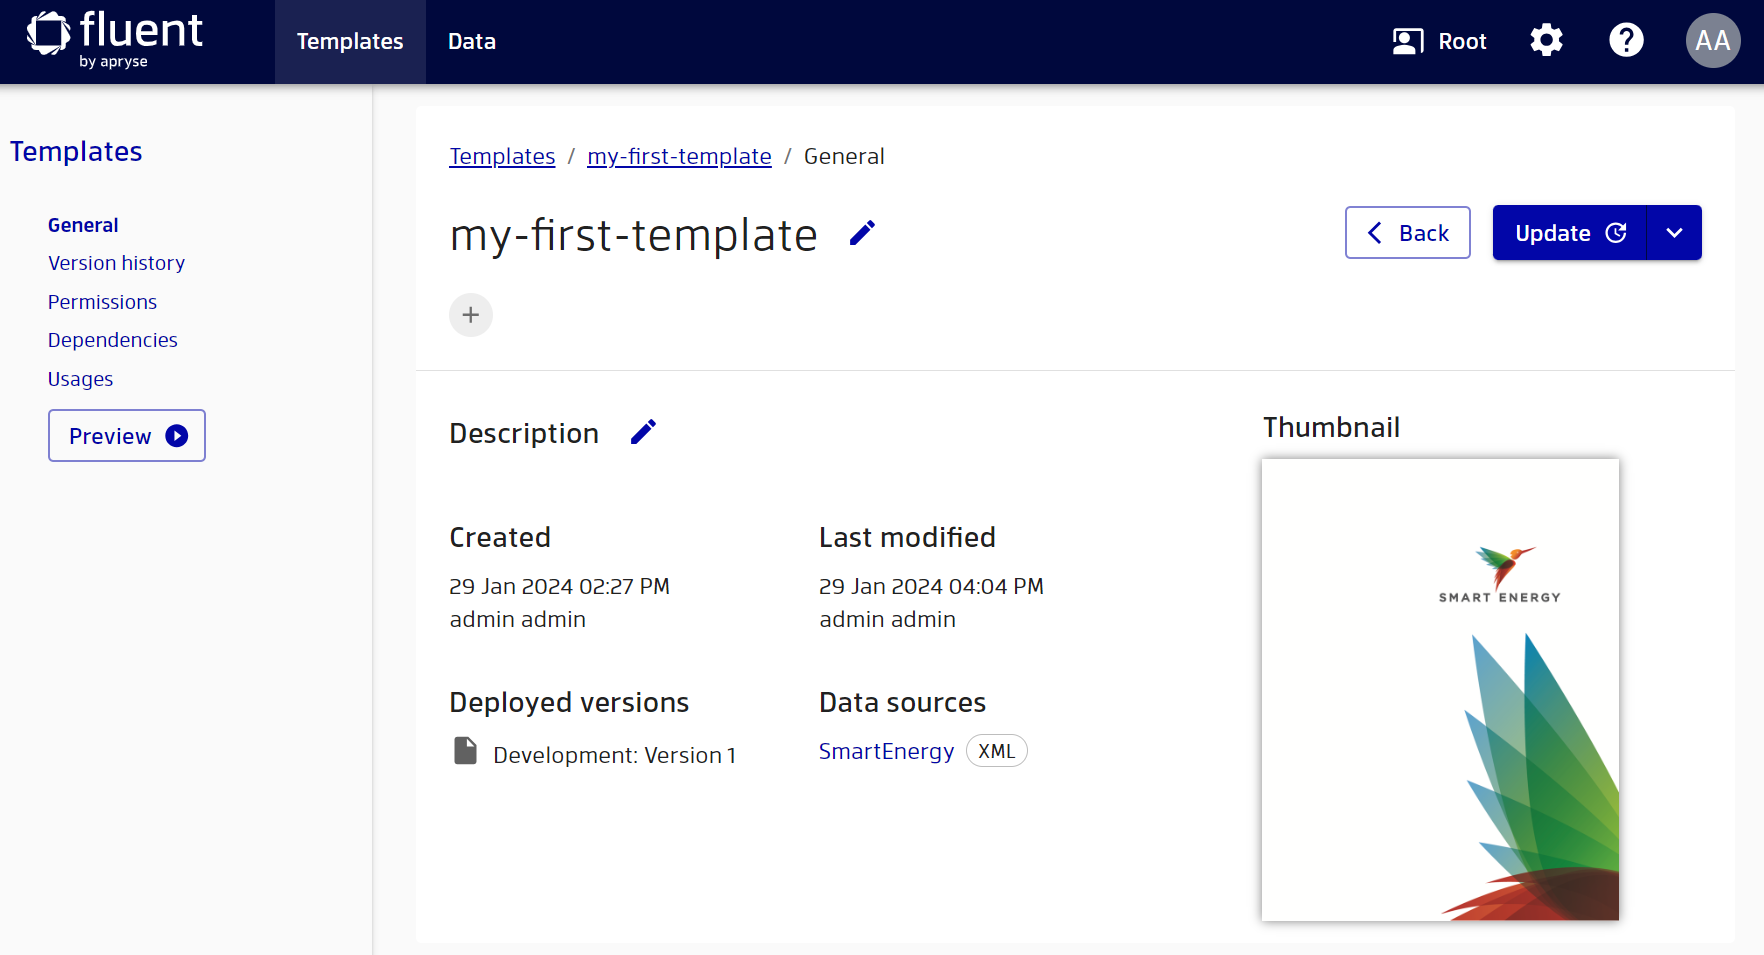
Here you can see various information about your template. By whom and when it was created, what data sources are used in it, a description of the template, its thumbnail and much more. In addition, you can make a preview of your template to see how it looks when populated with data.
To generate previews, you need to have the appropriate permissions. If you are an administrator, then you will definitely have them. However, if you have a custom role with limited permissions, but still want to preview your template, please contact your administrator.
To generate a preview, click the "Preview" button.
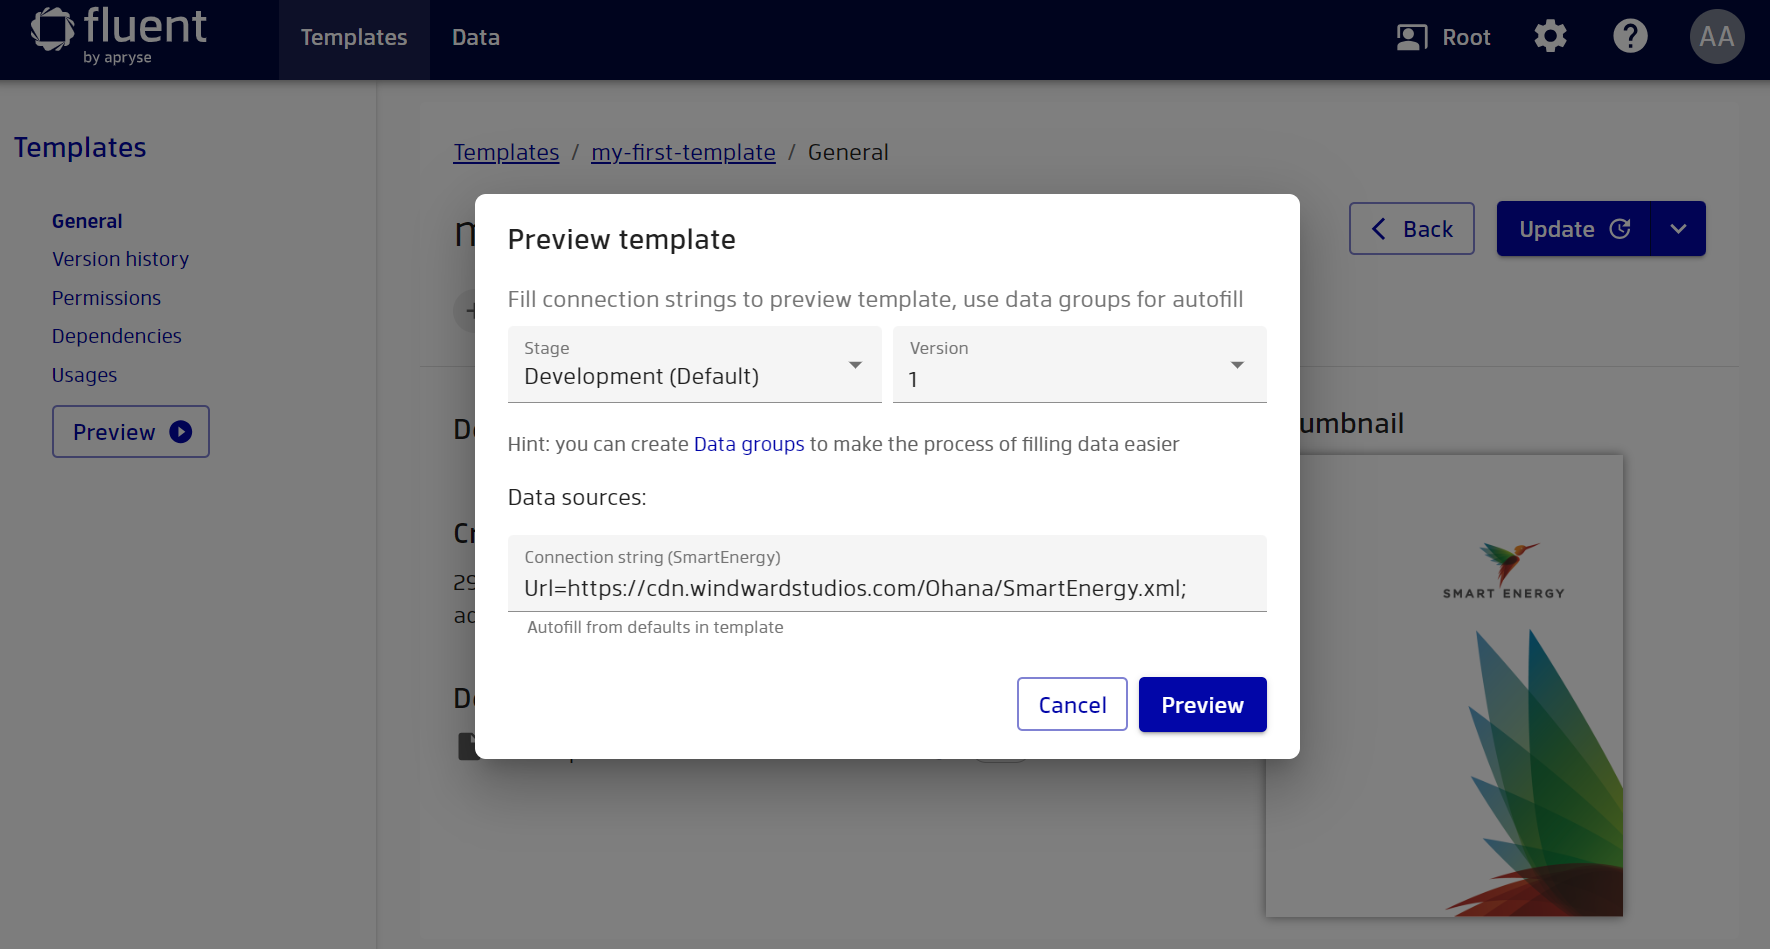
You will be presented with a wizard in which you can select stage, version and connection strings to generate a preview. We won't discuss stages in this starter guide, however you can read more on the topic in the "Stages Configuration" documentation. You can select the version for which you want to generate a preview. This will allow you to see not only what the current report looks like, but also what it looked like before. By default, the connection strings on the preview are the connection strings that were specified during the creation of the template.
We will soon discuss how to create additional connection strings, but for now just use the strings from the template. Also note that if your template contains input parameters, you will be able to specify them in the second step of the wizard. Click the "Preview" button.
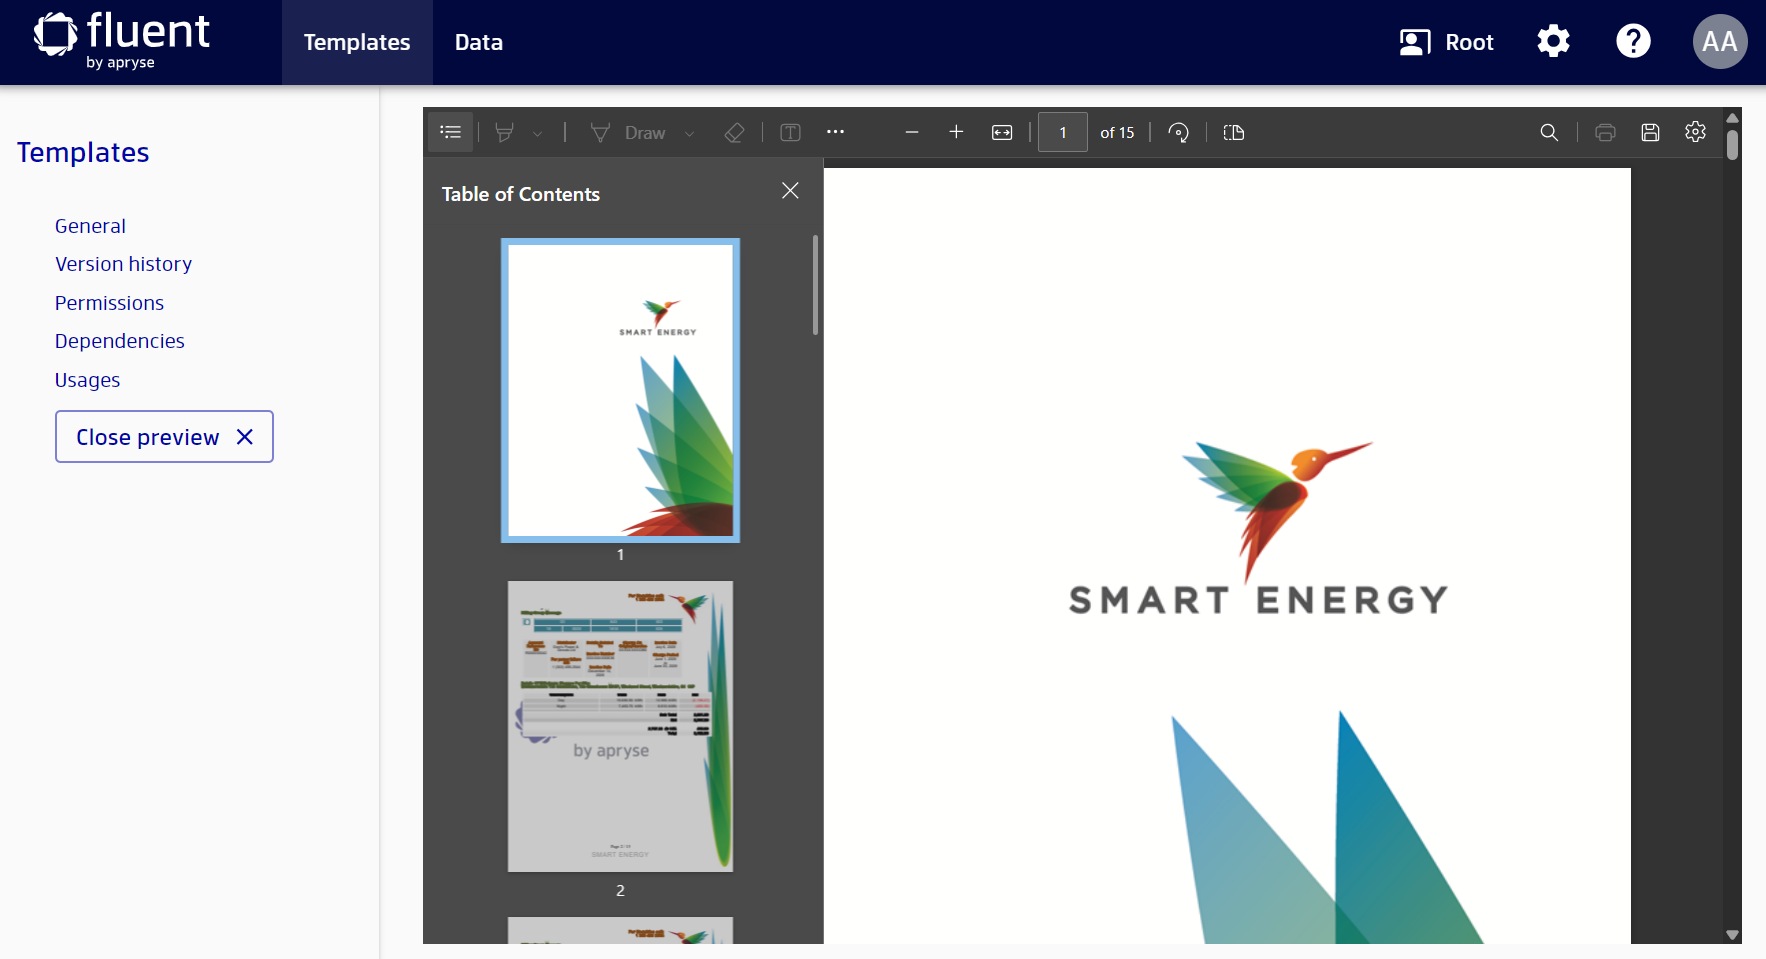
As a result, you will receive a PDF report, which you can now explore. Note that Manager can only generate previews in PDF format, but when generating a report through the Engine, you can choose a wider range of output formats. For more information, see the OutputFormat in the Template schema on the OpenAPI reference.
Report generation
What's even more exciting is that when you create or update a template, Manager automatically caches it on the RESTful Engine. This means that your template immediately gets to the RESTful Engine and can be used to generate reports through the REST API.
To do this, you can send a request to generate a report to the RESTful Engine by specifying the connection string in the format file://resources/{template-name}. To learn more about the REST API of the RESTful Engine, you can explore this tutorial.
But of course this is not the only option you can use. You can also use this template to generate reports using Java or .NET Engines, just like you would normally. For more information, check out the documentation for the Engine.
Data management
Great, let's now go ahead and see how you can manage your data using Manager.
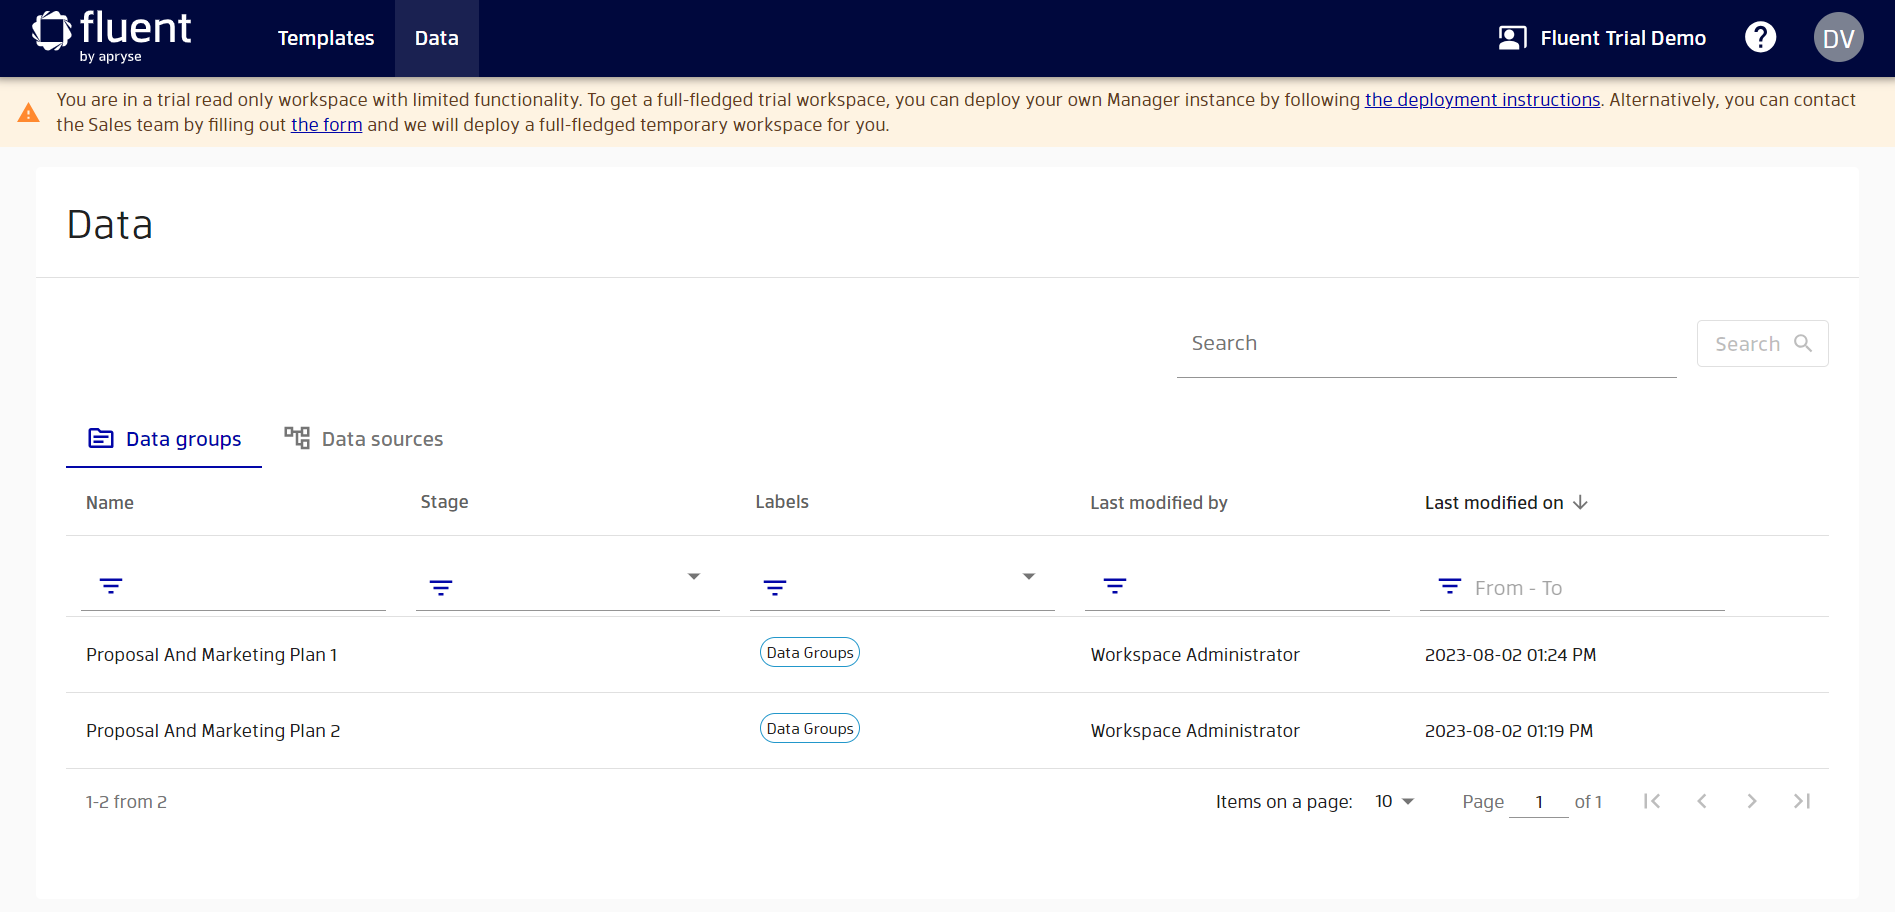
Go to data management by clicking on "Data" link in the header.
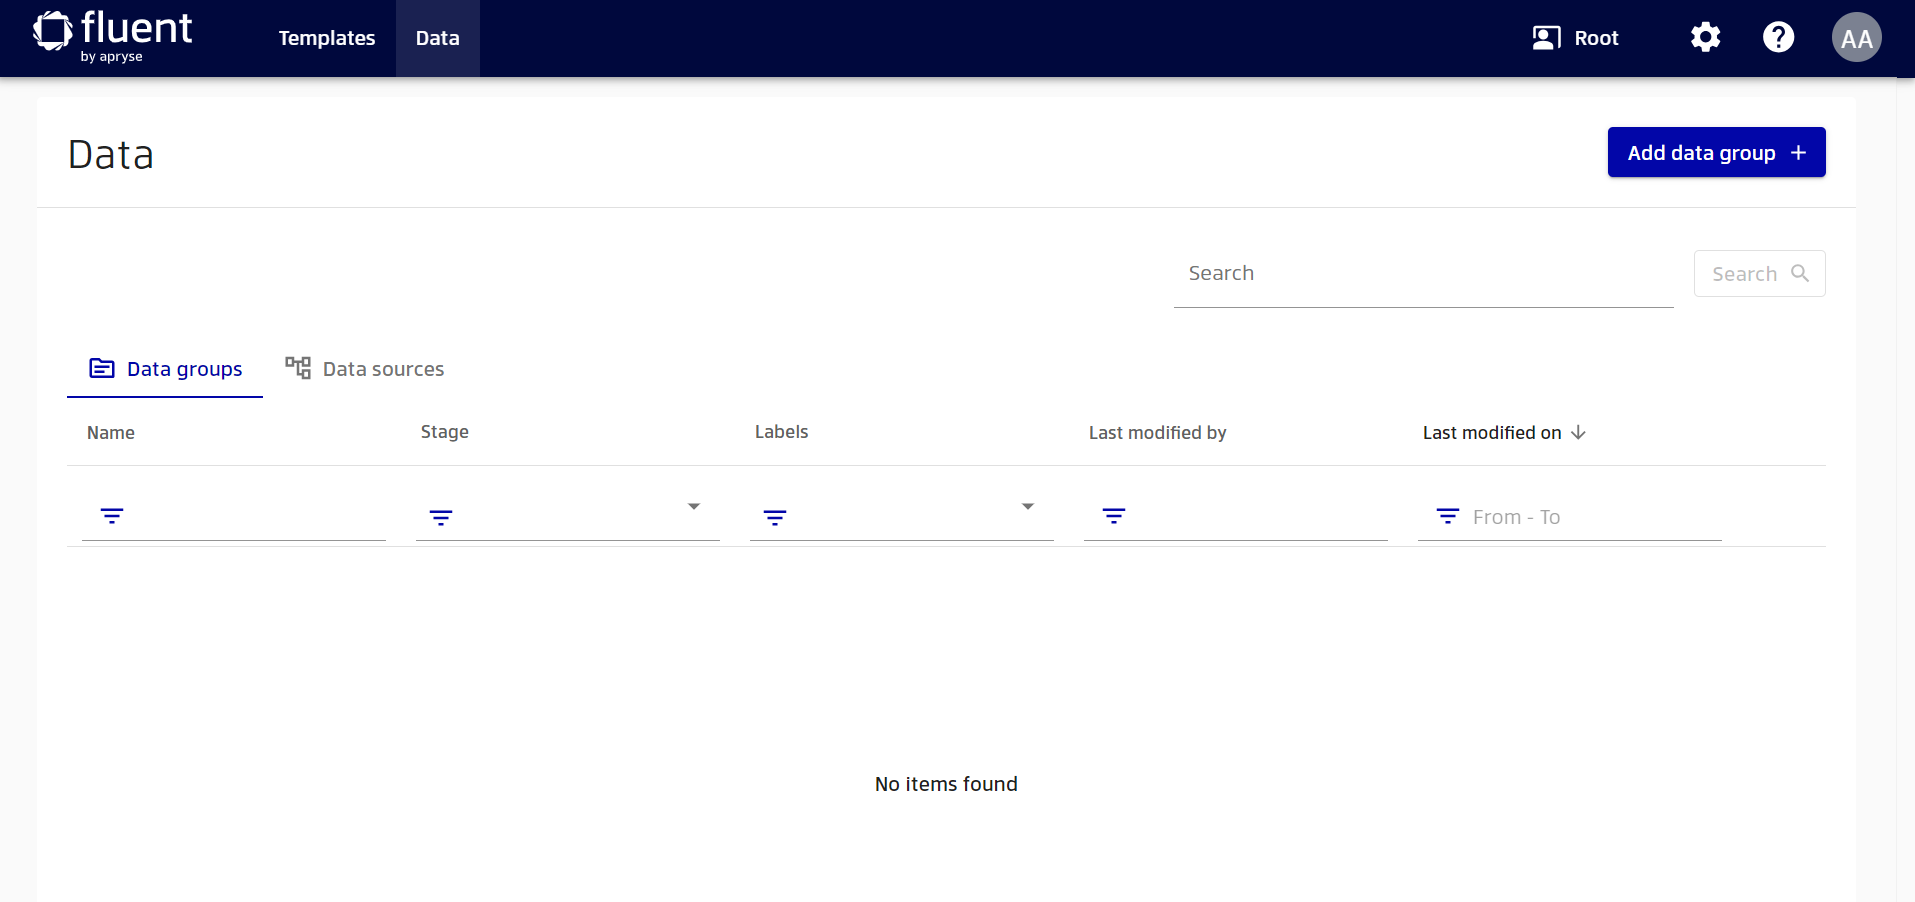
You will be able to see the data groups of your workspace. Working with data groups is outside the scope of this tutorial, but you can read this documentation to get started with data groups.
Let's switch to the data sources.
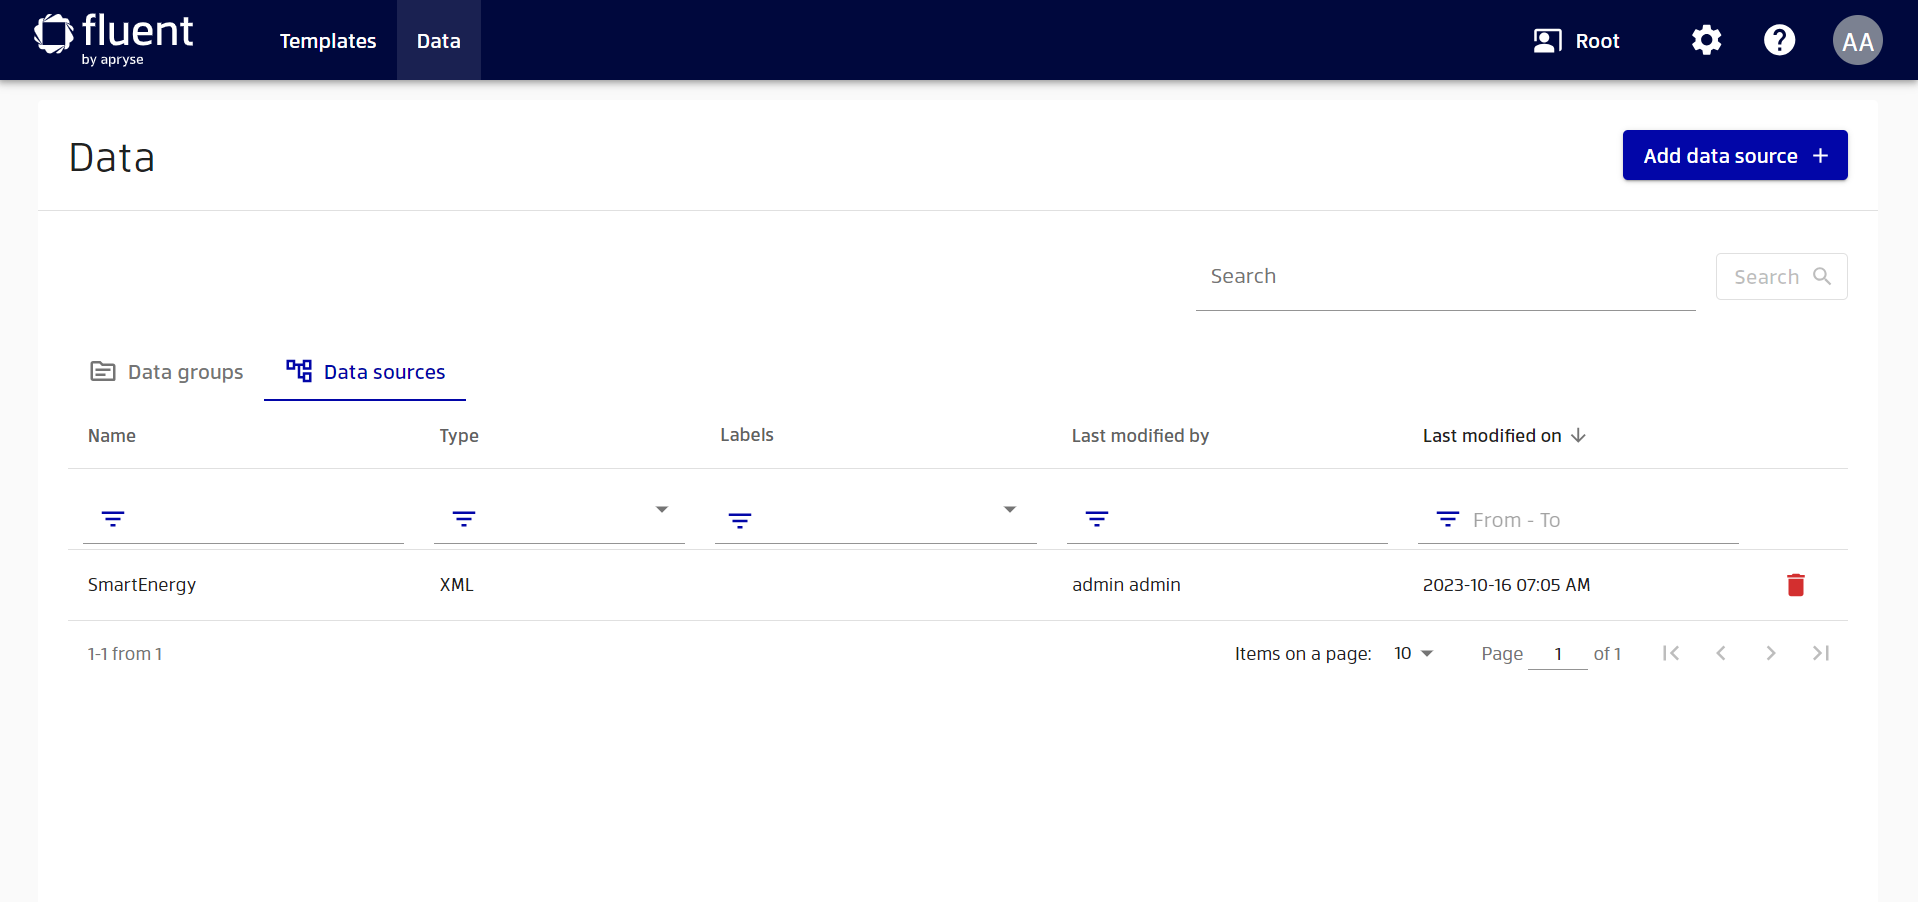
Here you can find all data sources in your workspace. Previously, we successfully created a template with a data source. This data source was automatically placed in the Manager, and now we can manage it.
To quickly find your data source, you can also use filters in the same way as we did earlier with templates.
Let's go into the details of the data source by clicking on the data source name in the table.
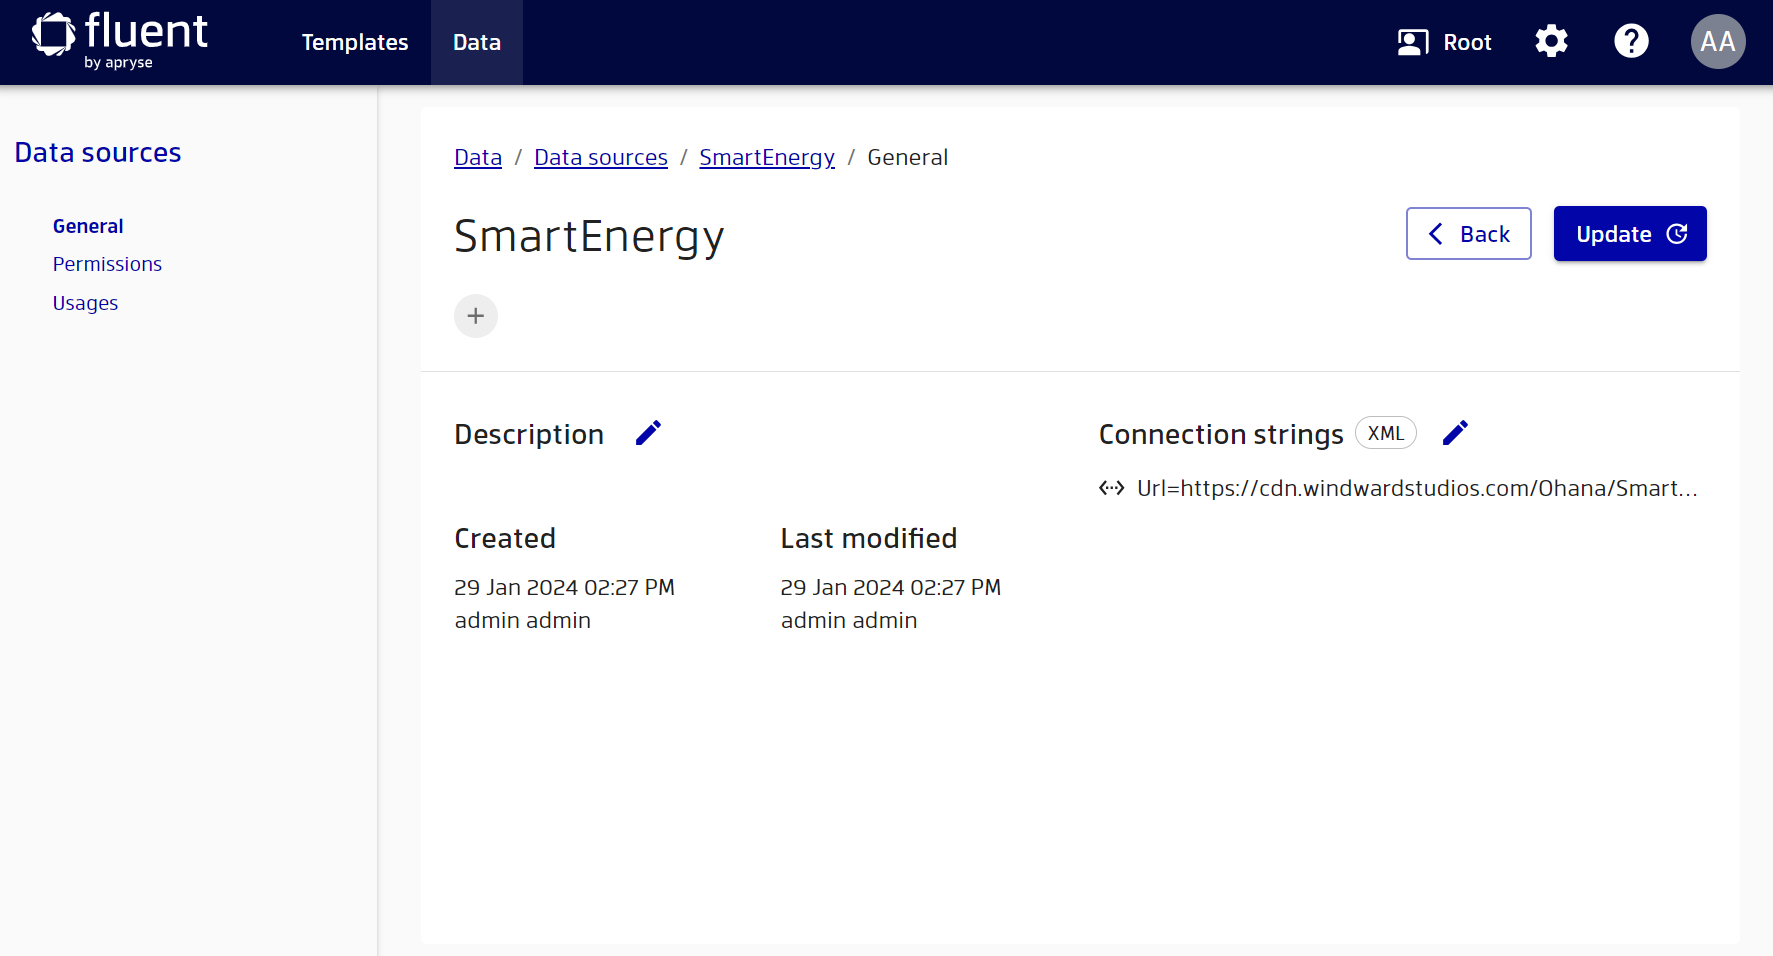
Here, as well as for templates, you can see various details of the data source.
To be able to view all information about your data source, you need to have the appropriate permissions. For example, you might not have permission to view connection strings because it is sensitive information. If you are an administrator, then you will definitely have the necessary permissions. However, if you have a custom role with limited permissions, but still want to view the missing data source information, please contact your administrator.
If you want to add an alternative connection string for a given data source, you can click the pencil to the right of "Connection strings" or just click the "Update" button. Note, however, that you do need to have the appropriate permissions to do this.
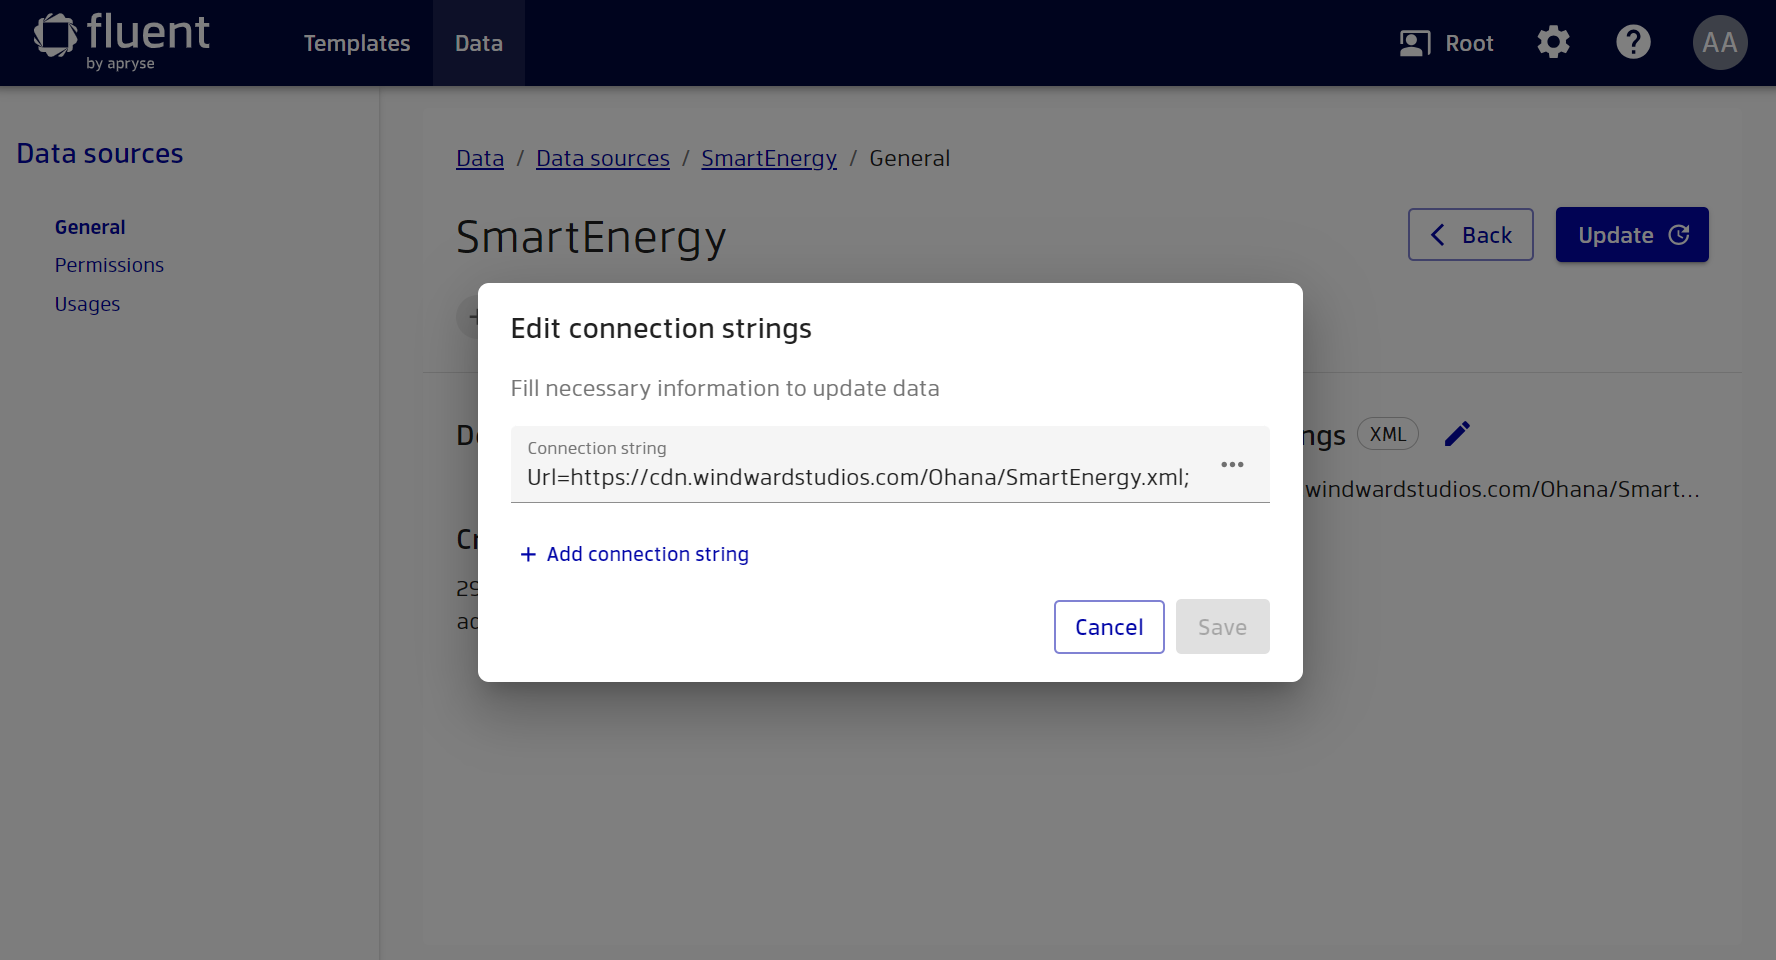
In this case, you will see a wizard for editing the data source. Here you can click on the "Add connection string" button, and specify a new location containing your data. The added connection strings can be used in the preview to check how your template works with different data.
Once you have added new connection strings, click the "Save" button.
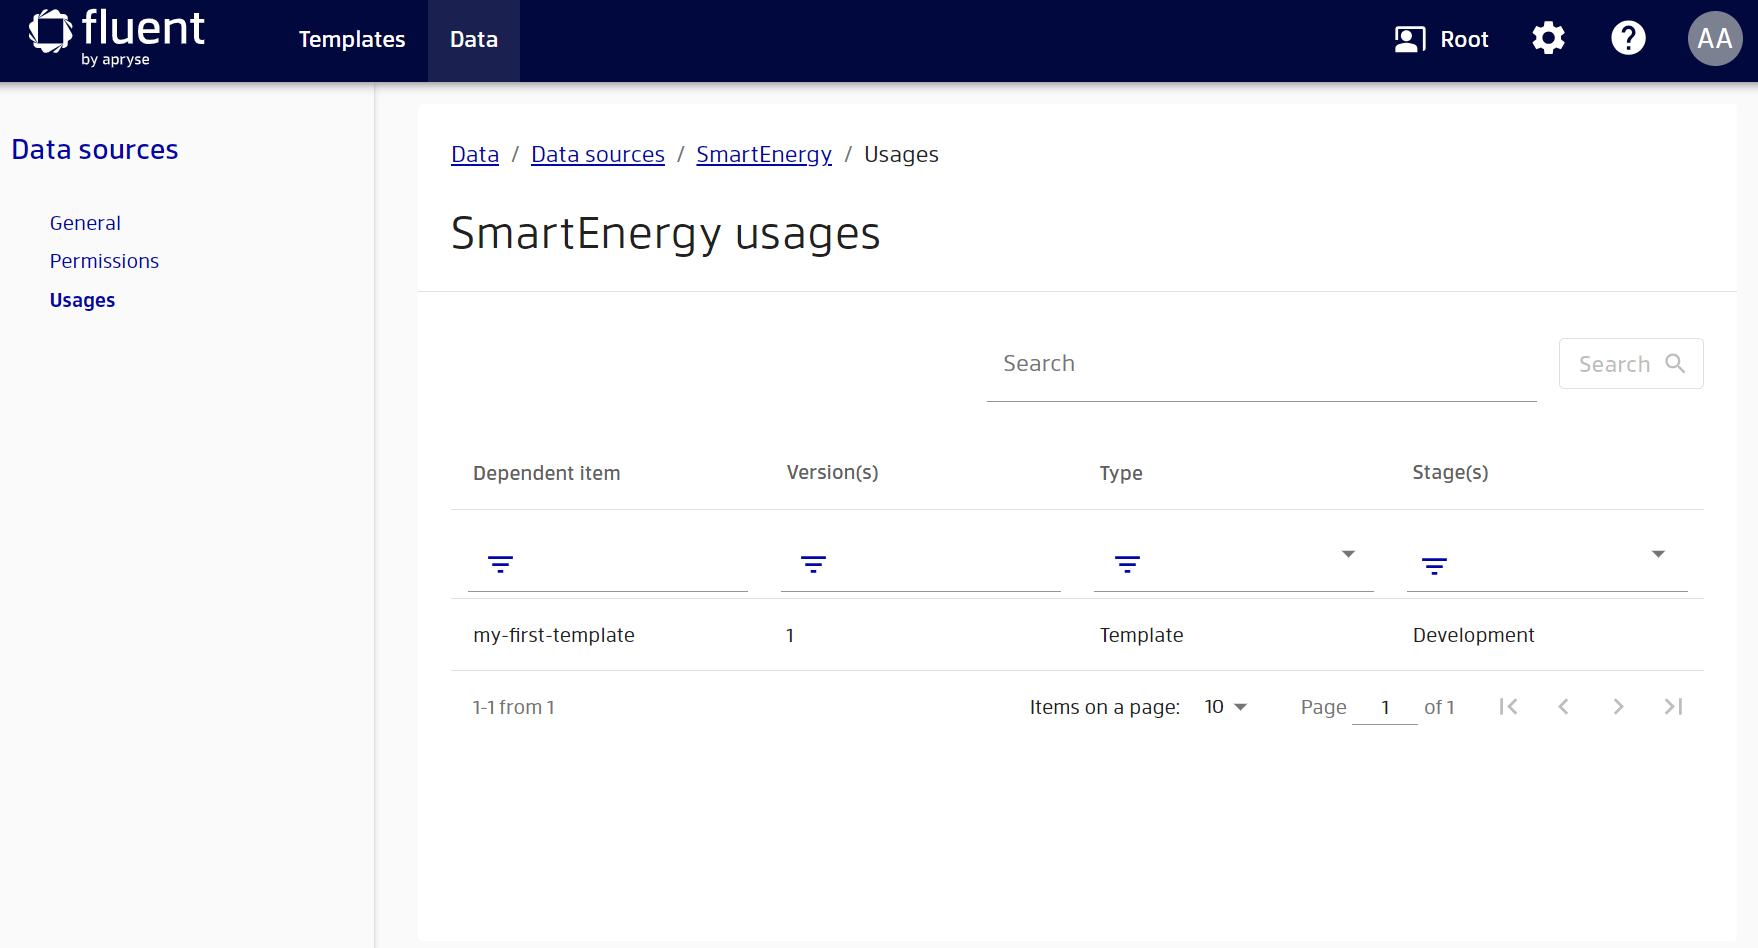
You can also see which templates use your data source by selecting "Usages" for your data source.
For more information about data management, you can read the documentation on data sources and data groups.
Where to look next?
Manager is a powerful tool that allows you to not only manage your templates and data, but also manage RESTful Engines, keep track of licenses, create users and manage their roles and permissions, create child workspaces, set up a promotion path for your templates, and much more.
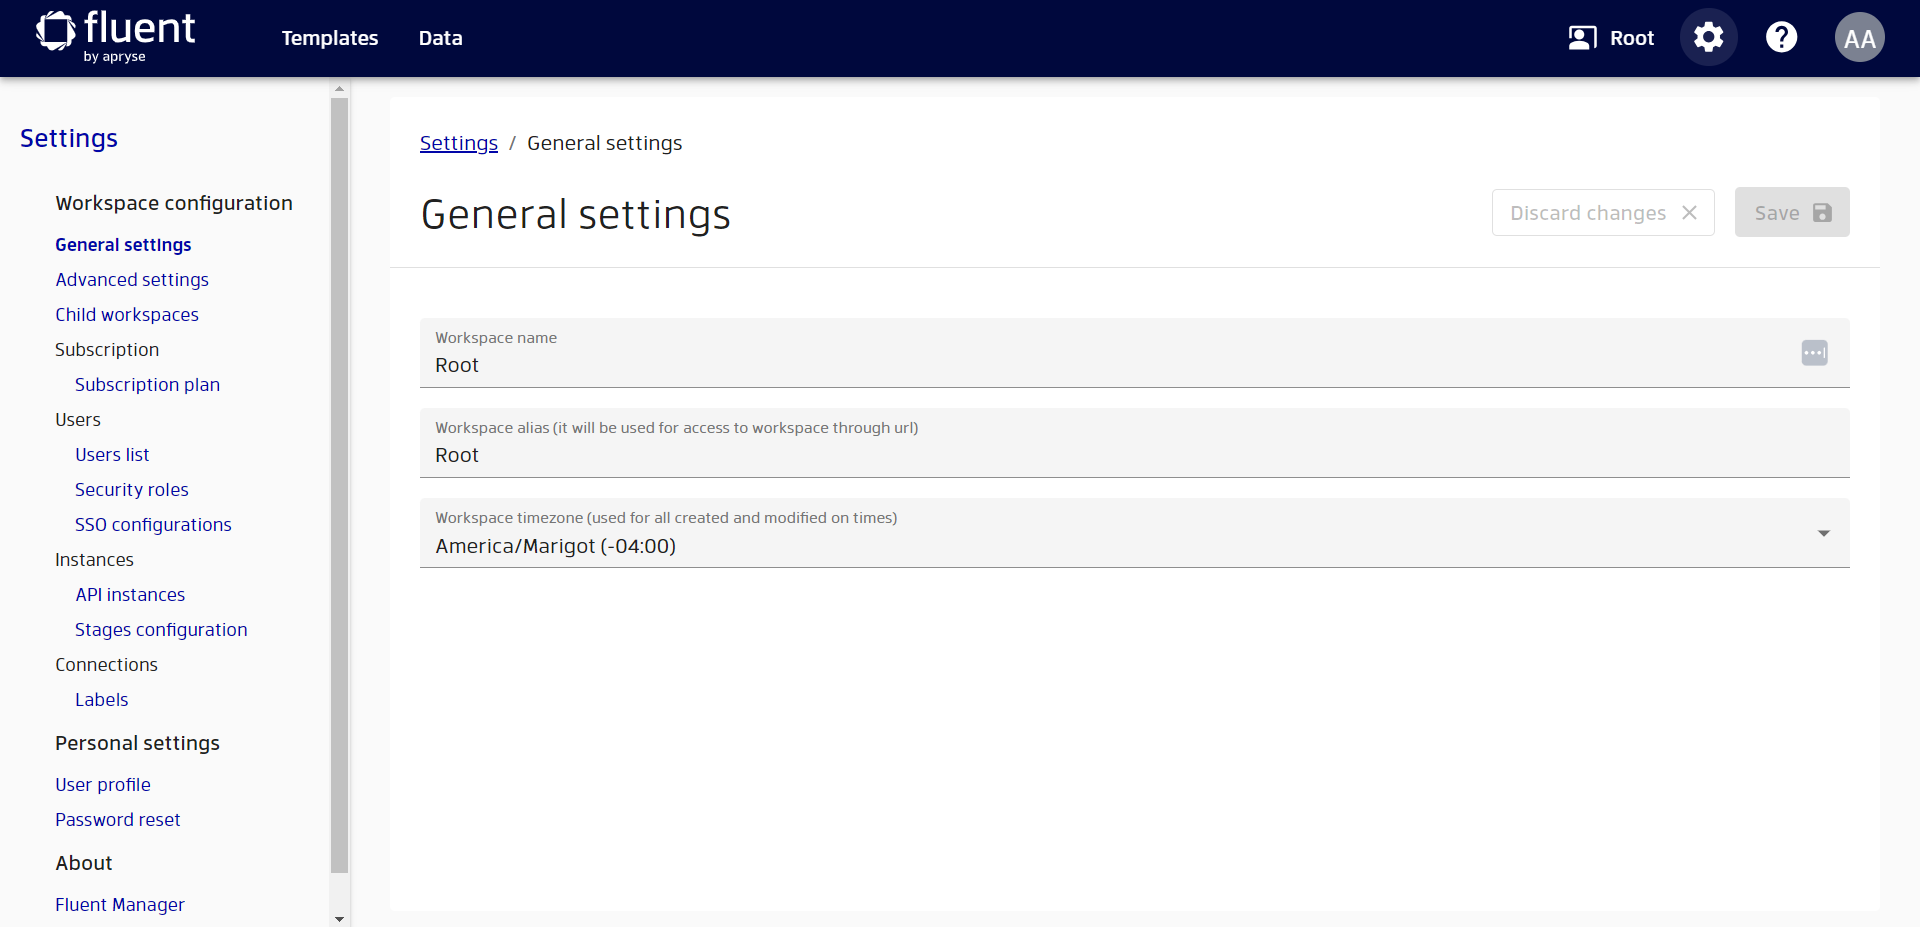
All these configurations can be found in settings.
To continue your adventure, we recommend that you explore the "Using Manager" section where you can find more information on every aspect of the application.
Congratulations 🎉, you have successfully completed this tutorial!
Getting Started for Trial Users
Mind that certain features require specific permission levels. In the instance that you get credentials for during the trial registration, you only have read-only permissions. Contact us to get a custom full workspace or deploy the application using the trial license in your local environment, see also "Hosting the application". If you have deployed the application or received a custom workspace, then you can go to the getting started documentation for non-trial users.
Welcome to Fluent Manager, the solution for managing and distributing templates created with Fluent Designer. Fluent Manager is a central repository where you can store and update your templates and data sources. You can also control your users, security roles, Engine instances, and more. This article will help you learn the basics of using Fluent Manager. For more information, you can follow the links to other pages that provide more details.
Also, before starting to explore this guide, we recommend that you watch the following video, which will give you an overview of Fluent as a whole.
Login to Manager
The first thing you'll see when opening Fluent Manager is the login screen.
The content on this screen is pretty flexible, and the workspace administrator can add custom colors, logos, and text according to your team's preferences.
Let's log in to our workspace by entering username and password and clicking the "Login" button.
Exploring templates in Manager
After a successful login, you will be able to see the templates in the workspace.

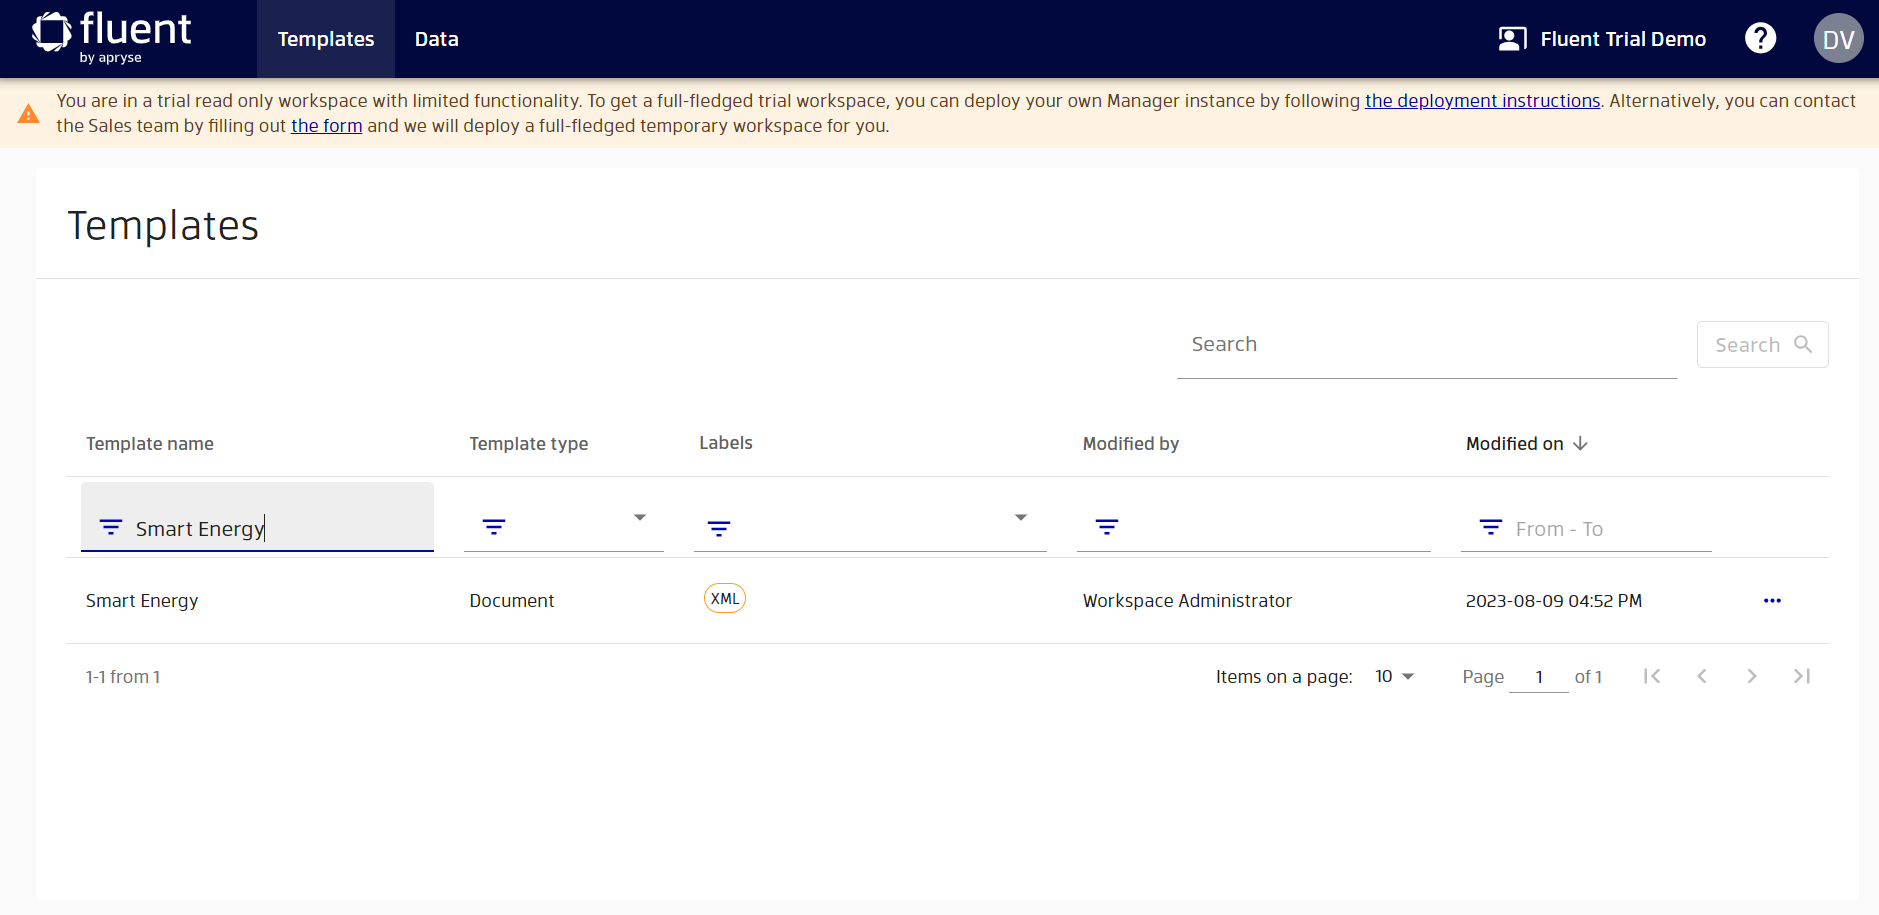
This trial workspace is filled with templates demonstrating different aspects of template creation. You can filter these templates by name, type, labels and so on. Let's start exploring templates with the most common type of template - Document.
Find the Smart Energy template by typing "Smart Energy" in the template name filter.
To open template details, click its name in the table. After clicking on the name, you will see the details of this template.
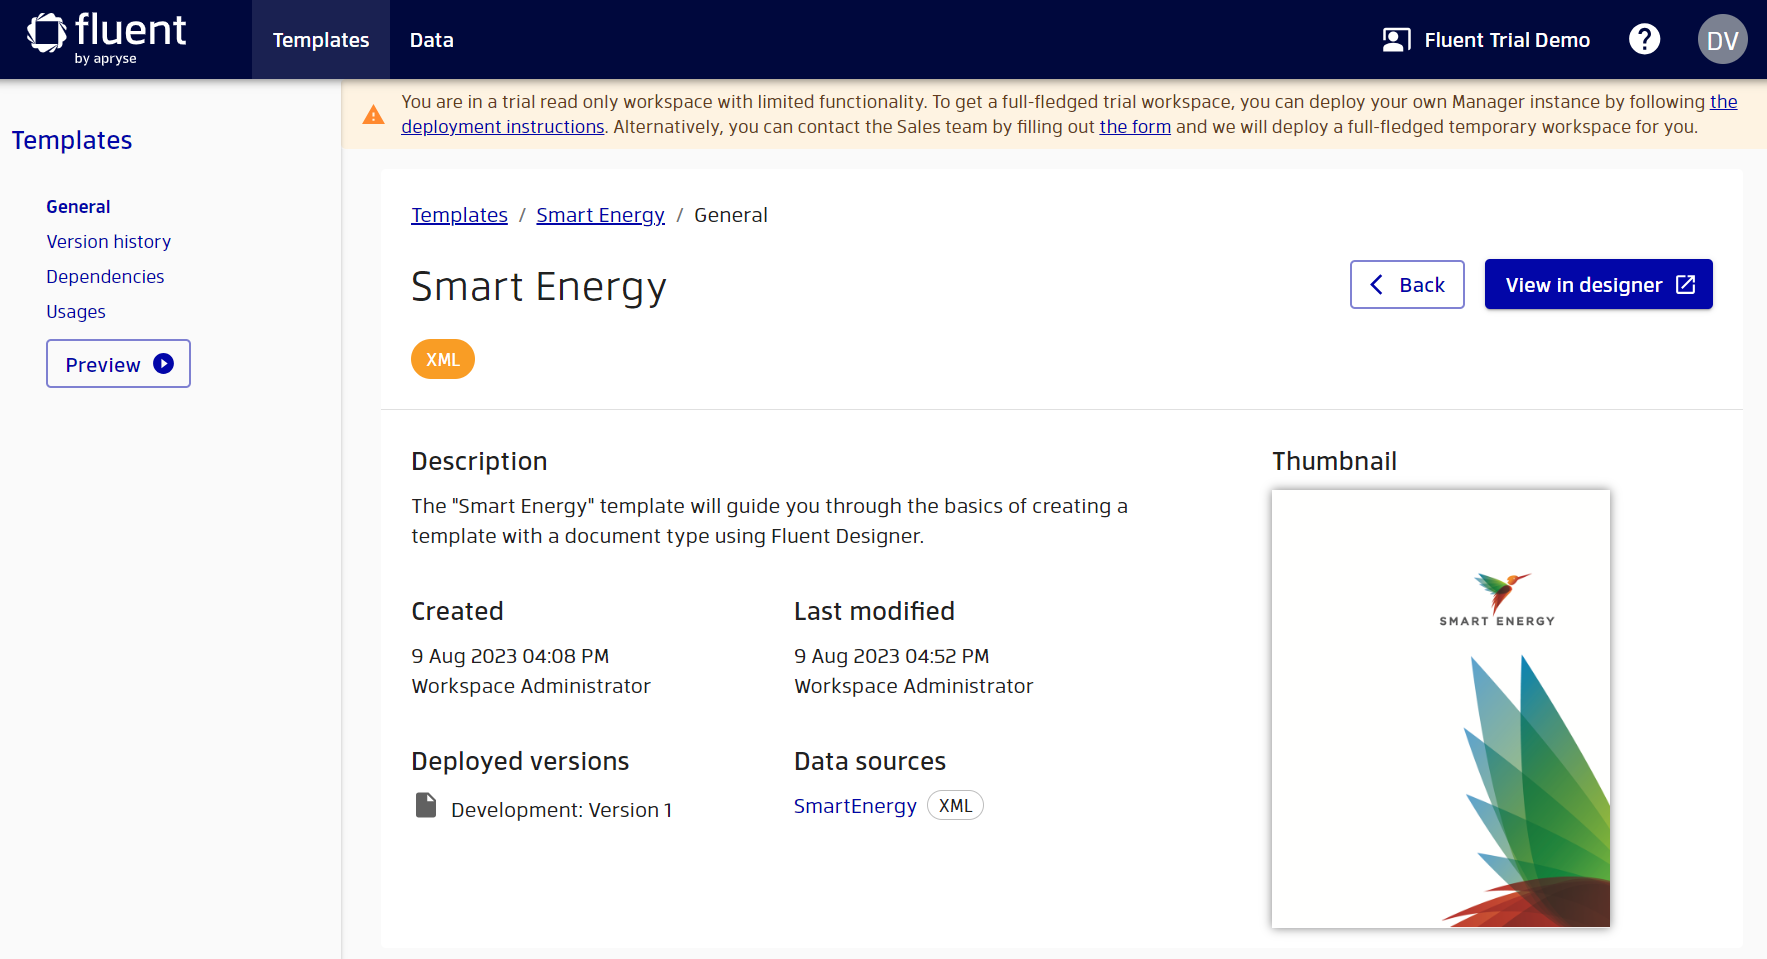
Here you can see various information about your template. By whom and when it was created, what data sources are used in it, a description of the template, its thumbnail and much more. In addition, you can make a preview of your template to see how it looks when populated with data.
Let's try to generate a preview. To do it, click the "Preview" button.
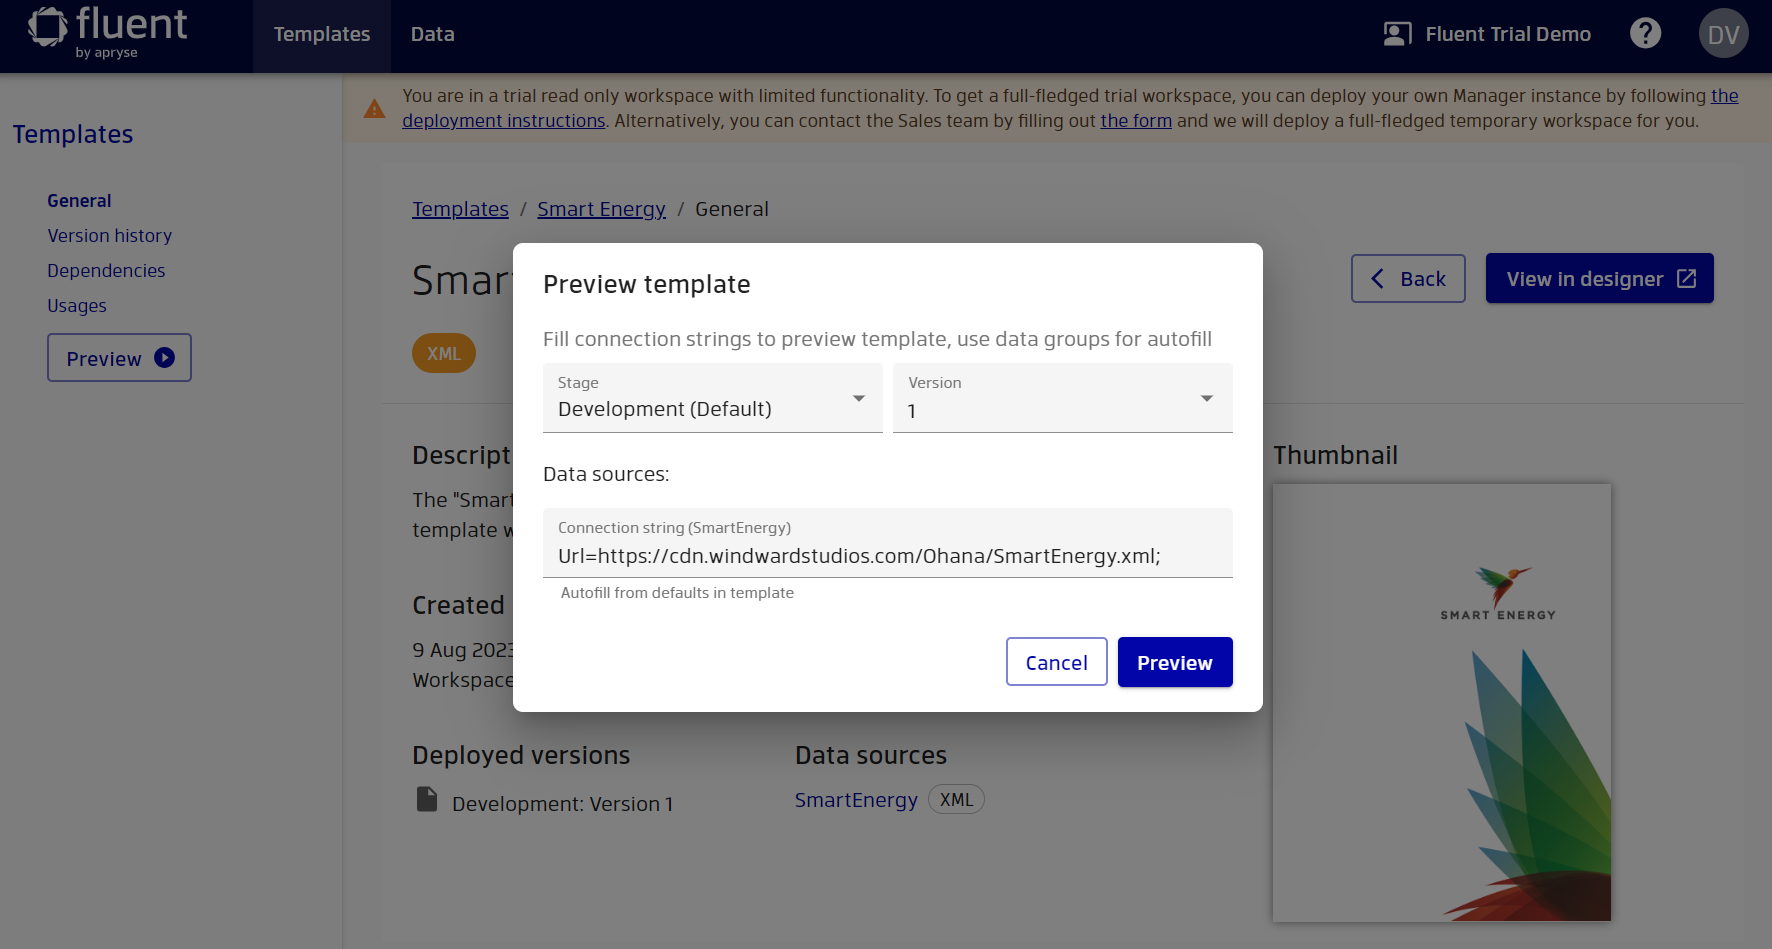
You will be presented with a wizard in which you can select stage, version and connection strings to generate a preview. We won't discuss stages in this starter guide, however you can read more on the topic in the "Stages Configuration" documentation. You can select the version for which you want to generate a preview. This will allow you to see not only what the current report looks like, but also what it looked like before. By default, the connection strings on the preview are the connection strings that were specified during the creation of the template.
It also usually makes sense to create multiple connection strings to test how the template looks with different data. In our case, there is only one connection string, so let's just use the existing string. Also note that if your template contains input parameters, you will be able to specify them in the second step of the wizard. We'll take a look at that very soon. Click the "Preview" button.
As a result, you will receive a PDF report, which you can now explore. Note that Manager can only generate previews in PDF format, but when generating a report through the Engine, you can choose a wider range of output formats. For more information, see the OutputFormat in the Template schema on the OpenAPI reference.
Great, now let's try to make a preview of the template with input parameters. Return to the list of templates by clicking on template management in the header. Add "Input Parameters" to the filter for labels.
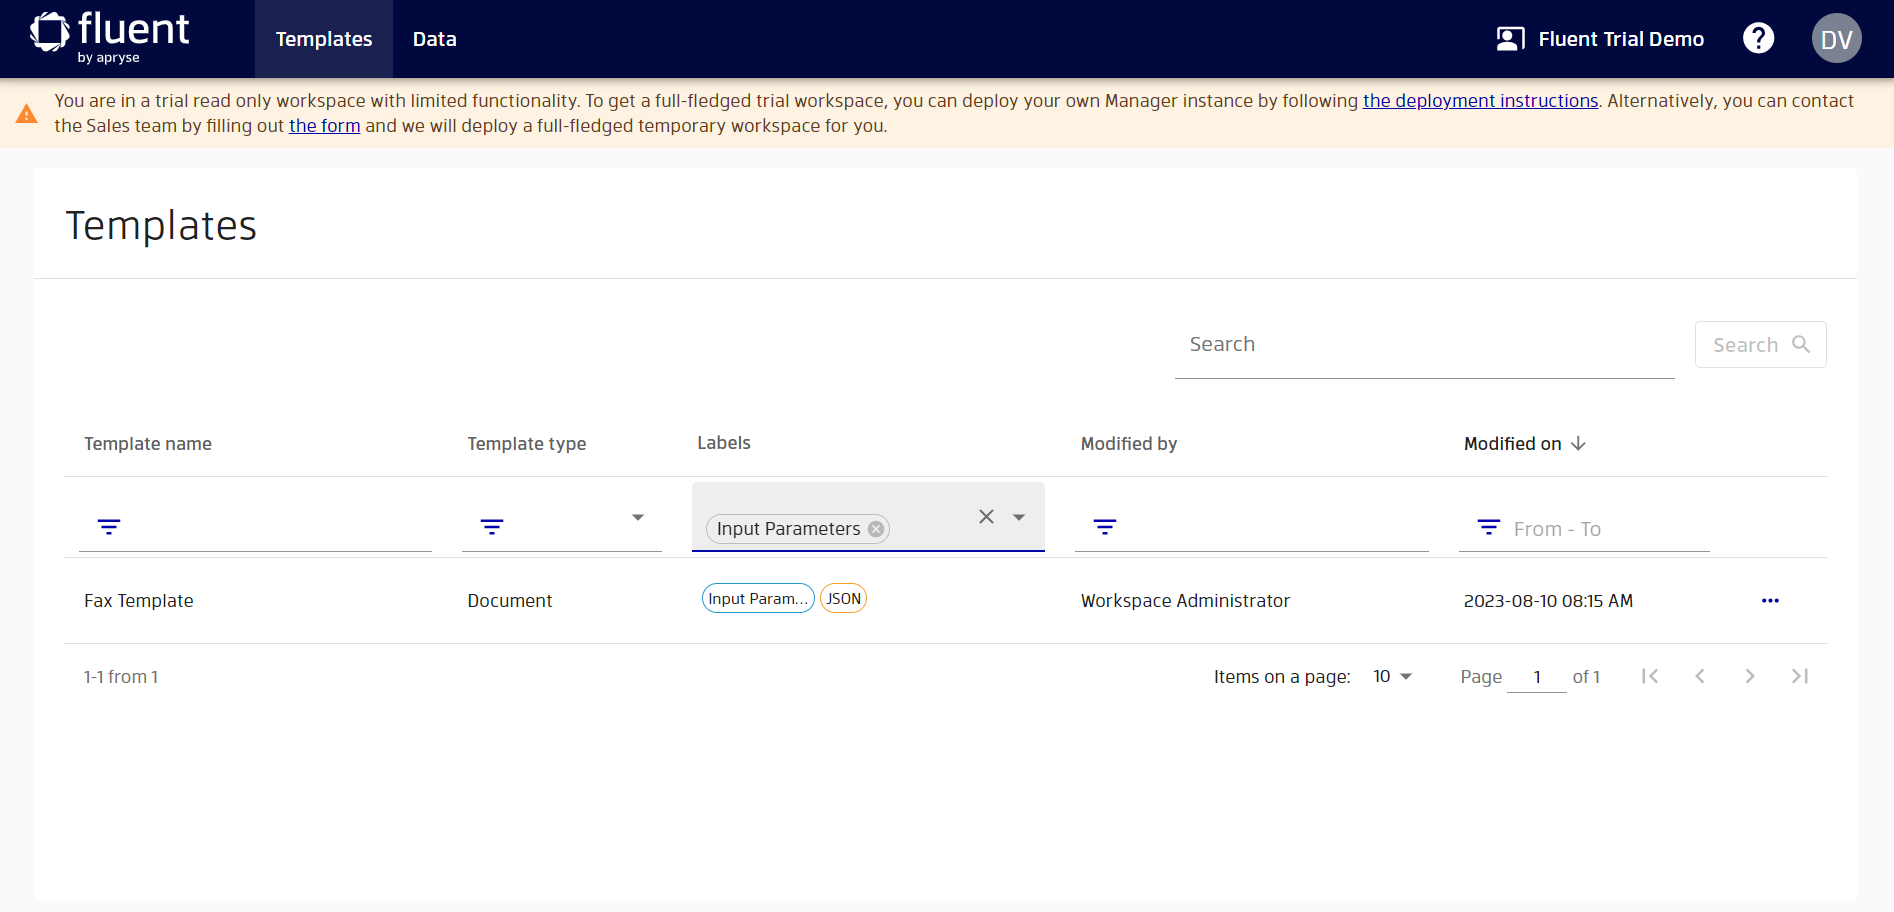
As a result of such filtering, you will get the only "Fax Template". Go to preview in Fax Template. You will see that in the 2nd step you also need to specify the input parameters.
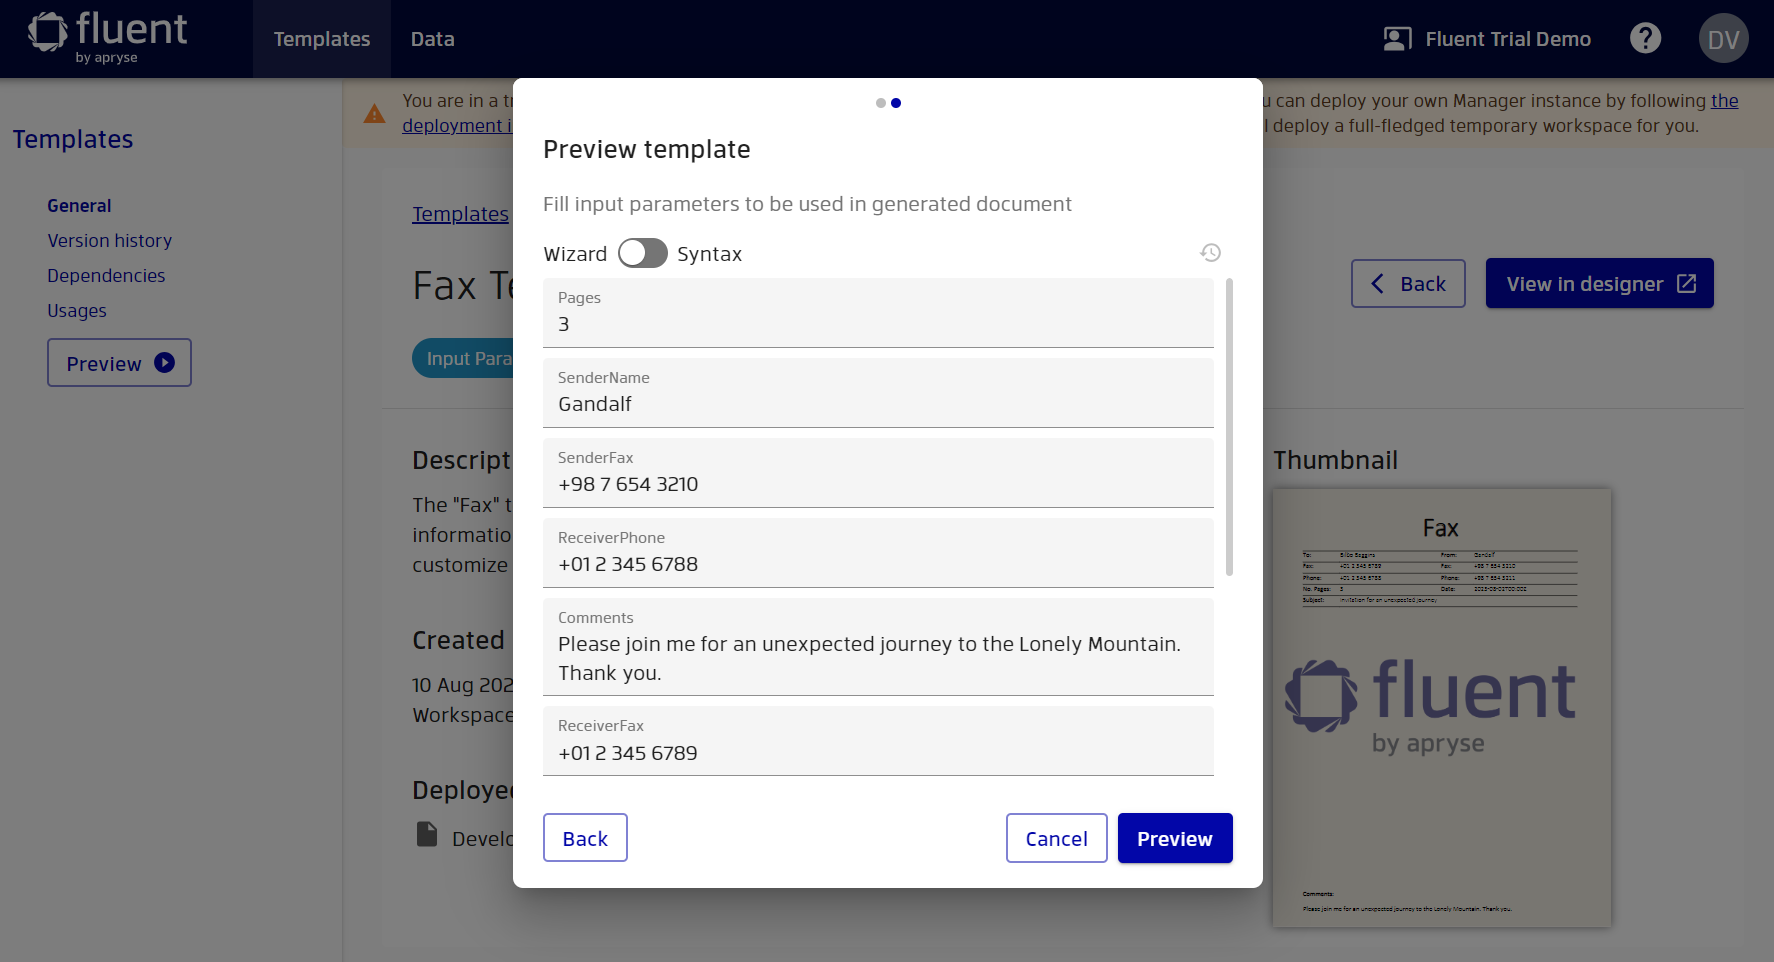
You can use the default values or specify your own values for generation and see how it affects the resulting output PDF.
In addition, Manager supports templates with dependencies. You can establish dependencies between templates using import tags. Import tags allow you to insert an external file into your report template output when the output is generated. This is useful when you want to reuse a common part in multiple templates, and also be able to update this part in all templates easily in the future.
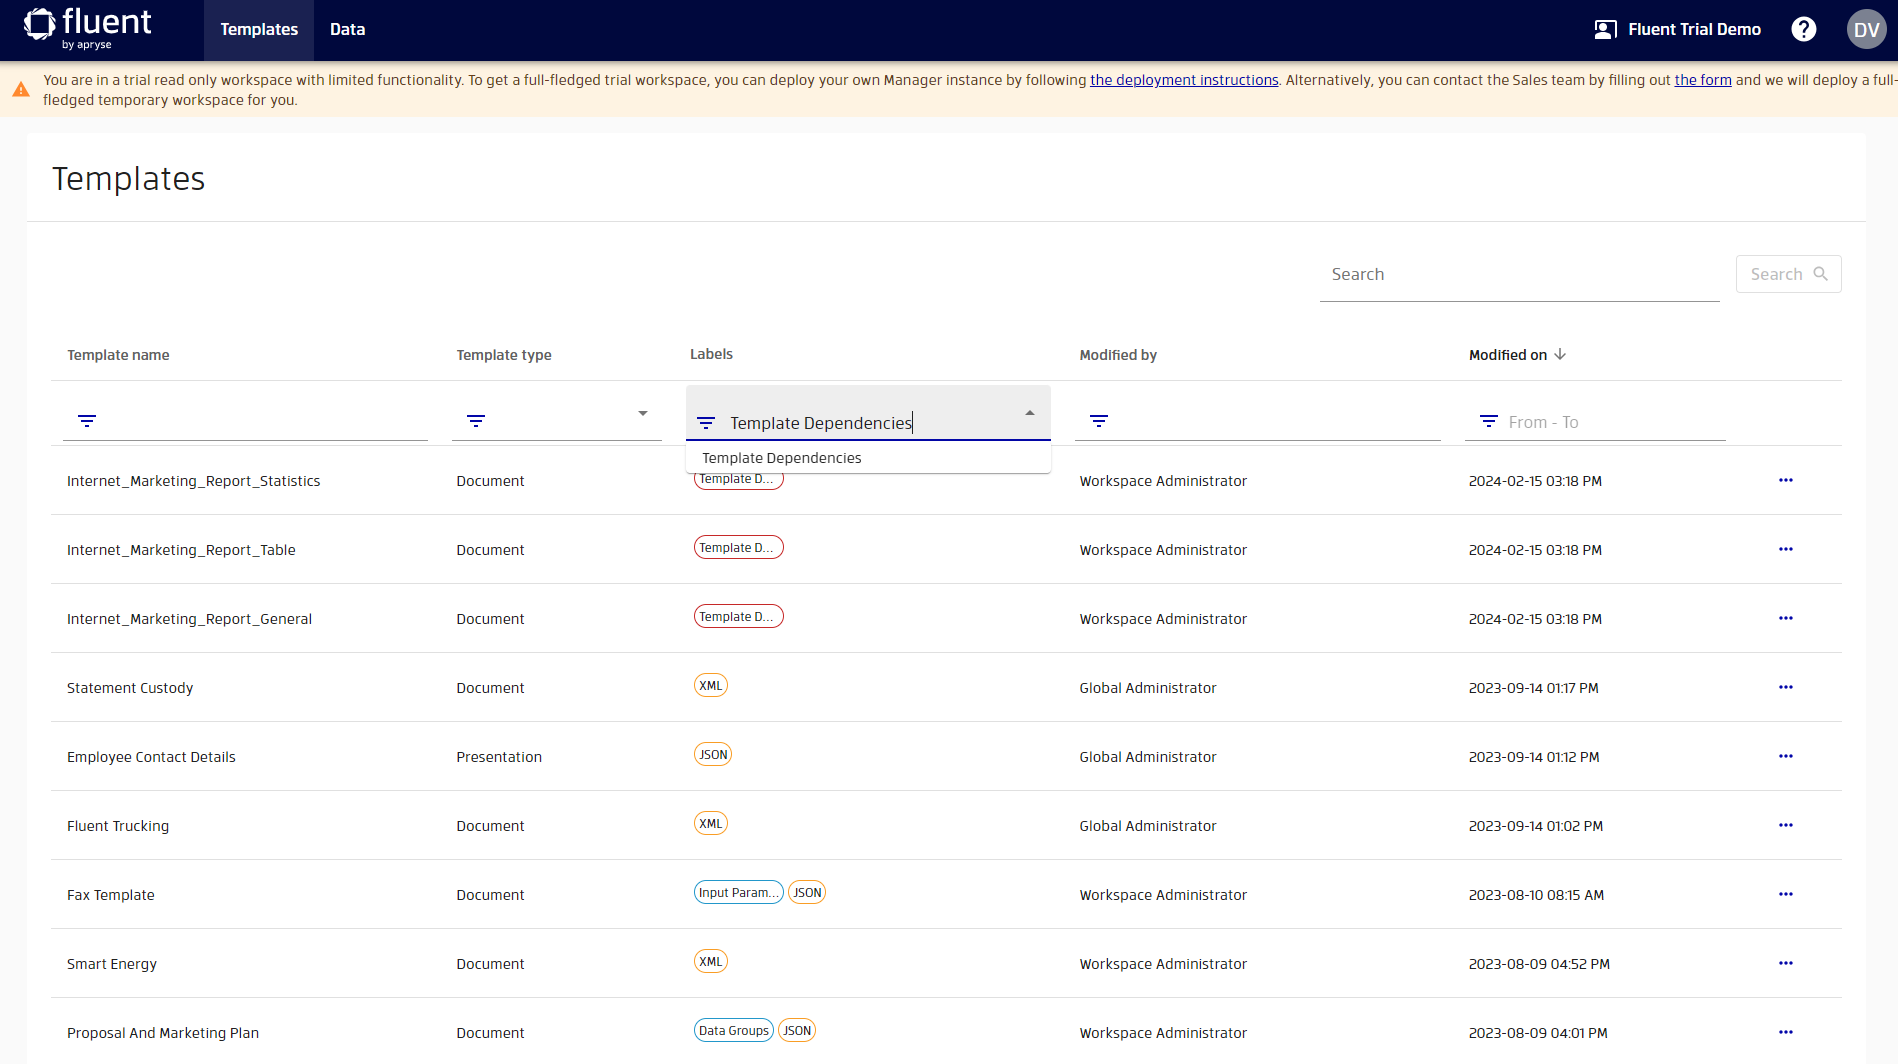
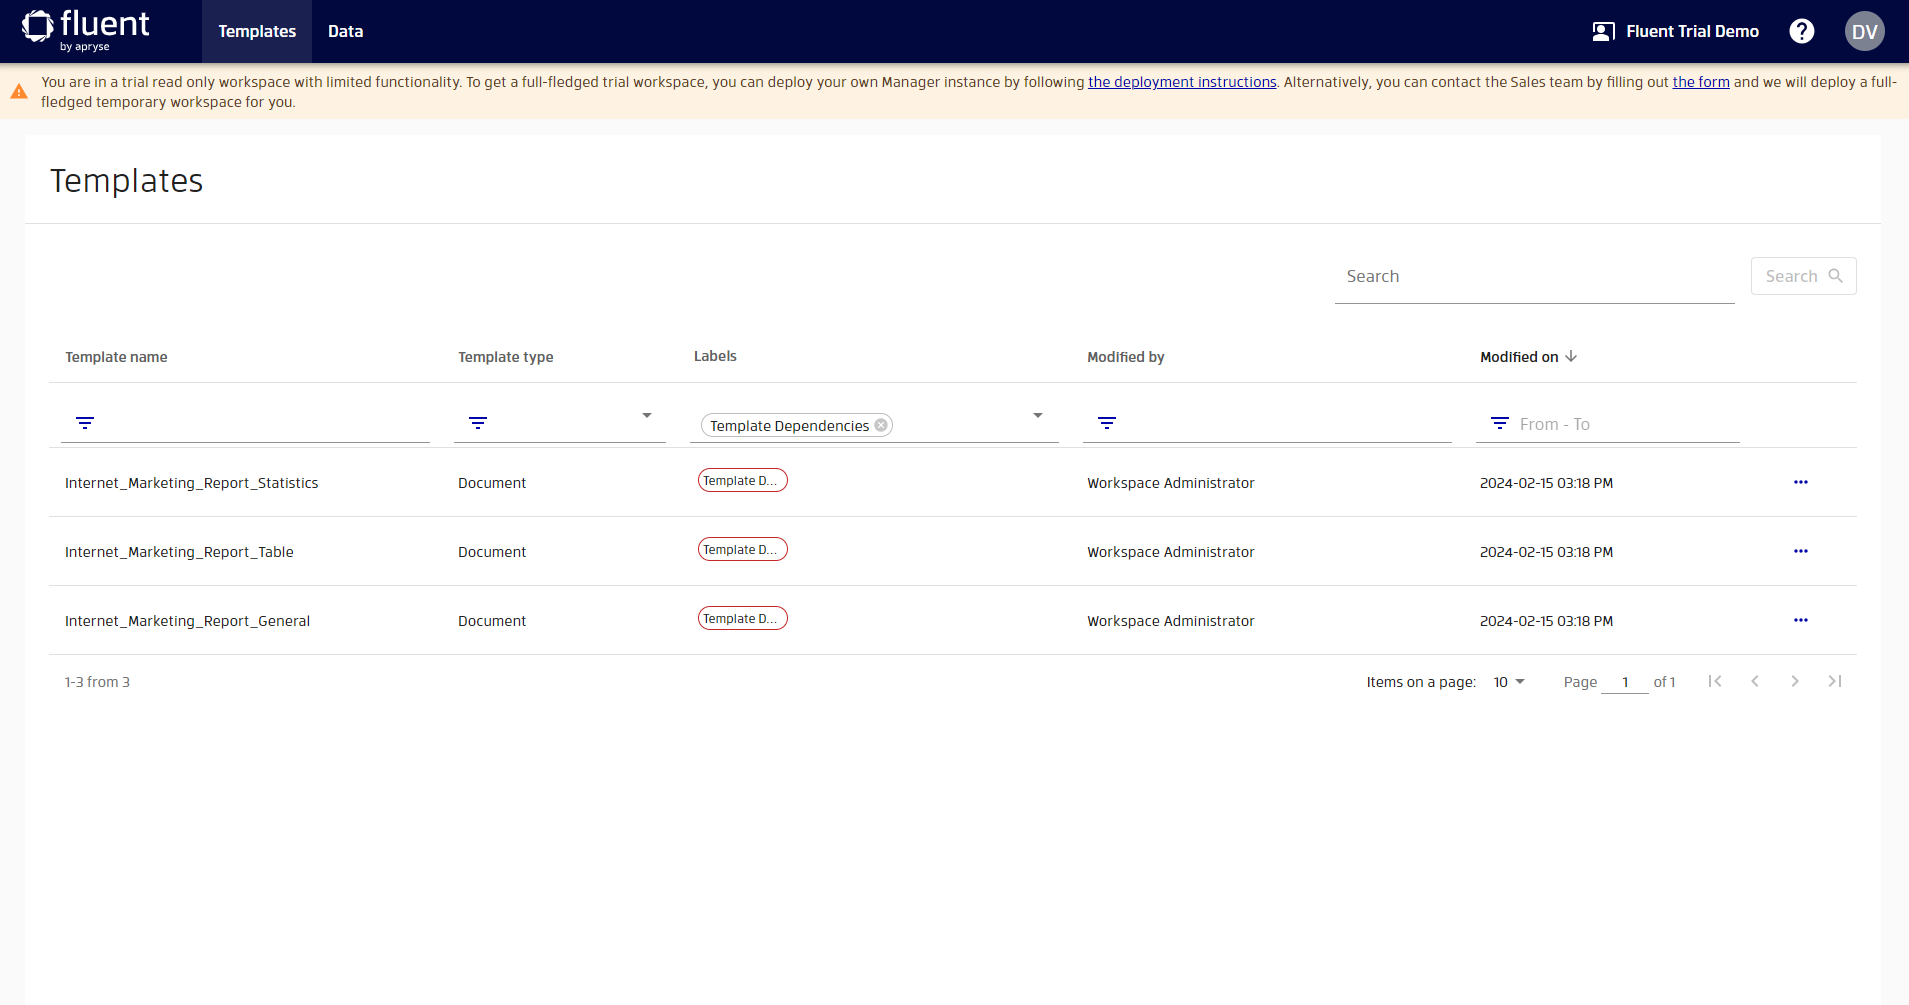
Let's explore templates which have dependencies. Find such templates by typing "Template dependencies" in the template label filter.
Here we have three templates: "Internet_Marketing_Report_General" and "Internet_Marketing_Report_Table" which contain one template dependency "Internet_Marketing_Report_Statistics".
To view the relationship between templates, open the details of the "Internet_Marketing_Report_General" template and then click on "Dependencies" in the left sidebar.
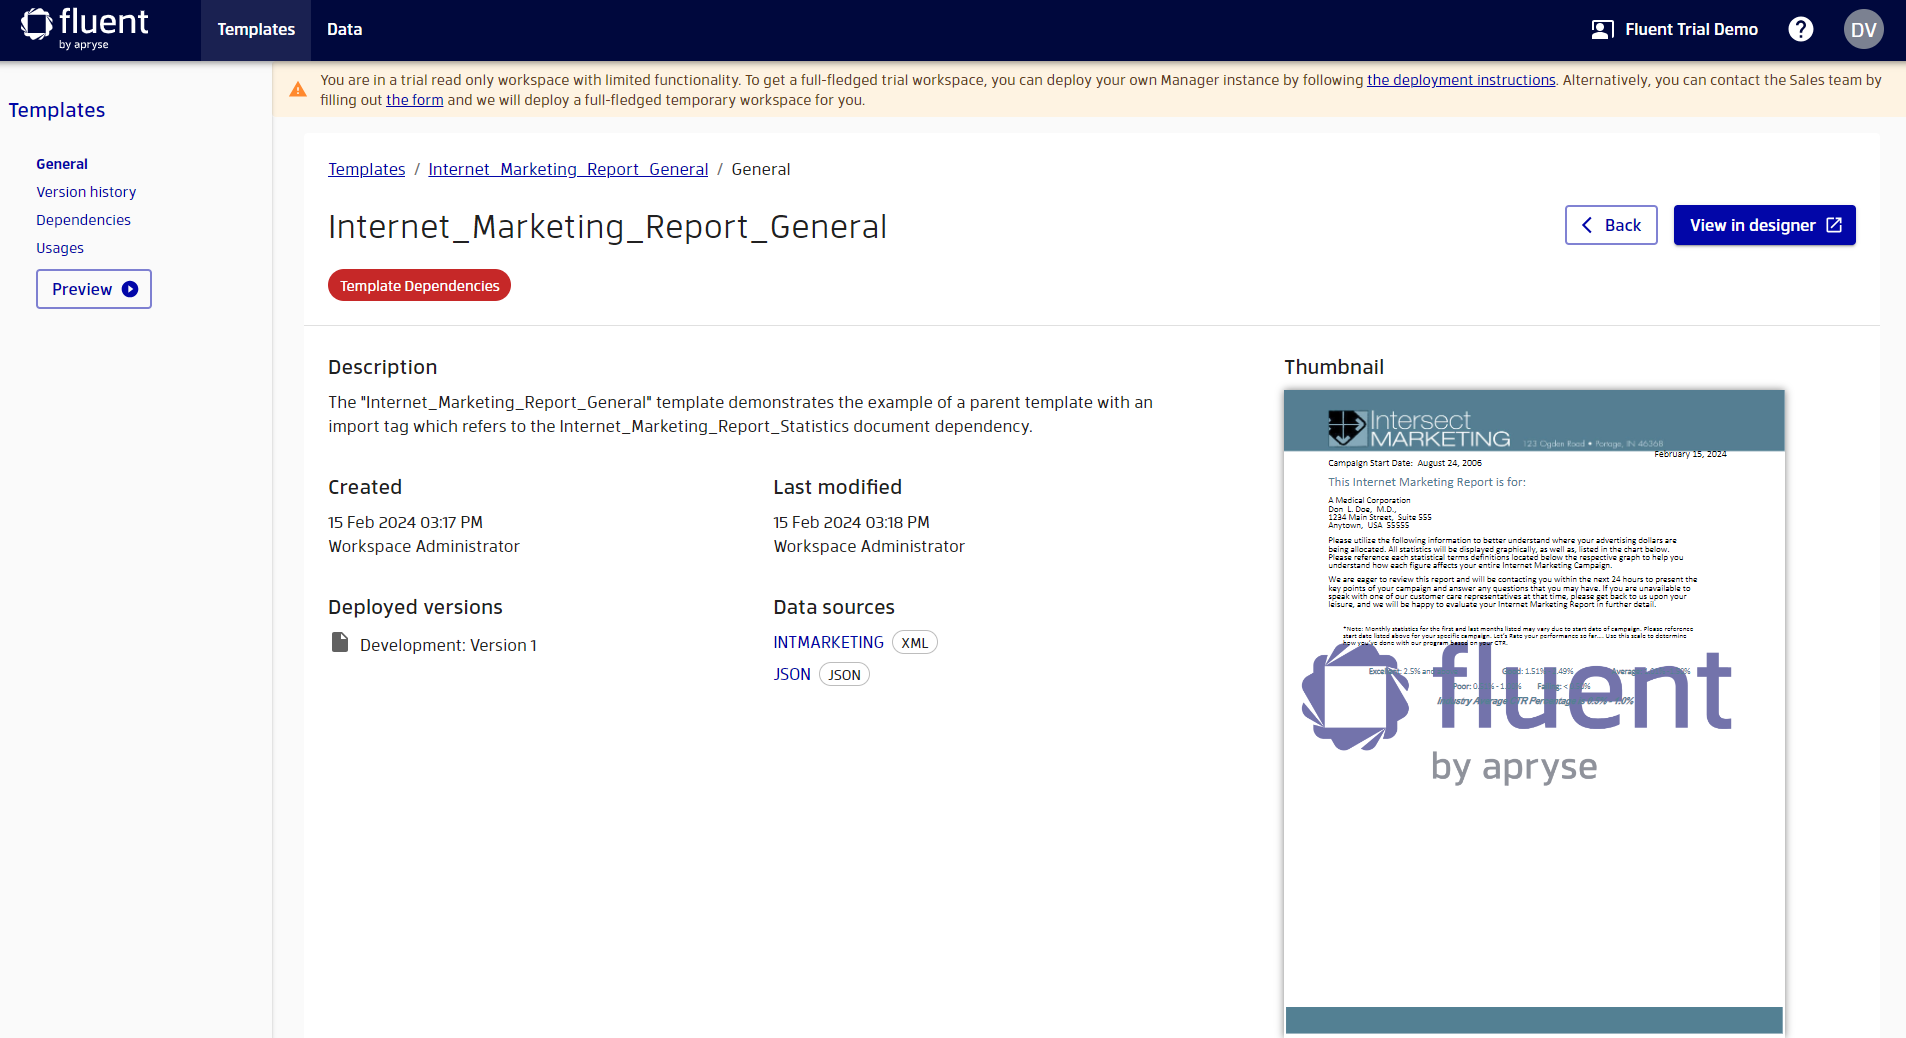
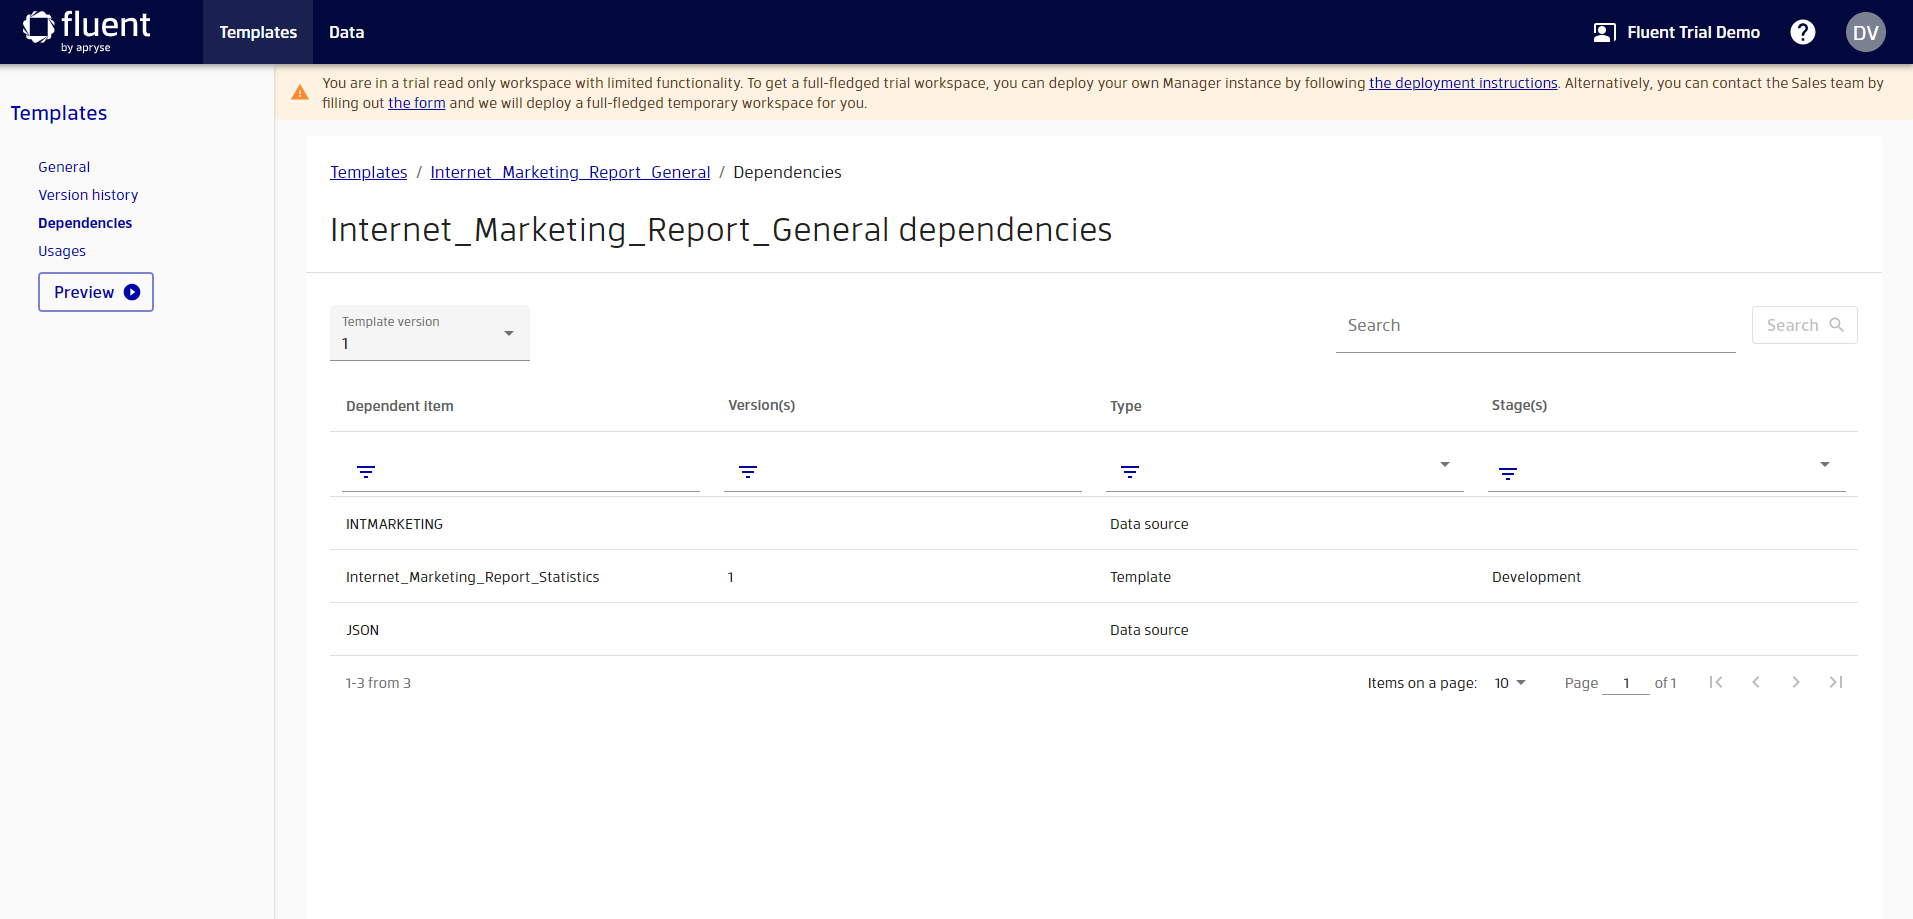
Here, apart from two data sources this template has, you'll see the "Internet_Marketing_Report_Statistics" template as it's referred to in the "Internet_Marketing_Report_General" template.
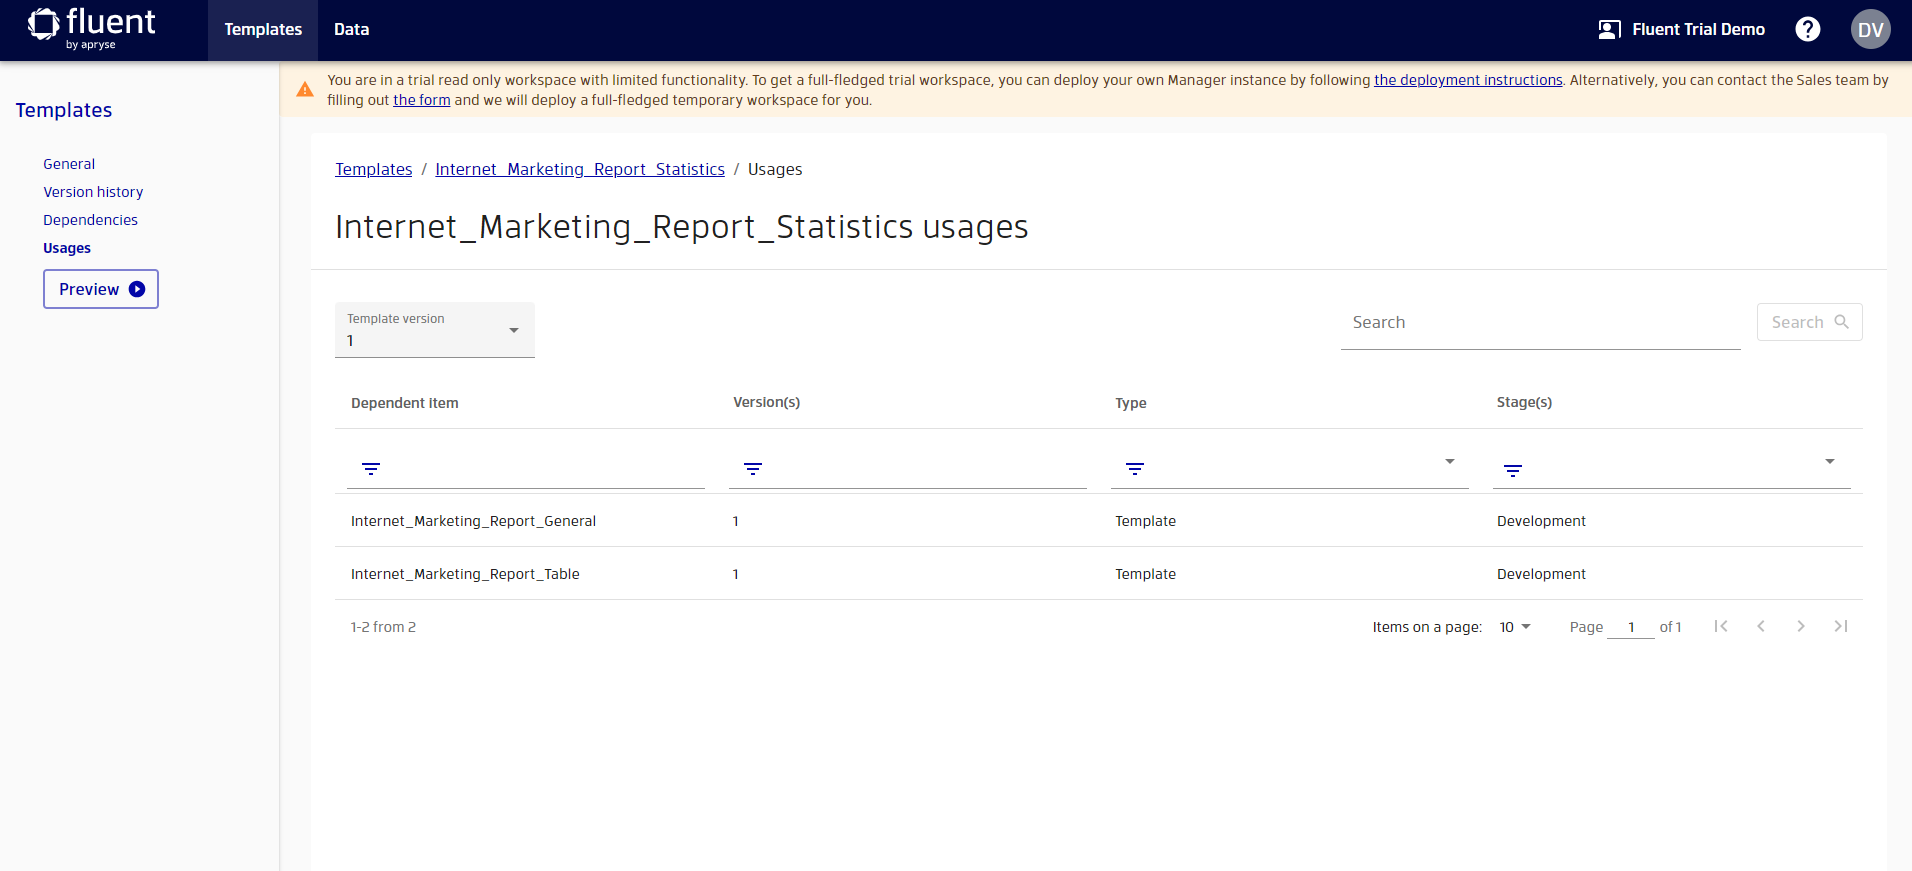
Click on "Internet_Marketing_Report_Statistics", and from its details page, click on "Usages" in the left sidebar. You'll see that this template is used in "Internet_Marketing_Report_General" and "Internet_Marketing_Report_Table" templates.
You can export these three templates and see in Designer how "Internet_Marketing_Report_General" and "Internet_Marketing_Report_Table" reference the "Internet_Marketing_Report_Statistics" template through the import tag. If you try to generate a report, you'll notice that the import tag has been replaced by the contents of "Internet_Marketing_Report_Statistics" template dependency file.
If you want to learn more about templates with dependencies you can read the documentation on ManagerTemplateDependencies.
Great, you have already acquired the basic skills for viewing templates in Manager. Let's see how it looks in the Designer.
Exploring templates in Designer
Let's now look at the contents of the templates. To do this, you need to open them in the Fluent Designer. Let's open the Smart Energy template in the designer. To do it, you can go to the template details and click the "View in designer" button.
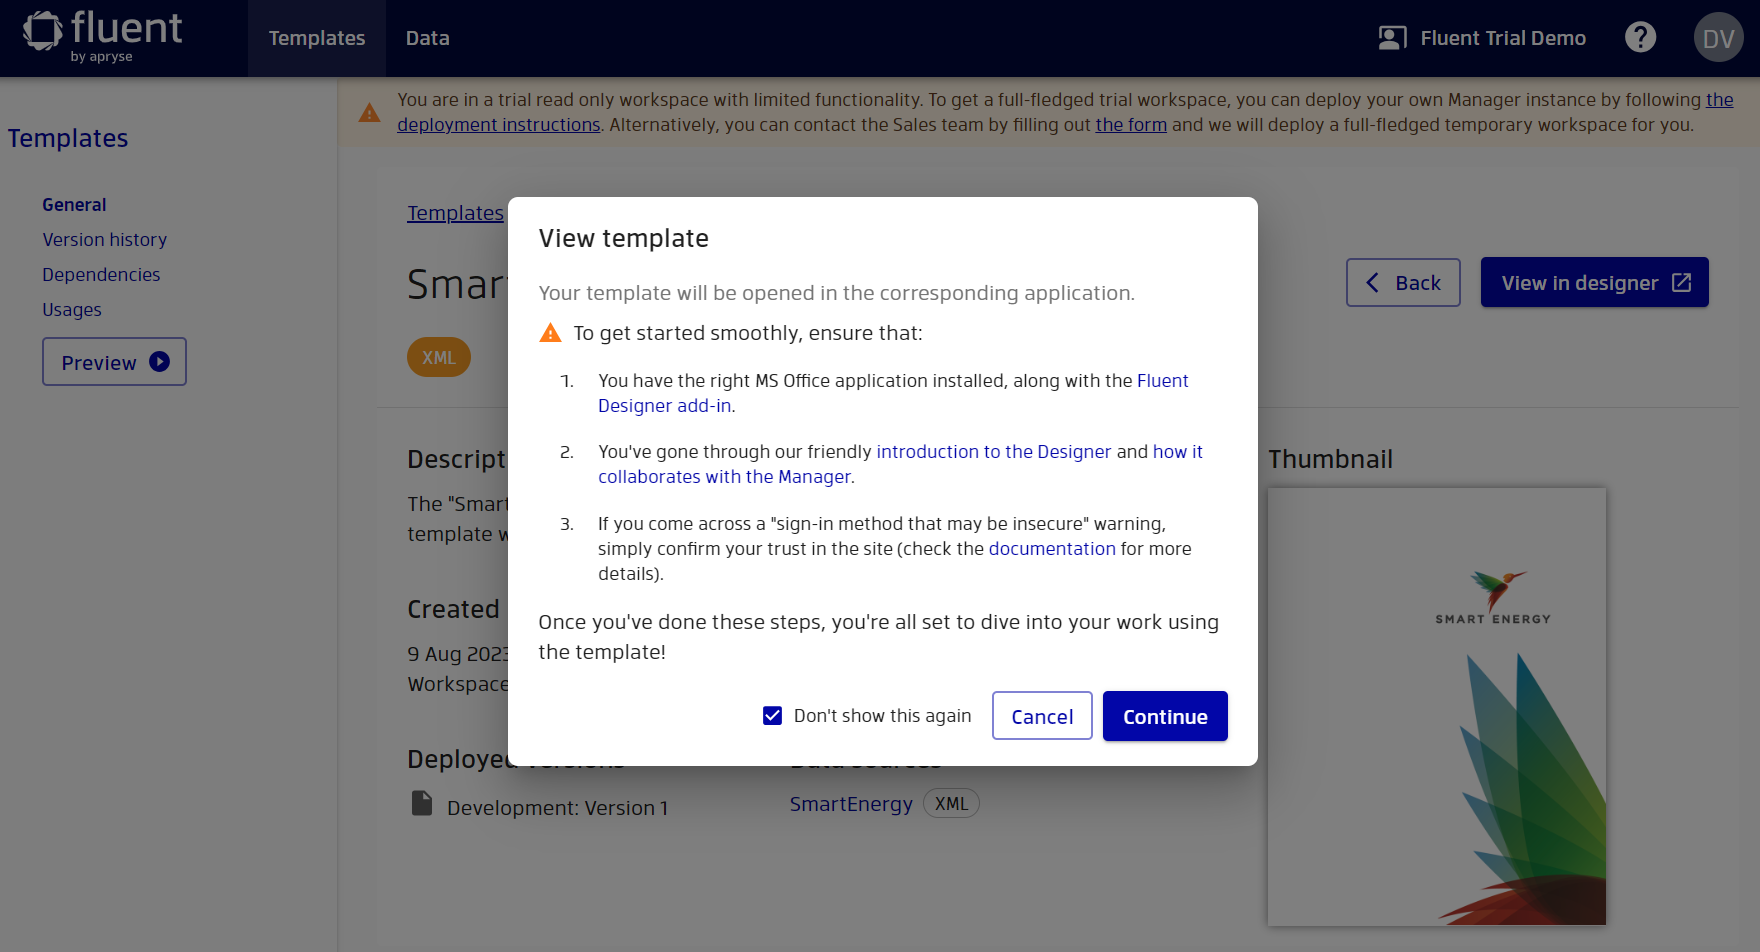
When trying to open a template for the first time, Manager will prompt that you also need to have the Fluent Designer add-in installed. If you don't have Fluent Designer yet, you can download it here. You can also select the "Don't show this again" option to no longer show this reminder.
Finally, press "Continue" to open the template in the Designer.
Designer can request permission to use the forms-based login method that is used to gain access to the Manager. For more information on how to grant permission to the Designer for form based authorization, go to the documentation on interacting with the Designer
The template that you open in Word is not stored on your computer, but is stored in the Manager. This template is secure, so you'll also need to provide your Manager credentials in order for Word to retrieve it. Enter your username and password and click "Remember me" if you want to avoid entering these details again.
Congratulations, you've made it pretty far. Now you can start exploring your first template with Fluent Designer. Click the "Enable editing button" button to be fully able to use the Designer.
To understand how the Designer works, please refer to the documentation for the Designer. The "The Five Steps of Fluent Designer" documentation is a good starting point.
Note that you will not be able to save the template after editing. However, if you wish, you can save a copy of the template. This is because you are in a Read Only workspace. In a normal situation, when you have your own workspace, you can save the template and the changes will be automatically uploaded to the Manager and thus a new version of the template will be created. In the future, if you wish, you can roll back to a previous version of the template.
Close your Office application.
Now you know how to explore templates in the Designer. For a better understanding of how this works, you can explore other workspace templates.
Report generation
What's even more exciting is that when you create or update a template, Manager automatically caches it on the RESTful Engine. This means that your template immediately gets to the RESTful Engine and can be used to generate reports through the REST API. You don't have permission to change templates yet, but it's still key knowledge that you need to learn and that will definitely come in handy when you have your own workspace.
You can send a request to generate a report to the RESTful Engine by specifying the connection string in the format file://resources/{template-name}.
The RESTful Engines connected to the Demo workspace are running on the internal network with the Manager, so you can't send requests to them. But to learn more about the REST API, you can explore this tutorial.
But of course this is not the only option you can use. You can also use this template to generate reports using Java or .NET Engines, just like you would normally. For more information, check out the documentation for the Engine.
Data management
Great, let's now go ahead and see how you can manage your data using Manager.
Go to data management by clicking on "Data" link in the header.
You will be able to see the data groups of your workspace. Working with data groups is outside the scope of this tutorial, but you can read this documentation to get started with data groups.
Let's switch to the data sources.

Here you can find all data sources in your workspace. Data sources are automatically loaded into Manager when importing or updating a template.
To quickly find your data source, you can also use filters in the same way as we did earlier with templates.
Let's go into the details of the "JSON" data source by clicking on the data source name in the table.
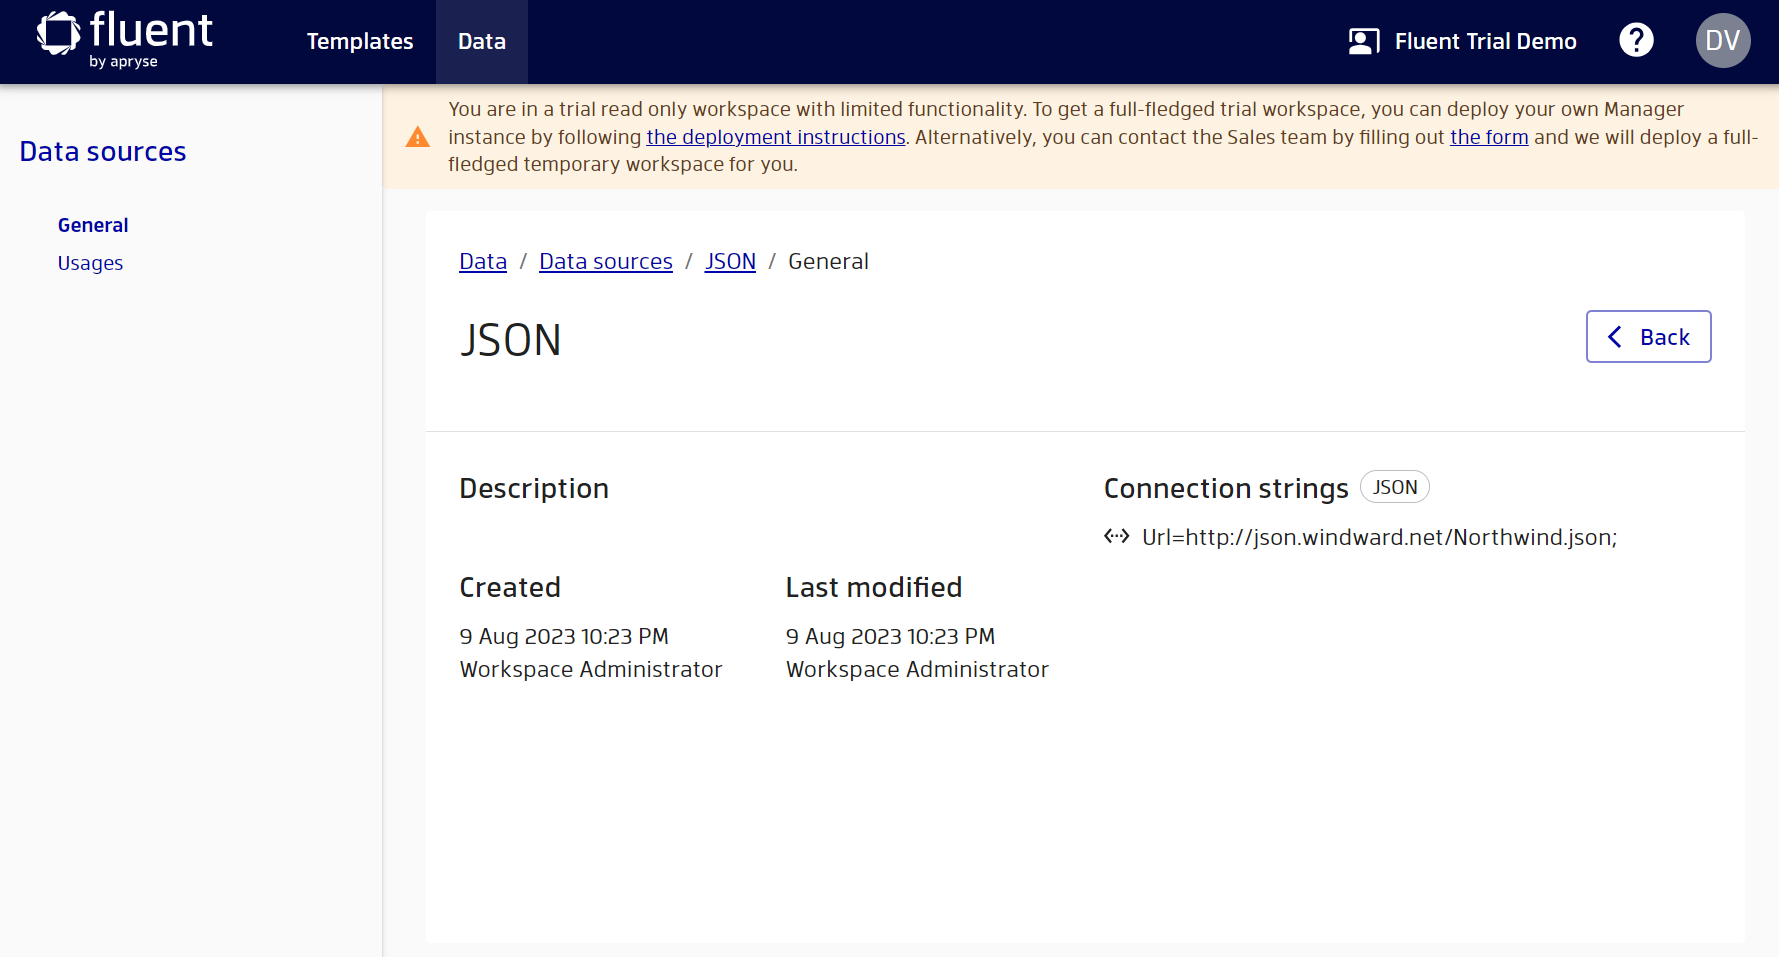
Here, as well as for templates, you can see various details of the data source.
In a non-read only workspace, you can add different connection strings for data sources to later see how your template looks with different data. In the meantime, you can just explore existing data sources.
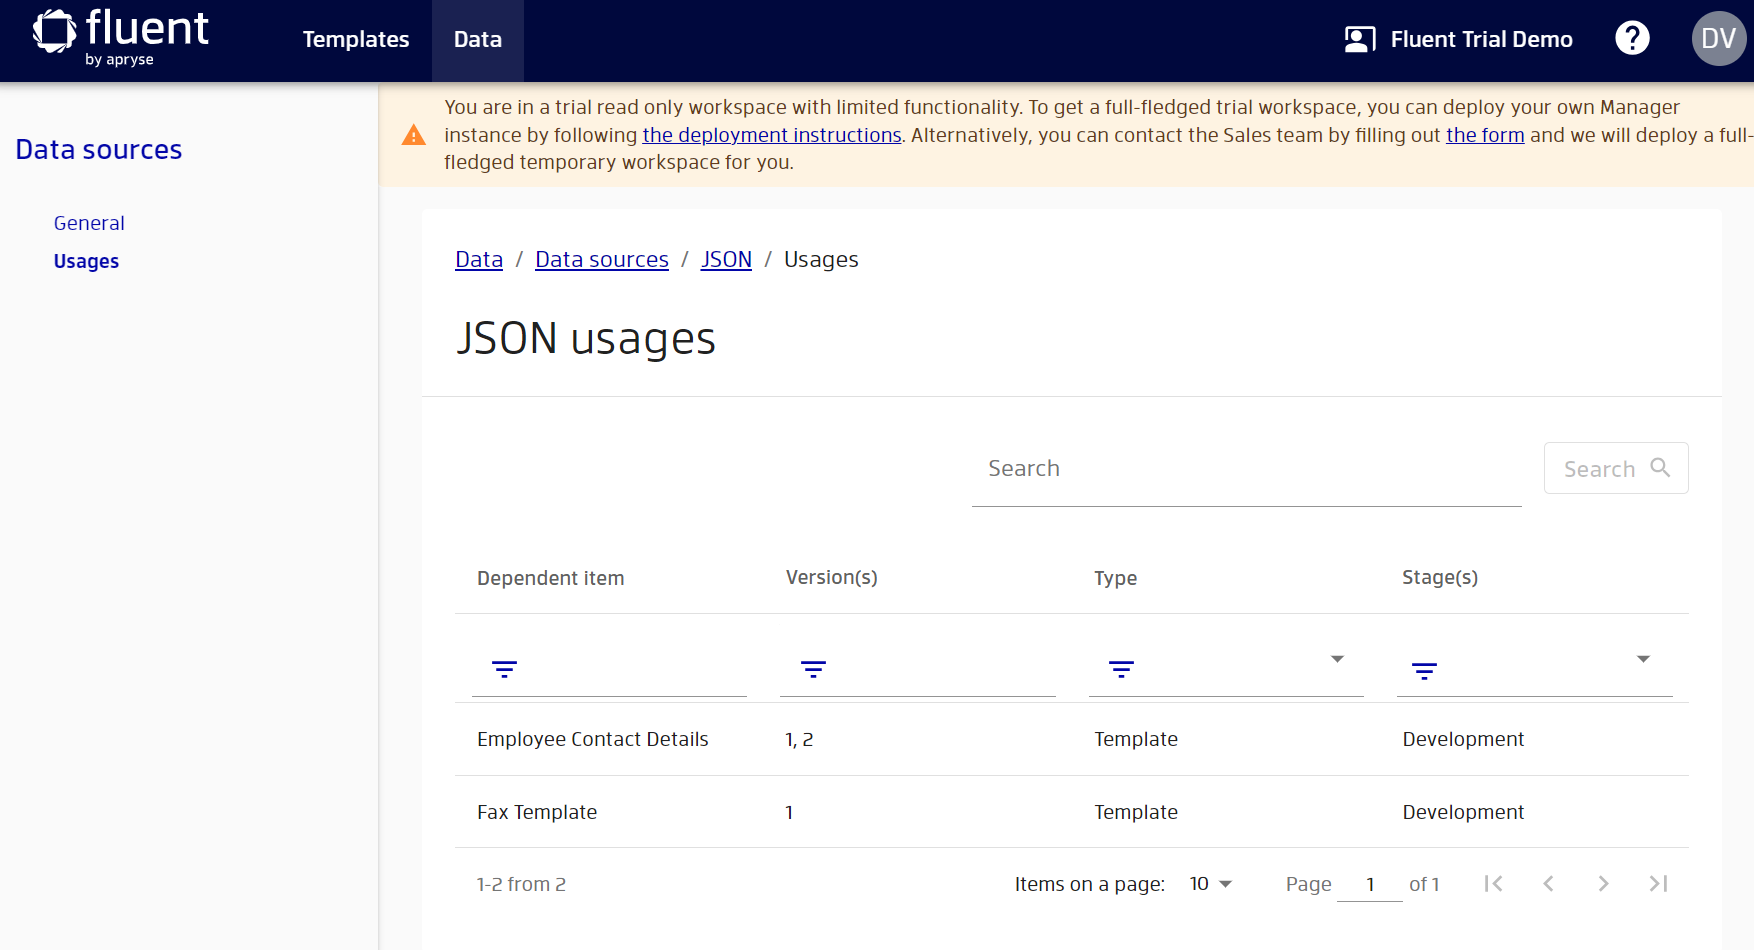
You can also see which templates use your data source by selecting "Usages" for your data source.
For more information about data management, you can read the documentation on data sources and data groups.
Where to look next?
Manager is a powerful tool that allows you to not only manage your templates and data, but also manage RESTful Engines, keep track of licenses, create users and manage their roles and permissions, create child workspaces, configure stage management for your templates, and much more.
All these configurations can be found in settings, but they are not available in this demo read only workspace.
To continue your adventure, we recommend that you explore the "Using Manager" section where you can find more information on every aspect of the application.
Congratulations 🎉, you have successfully completed this tutorial!