Fluent Manager REST API
Once Fluent Manager is deployed, you can explore it using the user interface, but sometimes you may need to communicate with Manager using the REST API. This documentation describes exactly how to do this and here you can find out how to explore the available endpoints, request/response formats, and authentication mechanisms.
The Fluent Manager REST API is a powerful tool that allows you to interact with the backend service of the Fluent Manager application. It provides a comprehensive set of endpoints for managing various aspects of the application, such as template manipulation, data retrieval, user authentication, system configuration and much more.
How to find REST API
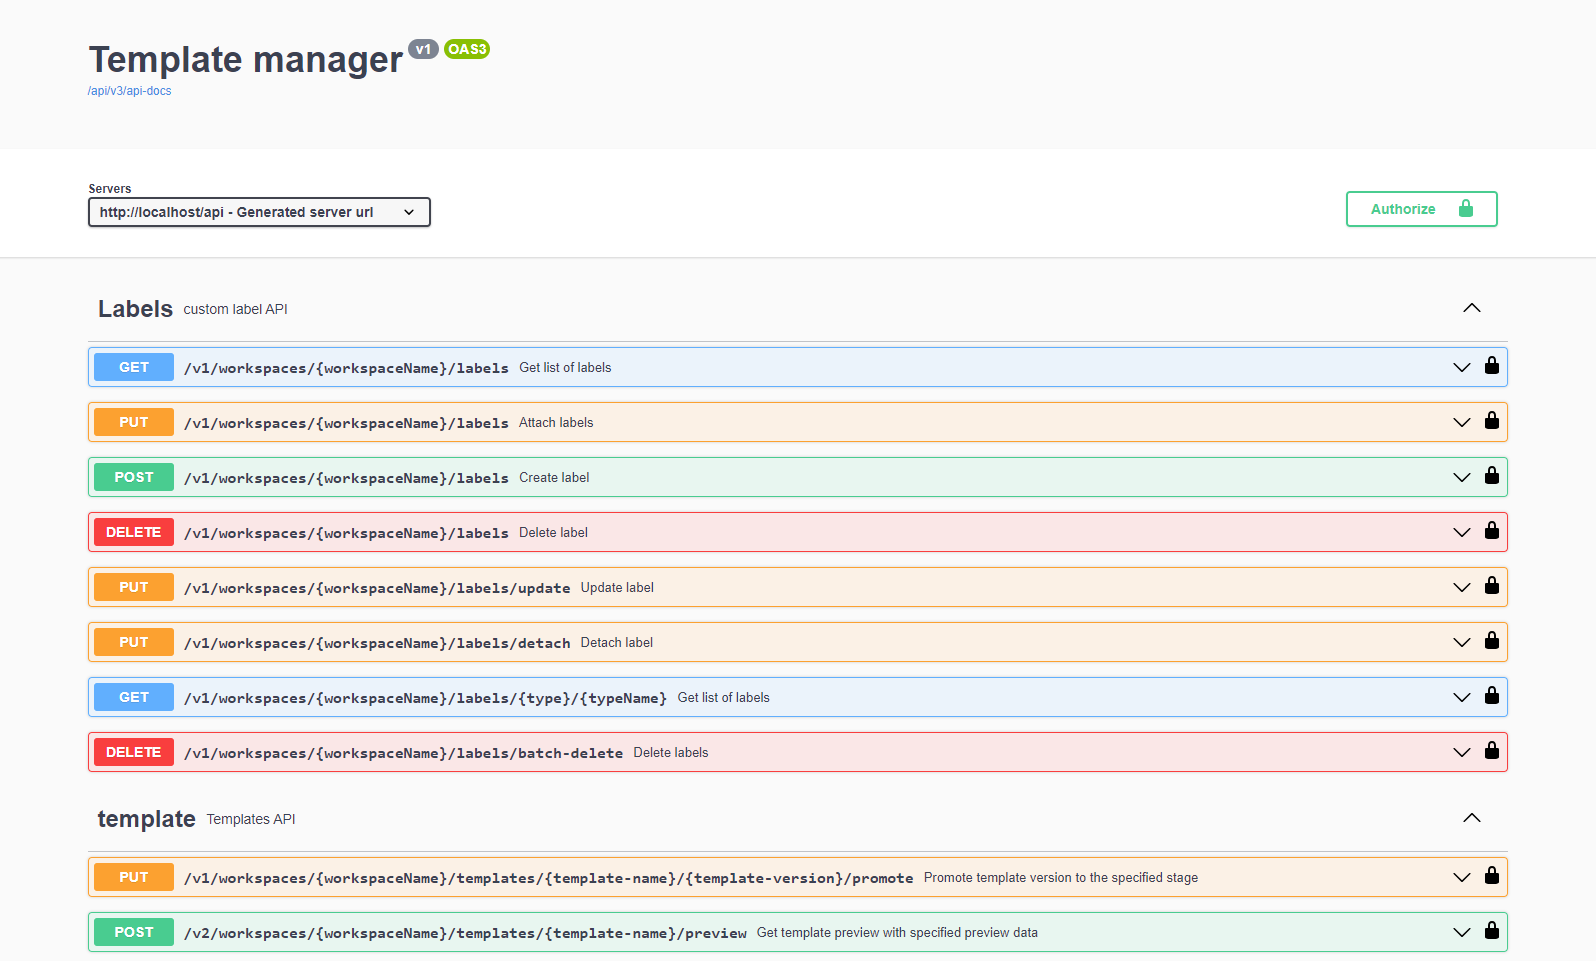
The Fluent Manager REST API is accessible at http(s)://{fluent-manager-domain}/api/swagger-ui/index.html. Swagger API can be accessed after the application is deployed.
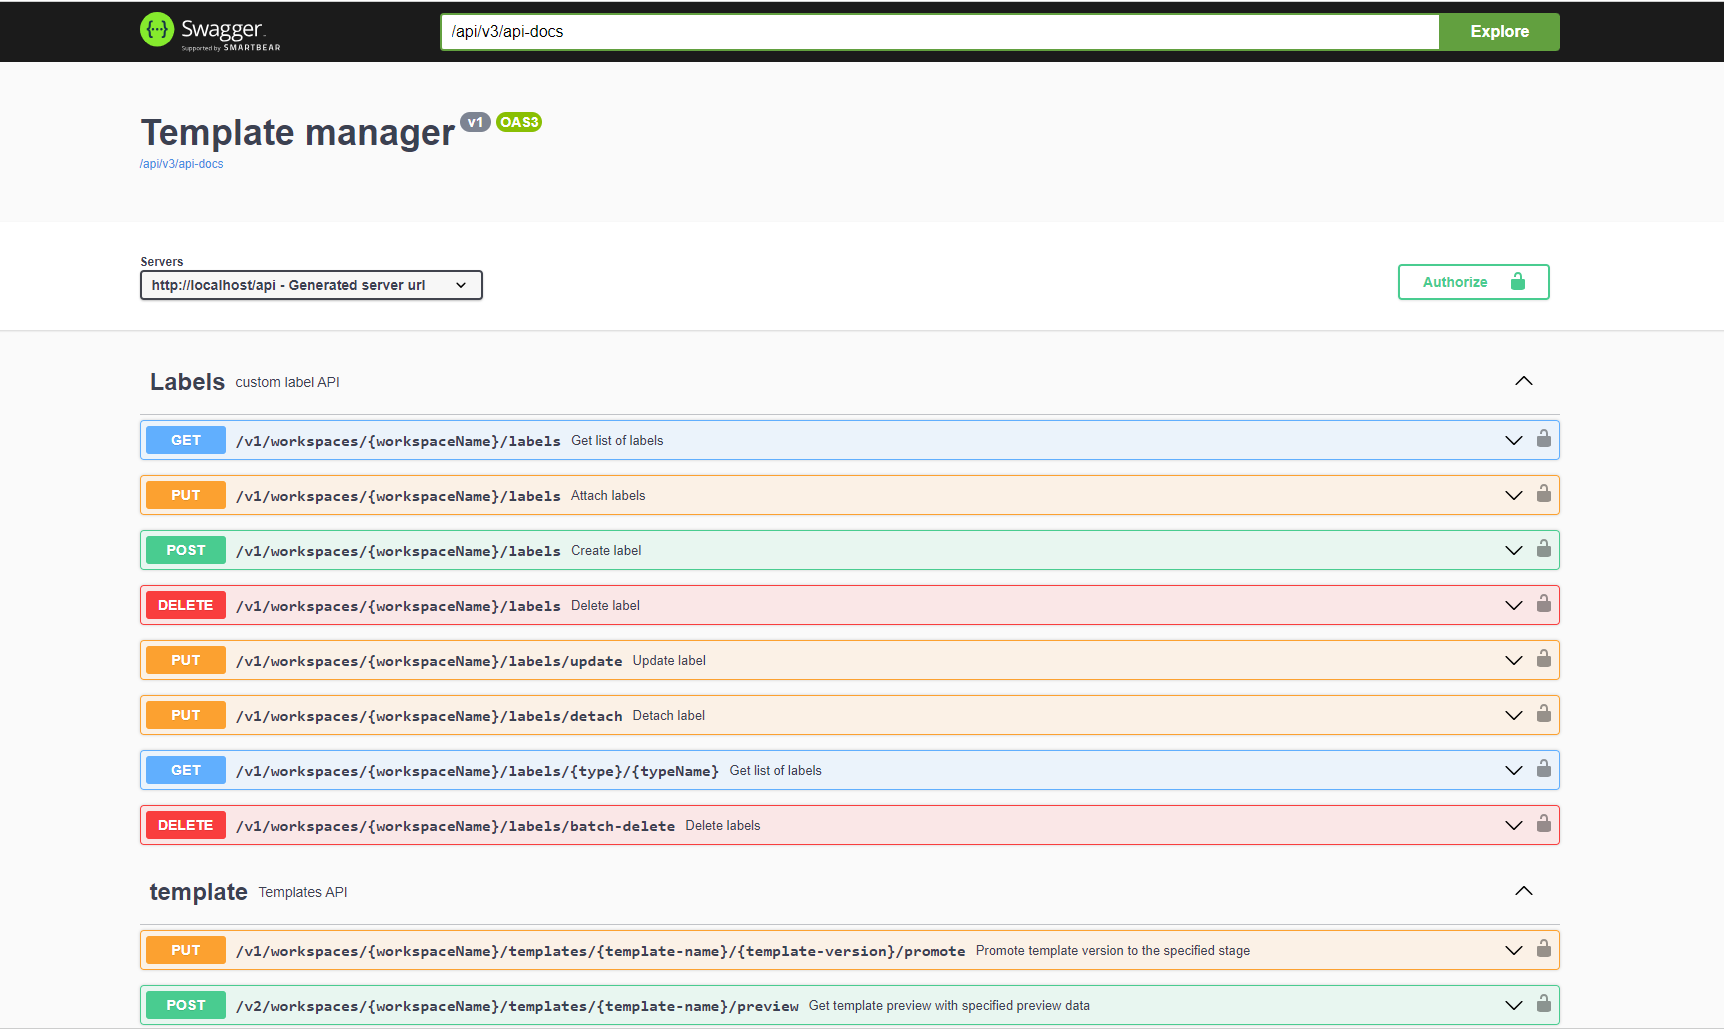
Authorize in REST API
You can make requests to the backend service from the application, postman or any other client. In order to make requests from swagger you’ll first need to authorize, this can be done by clicking the Authorize button on the right side of the screen.

You can either provide a username and password (for example, those which you’ve provided during application deployment) or an authentication token. To get such a token, run the authentication request and retrieve the string from the response body under the accessToken parameter.

Using an authentication token is useful when you want to send a lot of requests. In this case, credentials will be transmitted over the network only once during the token receipt. In the case of the Basic approach, credentials will be transmitted every time over the network. When you're playing with sending requests in the swagger documentation, it's easier to use Basic authentication, but if you send a lot of requests to Manager from your application, then it's better to use token-based authentication.
Once we’ve authorized, all the lock icons are now in the closed state.
Explore REST API
All the documented requests are grouped by their APIs; for example everything for template management is located in Template API.
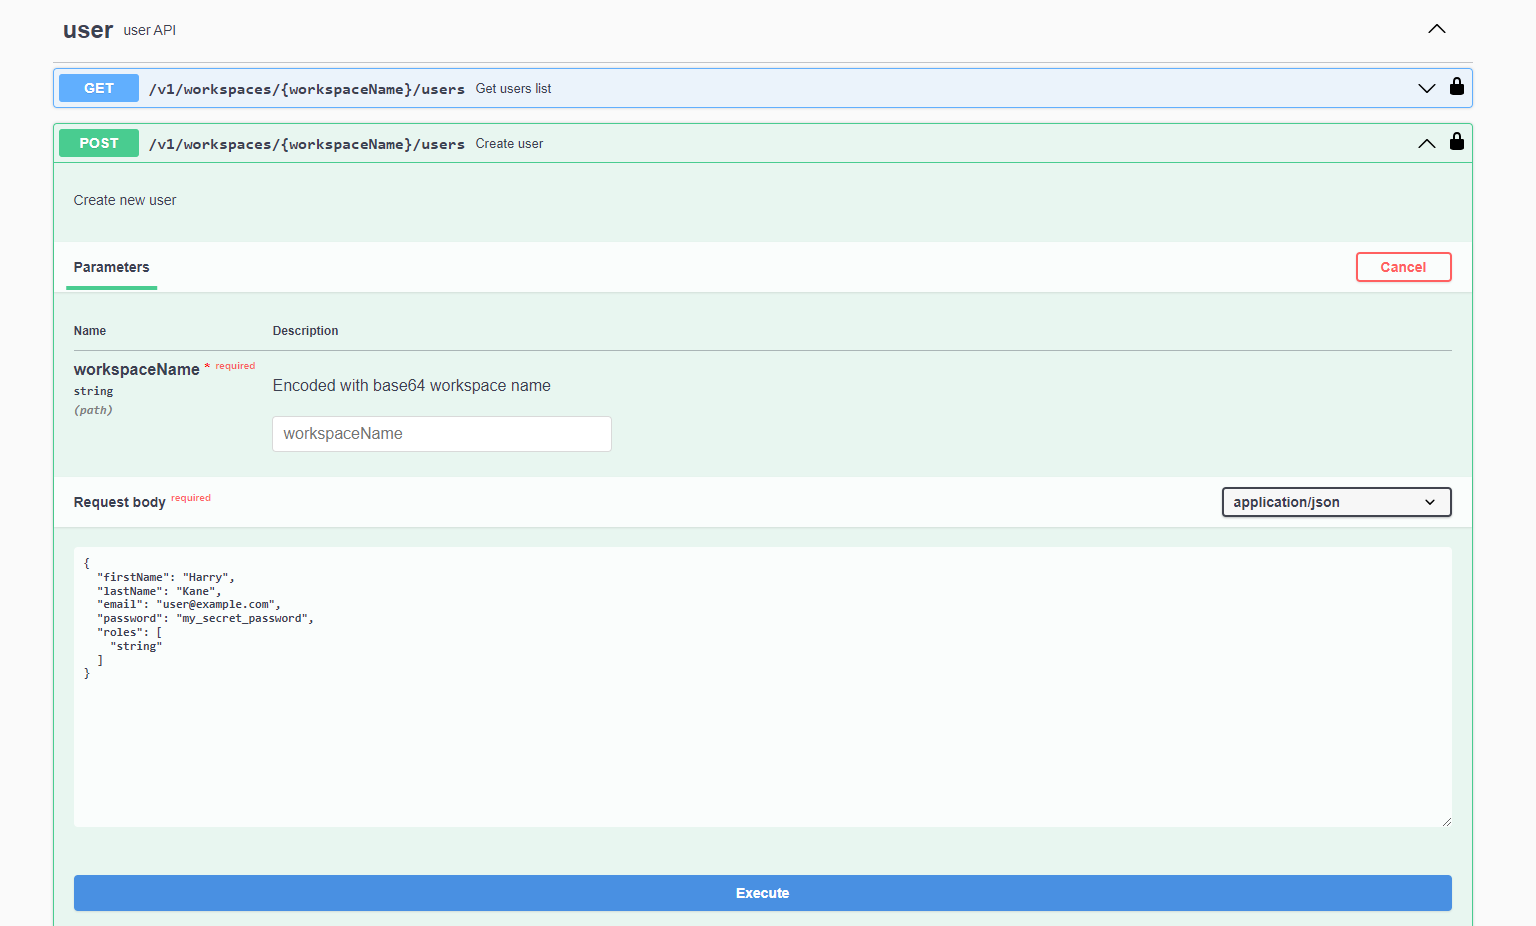
Now we will try out actual request sending. Let’s suppose that we want to create a new user. For that we will go to the user API. This can be done by typing the user API name in the search bar http://localhost/api/swagger-ui/index.html#/user or just scrolling to the user API. Then click on Create user request.

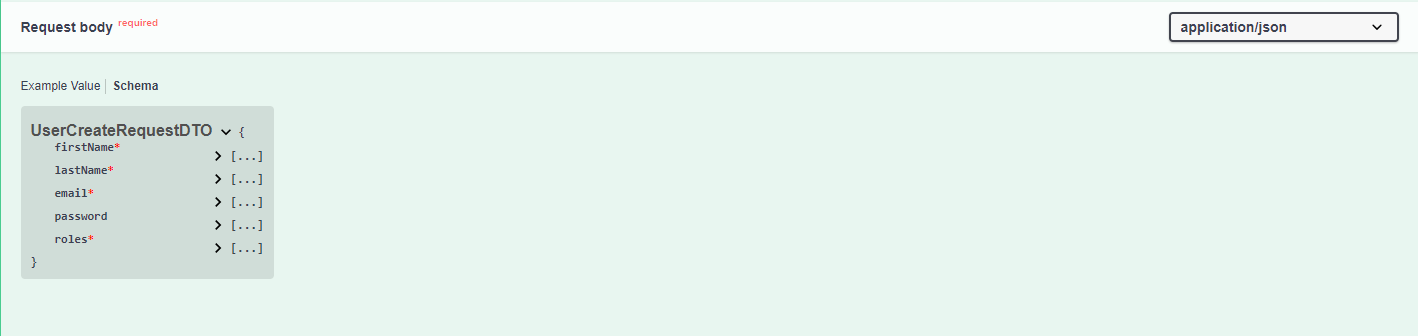
Here we see the requested parameters for user creation: workspace name (note, that it should necessarily be encoded with Base64) and the example of a request body which includes different fields.
We can also click Schema (next to Example value) and see the structure of the request body, type and description of its parameters, as well as possible values in the case of enum.
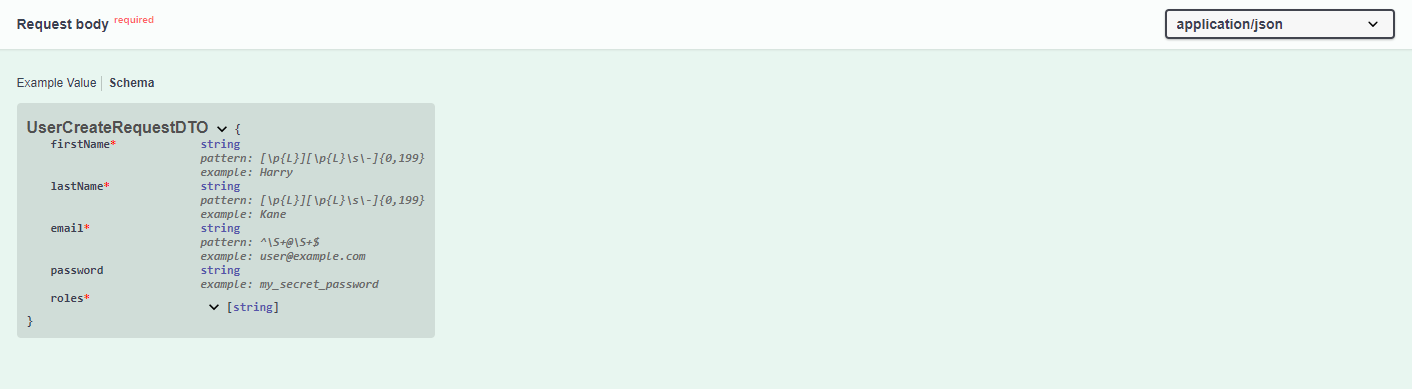
A list of all schemes is given at the end of the documentation.

We are also given a list of all possible responses which can be returned after the user creation request.
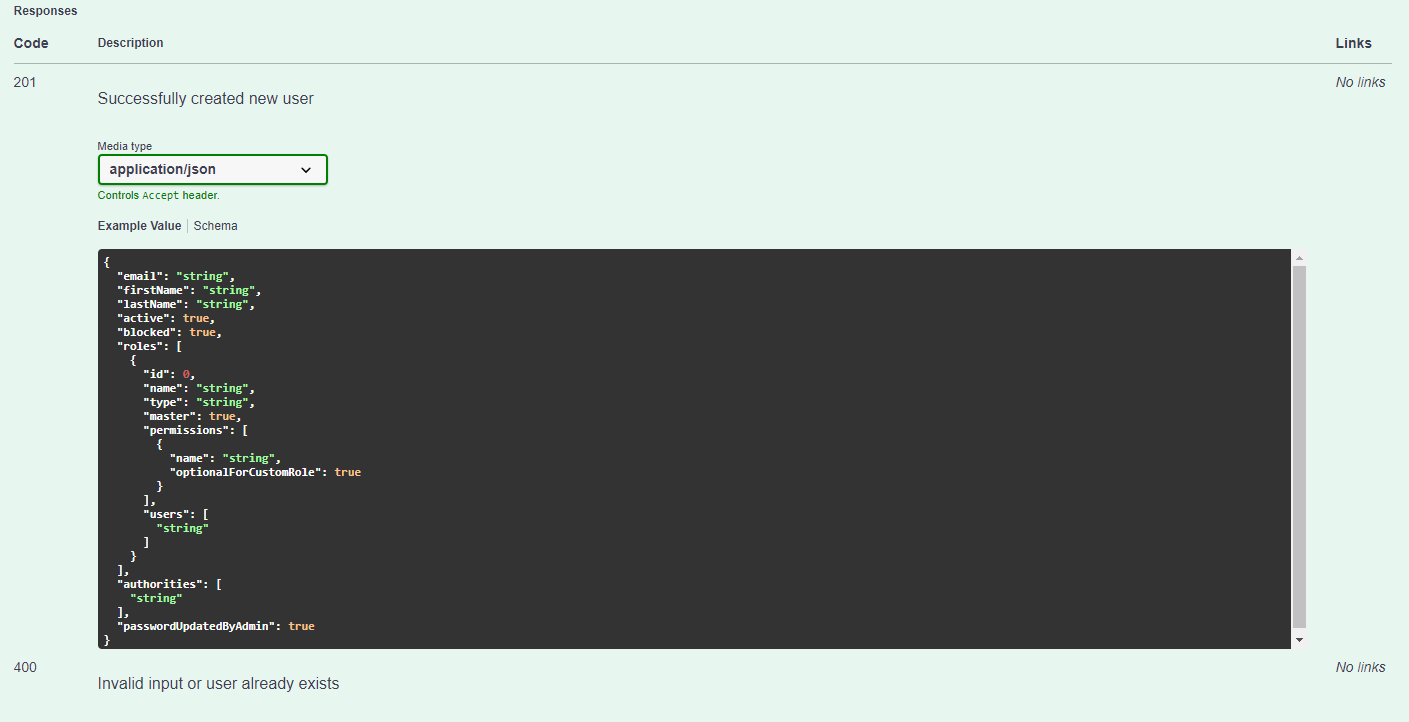
To send the request, we need to click the Try it out button, and then enter the necessary information into all input fields that have become editable.
When the fields are filled in, but for some reason you need to reset the field state to its original state, just click the Reset button.

After clicking execute, we see that our user has been successfully created. We can see the response code as well as the body and headers. In addition, we are provided with the corresponding curl request.
