Table of Contents
- How to import templates with dependencies
- How to upload a new version for templates with dependencies
- How to update templates with dependencies
- How to rollback templates with dependencies
- How to view dependencies between templates
- How to export templates with dependencies
- How to delete templates with dependencies
- How to set up stages for templates with dependencies
- How permissions work for templates with dependencies
- How to deal with external dependencies
- How to deal with unknown dependencies
- How Manager helps to normalize templates with dependencies when deploying to RESTful Engines
This documentation explains how to use templates that depend on other templates, or are used by other templates. We will mainly focus on template-to-template dependencies in this document. We will also look at how to deal with dependencies of an unknown type in one of the sections. Please refer to the "Data Sources" documentation for template-to-data source dependencies.
You can create dependencies between templates using import tags. Import tags allow you to insert an external file into your report template output when the output is generated. This is useful when you want to reuse a common part in multiple templates, and also be able to update this part in all templates easily in the future.
How to import templates with dependencies
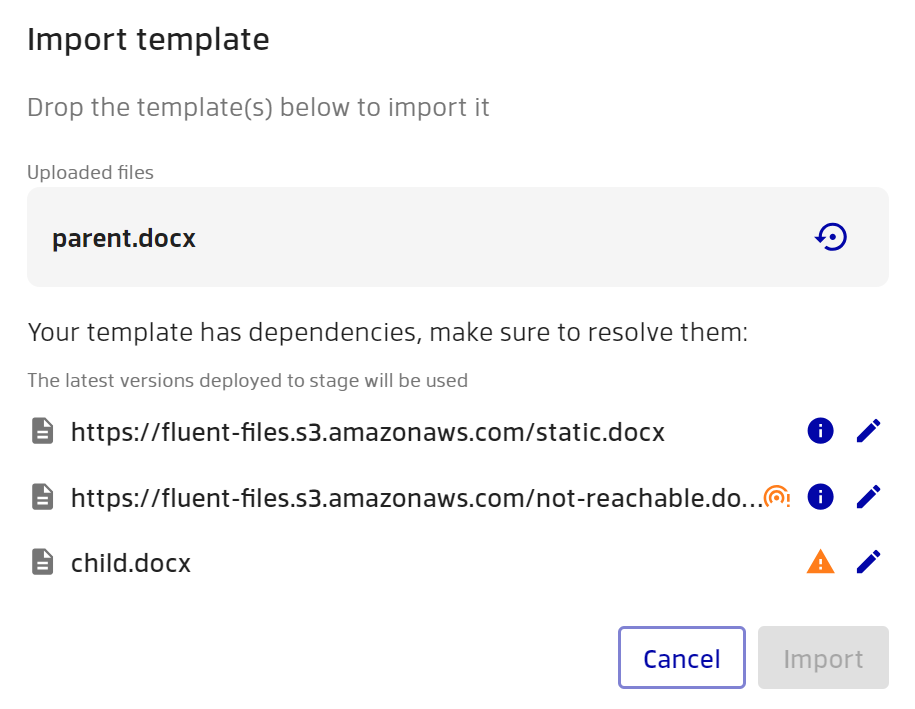
If your template depends on other templates, you need to import not only your template, but also all the templates it depends on. Manager will help you track and resolve any missing dependencies. By default, when you try to import a template and Manager detects any import tags in the template, it will launch the dependency resolution wizard.

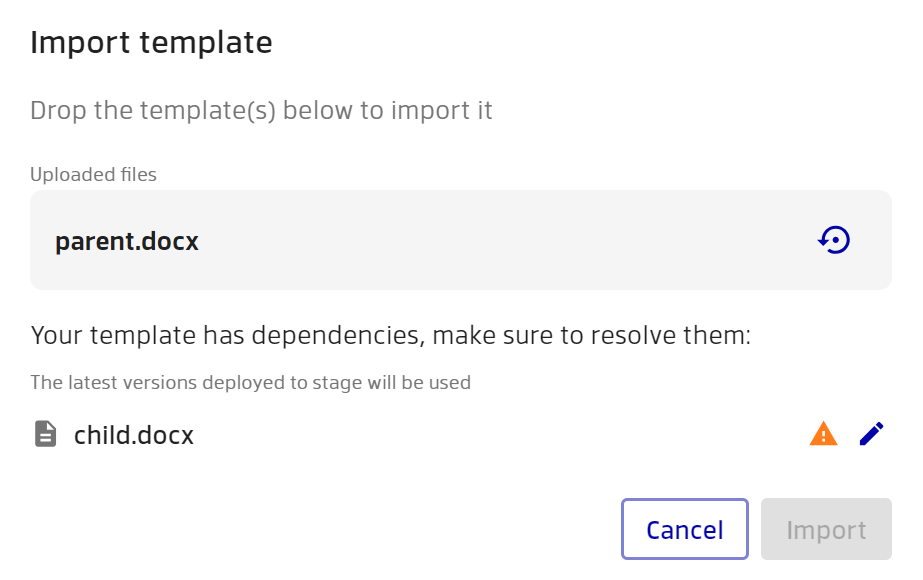
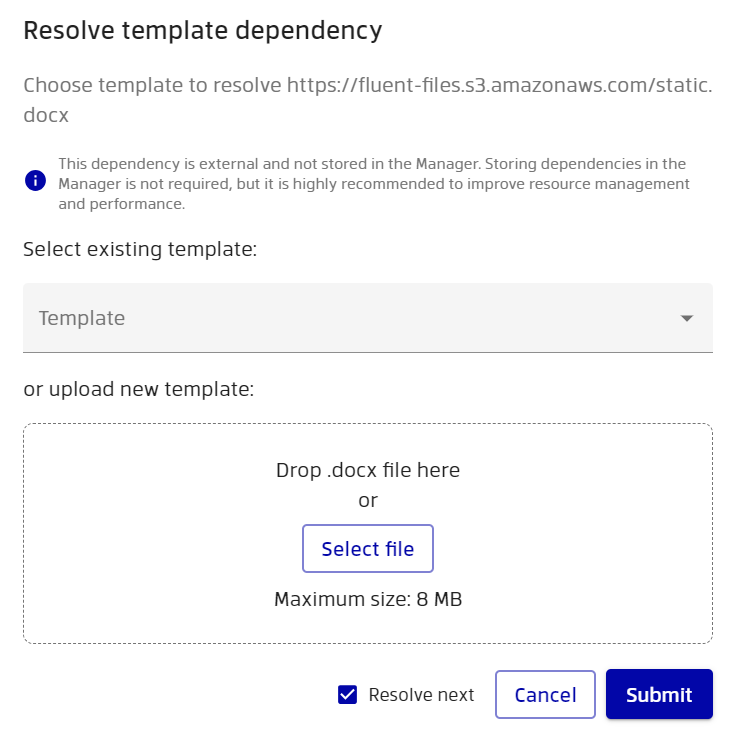
In this wizard, you will see which dependencies Manager cannot find and requires your input. Missing dependencies are marked with a warning sign. You cannot proceed with the import until you resolve all dependencies. You need to click the “Edit dependency” button to resolve a dependency. Then you can either upload the dependency file, or choose an existing template from Manager that matches the dependency.
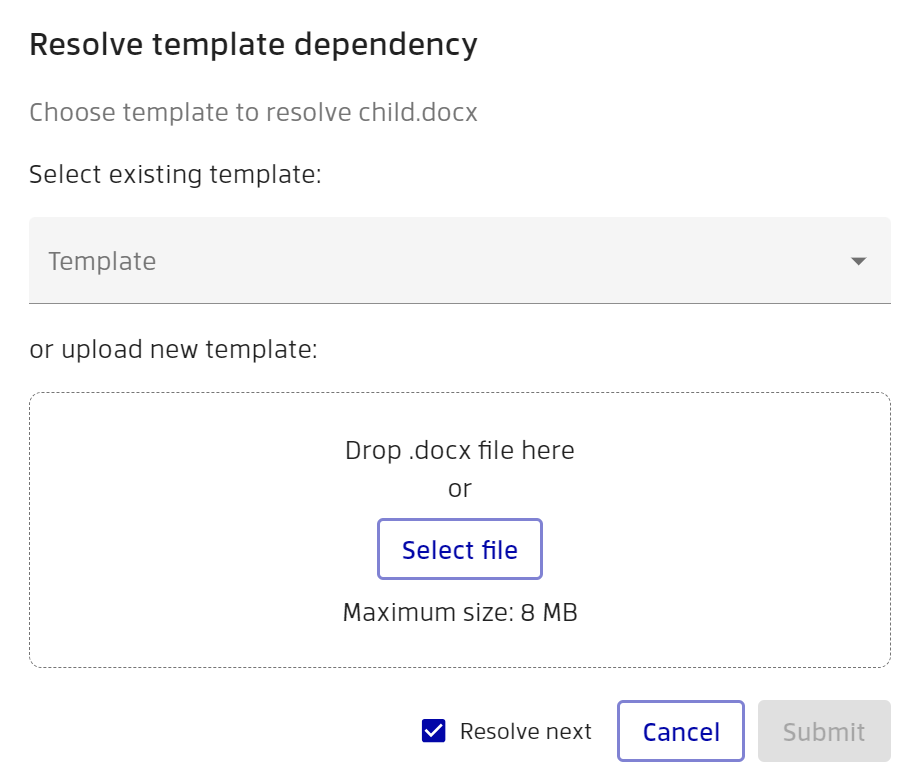
Once you have uploaded a dependency, the "Import & Submit" button will be enabled. This button will import the dependency file to Manager so it is available for future use. You can also toggle the “Resolve next” option. If this option is on, when you click the “Import & Submit” button you will move on to the next dependency. If this option is off, you will go back to the dependency resolution wizard for your template.

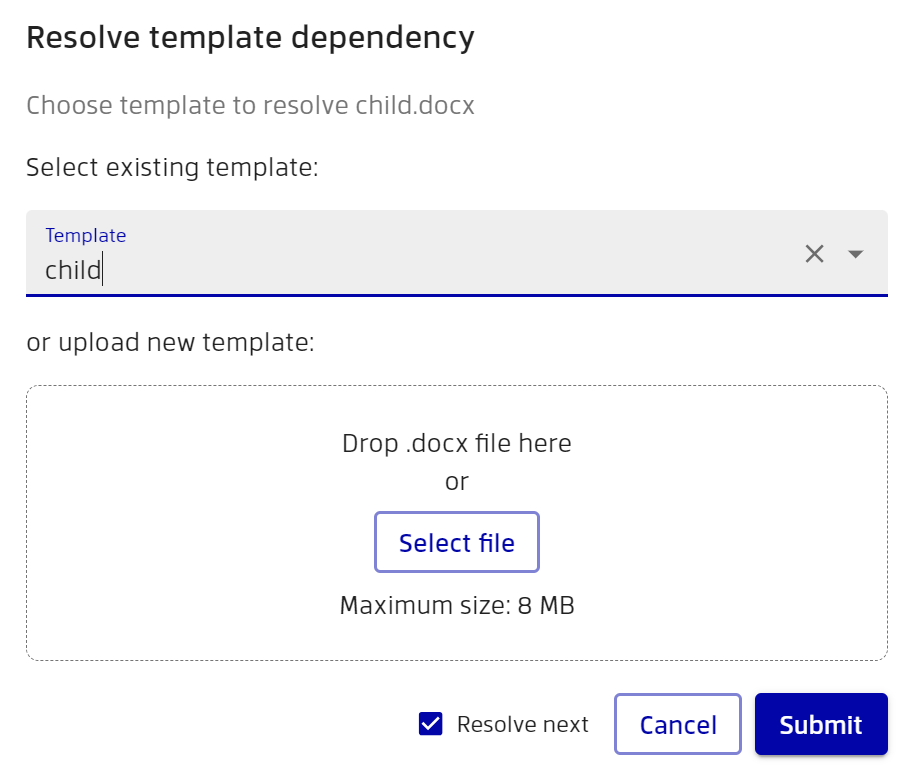
If you choose to use an existing template to resolve a dependency, the only difference is that the button will be labeled as “Submit”.
Note that if a dependency file also contains import tags, you will need to resolve those dependencies as well.
After resolving all dependencies, you will see a success icon next to each dependency and you can finally import your main template. To do this, just click the “Import” button.

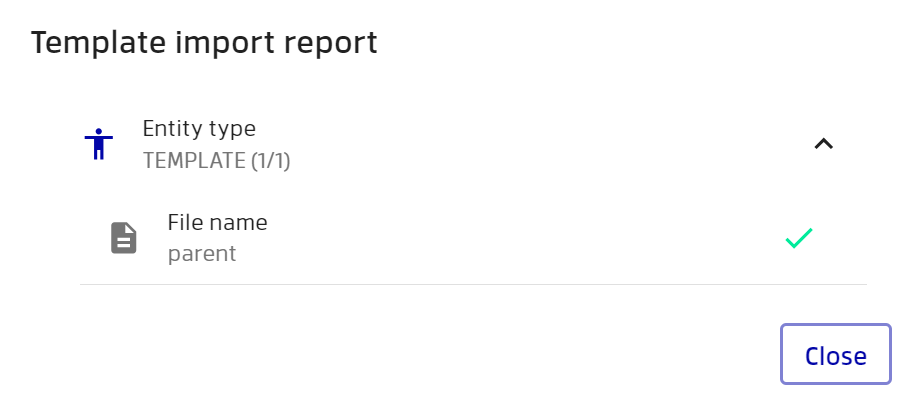
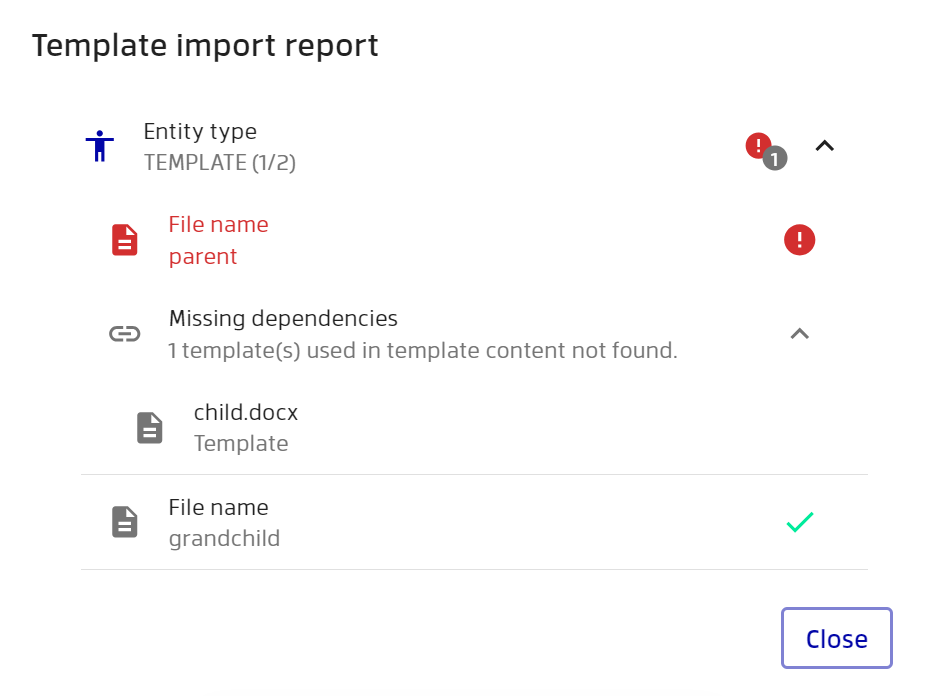
After the import is complete, you will see an import report, similar to the normal import of a template without dependencies.
This is the standard process of importing a template with dependencies. Note that Manager can also suggest some dependencies based on the names of existing templates. For example, if you try to upload another template that has an import tag for a child, Manager will automatically resolve the dependency using the child template that you have already imported. However, you can still override this by clicking the “Edit dependency” button and uploading a different file.
Additionally, you can select the “Auto-resolve dependencies” option. This option is useful when you are sure that all your dependencies are already in Manager and you want them to be resolved by their names automatically. If this option is on, and all your dependencies can be resolved this way, you will skip the dependency resolution wizard and the import will happen in the background.
As an alternative to the wizard-based import approach described above, you can import the main template and all its dependencies at once using the multiple import feature. To do this, drag and drop all the required templates together to import them simultaneously.
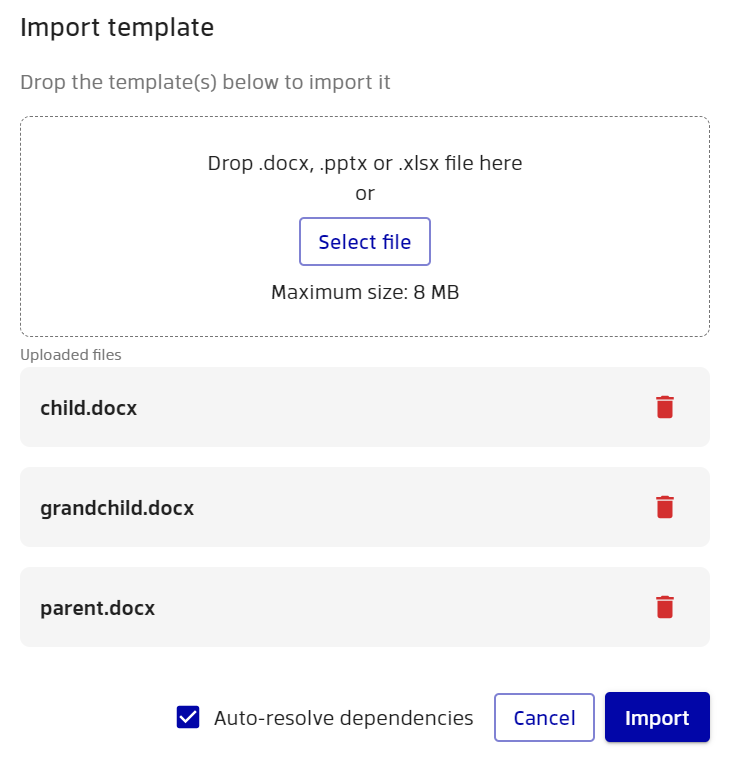
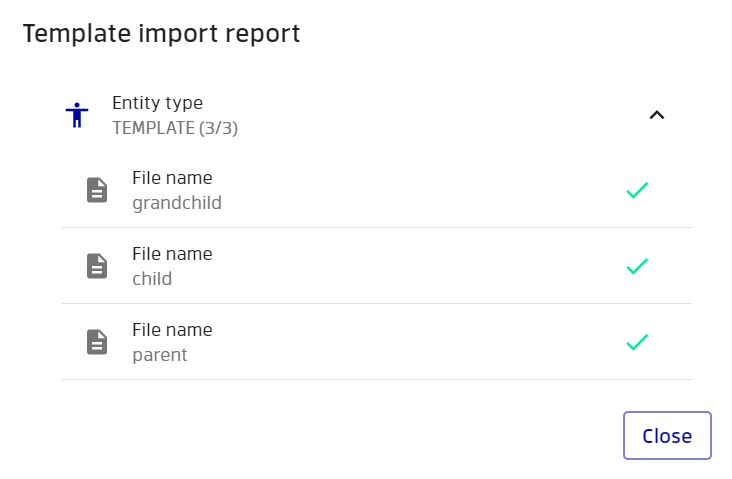
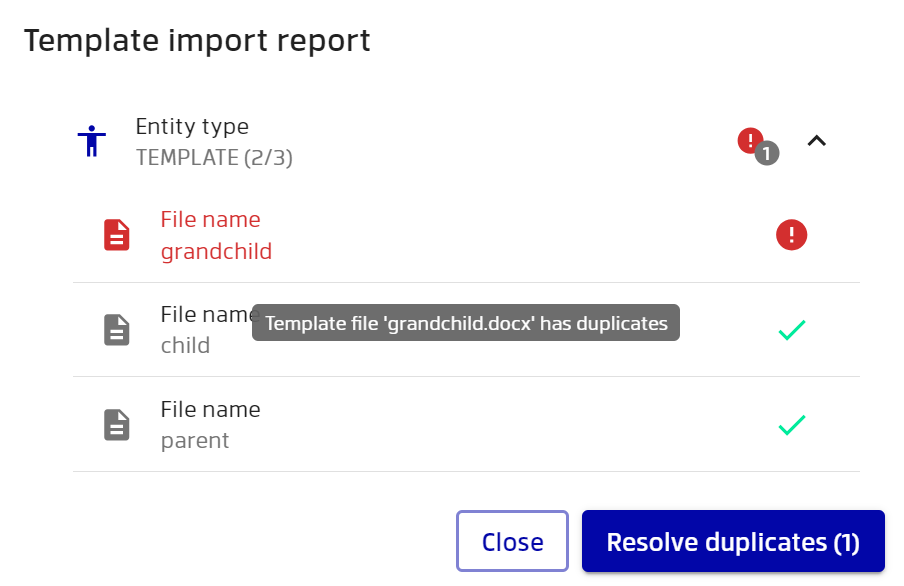
With this feature, Manager will automatically resolve the dependencies based on their names by default. After a successful import, you will see a report with information about all the imported templates.
If the import fails and Manager cannot find some dependencies, then the import will be aborted and only the templates with fully resolved dependencies will be imported. Manager will also inform you which dependencies are missing.

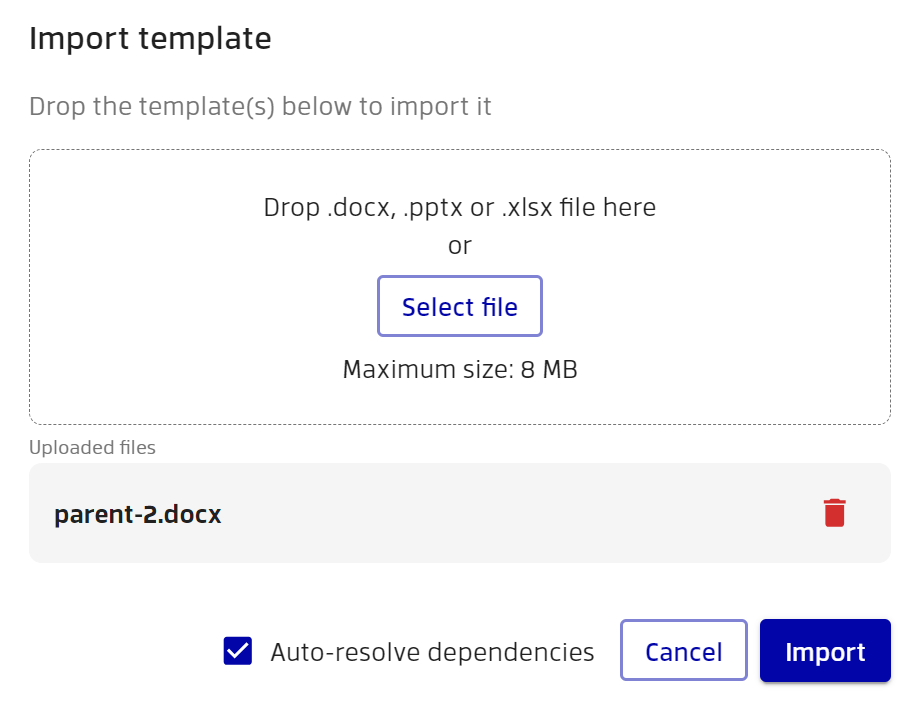
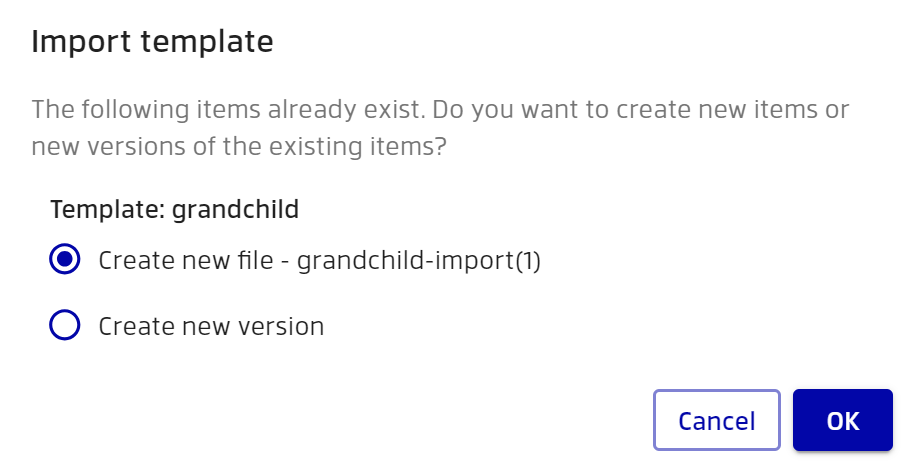
If some dependencies already exist in Manager, you will have the option to either upload a new version, or create a new template file with a different name.
How to upload a new version for templates with dependencies
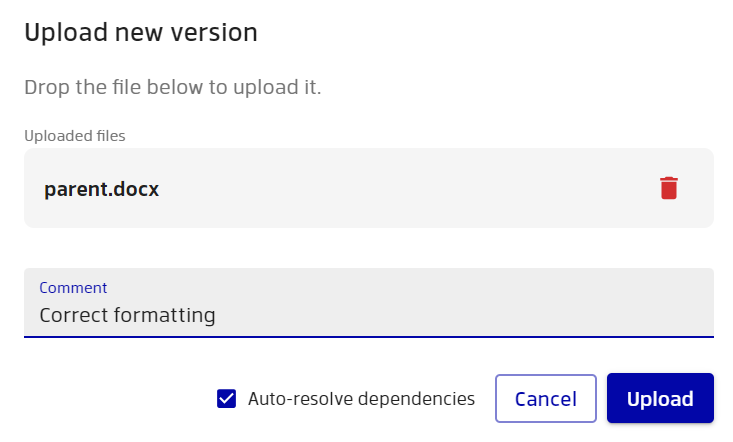
If you want to upload a new version for a template that has dependencies, you can follow the same steps as for a template without dependencies. Go to the template details and choose the “Upload new version” option.

The process of uploading a new version is similar to the single import process. You can upload your template, and Manager will check its dependencies to inform you if there are any new ones. If there are no new dependencies, and the auto-resolve option is on, the import will happen automatically. If the auto-resolve option is off, or there are some missing dependencies, you will see the dependency resolution wizard, where you can verify the resolution or upload the required dependencies.
How to update templates with dependencies
Updating a template with dependencies is similar to updating a template without dependencies. The only additional information you need to be aware of is that you can use import tags to reference templates that are already in Manager. To do this, write the import tag value as {template-name}.{extension}. For example, to reference a child template of document type, write the import tag value as child.docx.
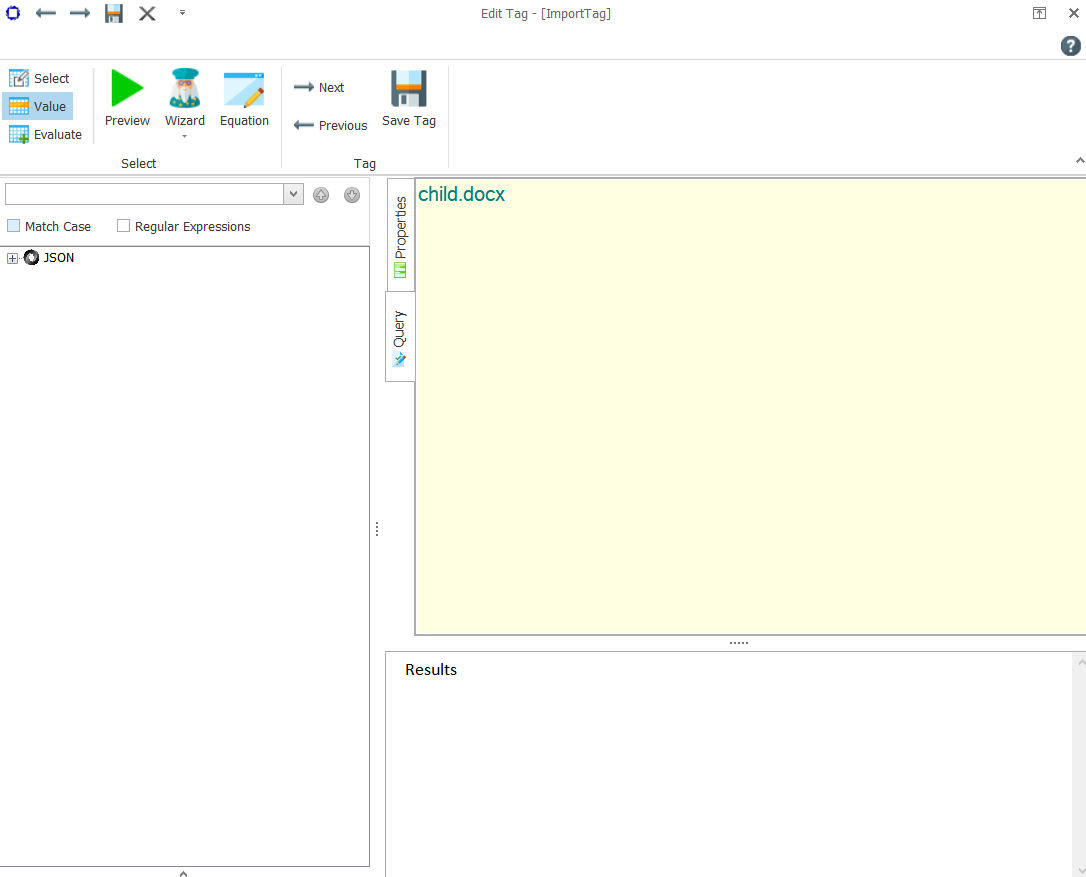
When you save a template in the Office application, Manager will automatically resolve the dependencies between templates. You can also delete import tags from the template. In this case Manager will also create a new version of the template with the updated dependencies.
- You cannot preview a template with a dependency from the Designer. This feature is not supported yet.
- You cannot add an import tag to a dependency that is not an external file or an existing template in Manager.
How to rollback templates with dependencies
Rollback for templates with dependencies can also be done in "Version history". When you do a rollback, you can see how many templates will be affected by this action. Affected templates are templates whose output report will change because they will automatically start using the latest version that will be created during rollback. So you will only see such a notification for templates which are used by other templates.

How to view dependencies between templates
You can view the dependencies between templates using the “Dependencies” and “Usages” tabs. The “Dependencies” tab shows all the templates that the selected version depends on. This includes direct dependencies, as well as transitive dependencies that occur when dependencies have their own dependencies. This tab is useful when you want to see the relationship between templates. For example, if your template imports a header and a footer template, you will see them listed in the “Dependencies” tab. The “Usages” tab shows all the templates that use the selected version as a dependency and also transitive usages. This is useful when you want to see the impact of changing the selected template. For example, if your header template is used by many other templates, you will see them listed in the “Usages” tab.
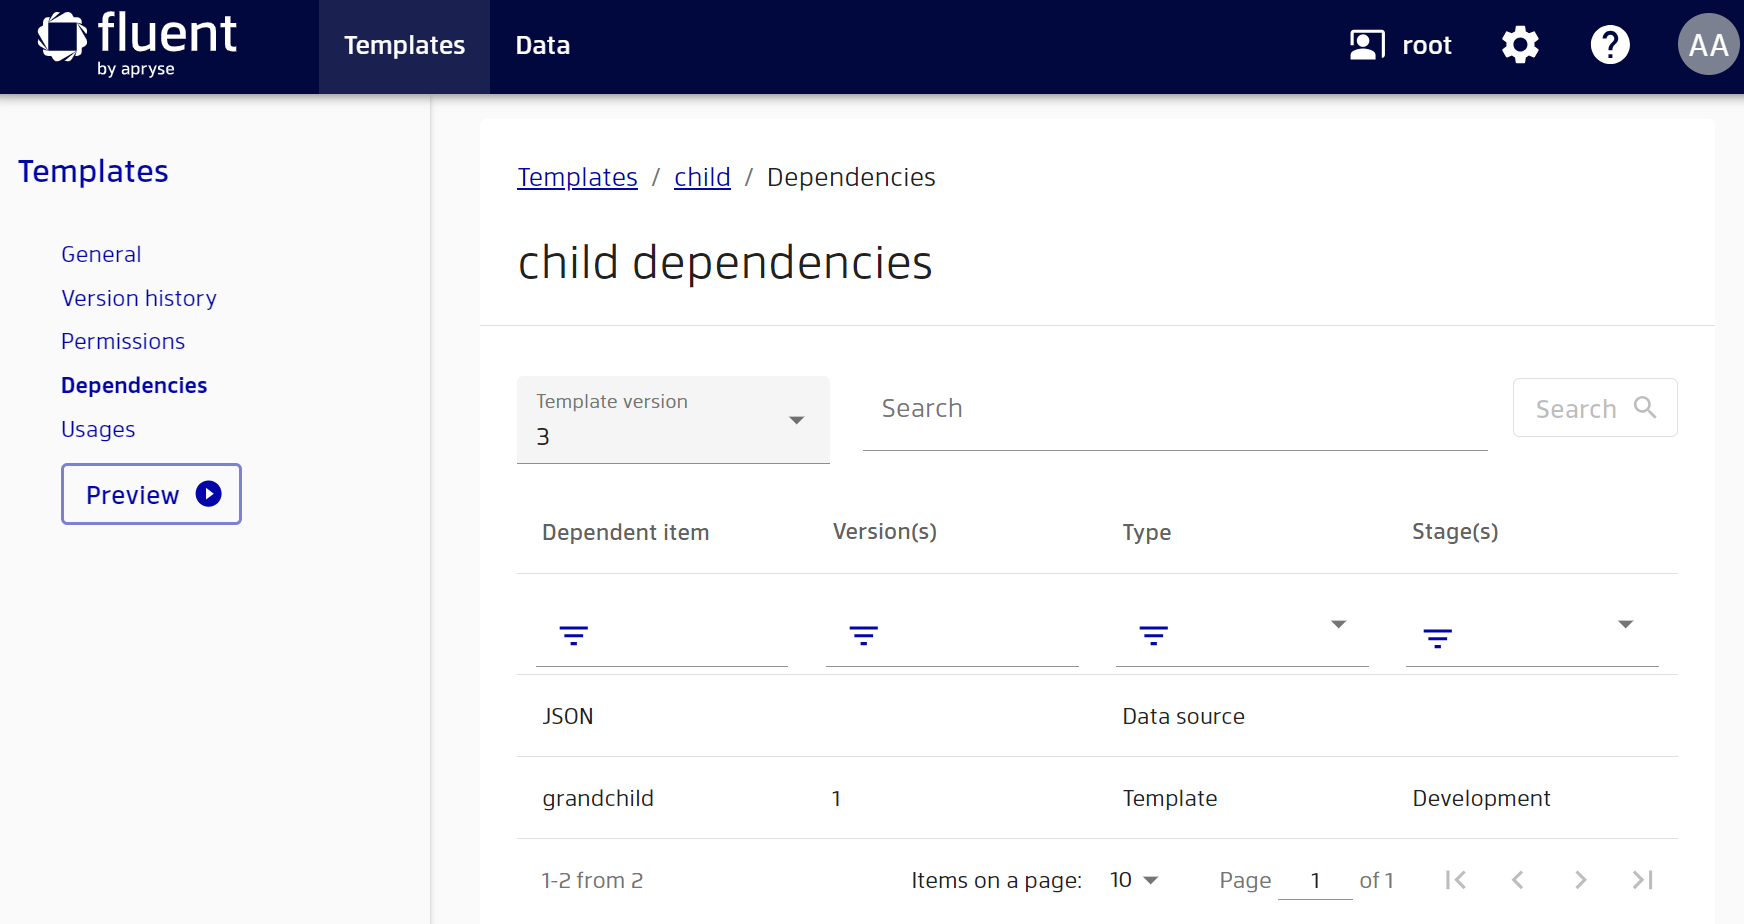
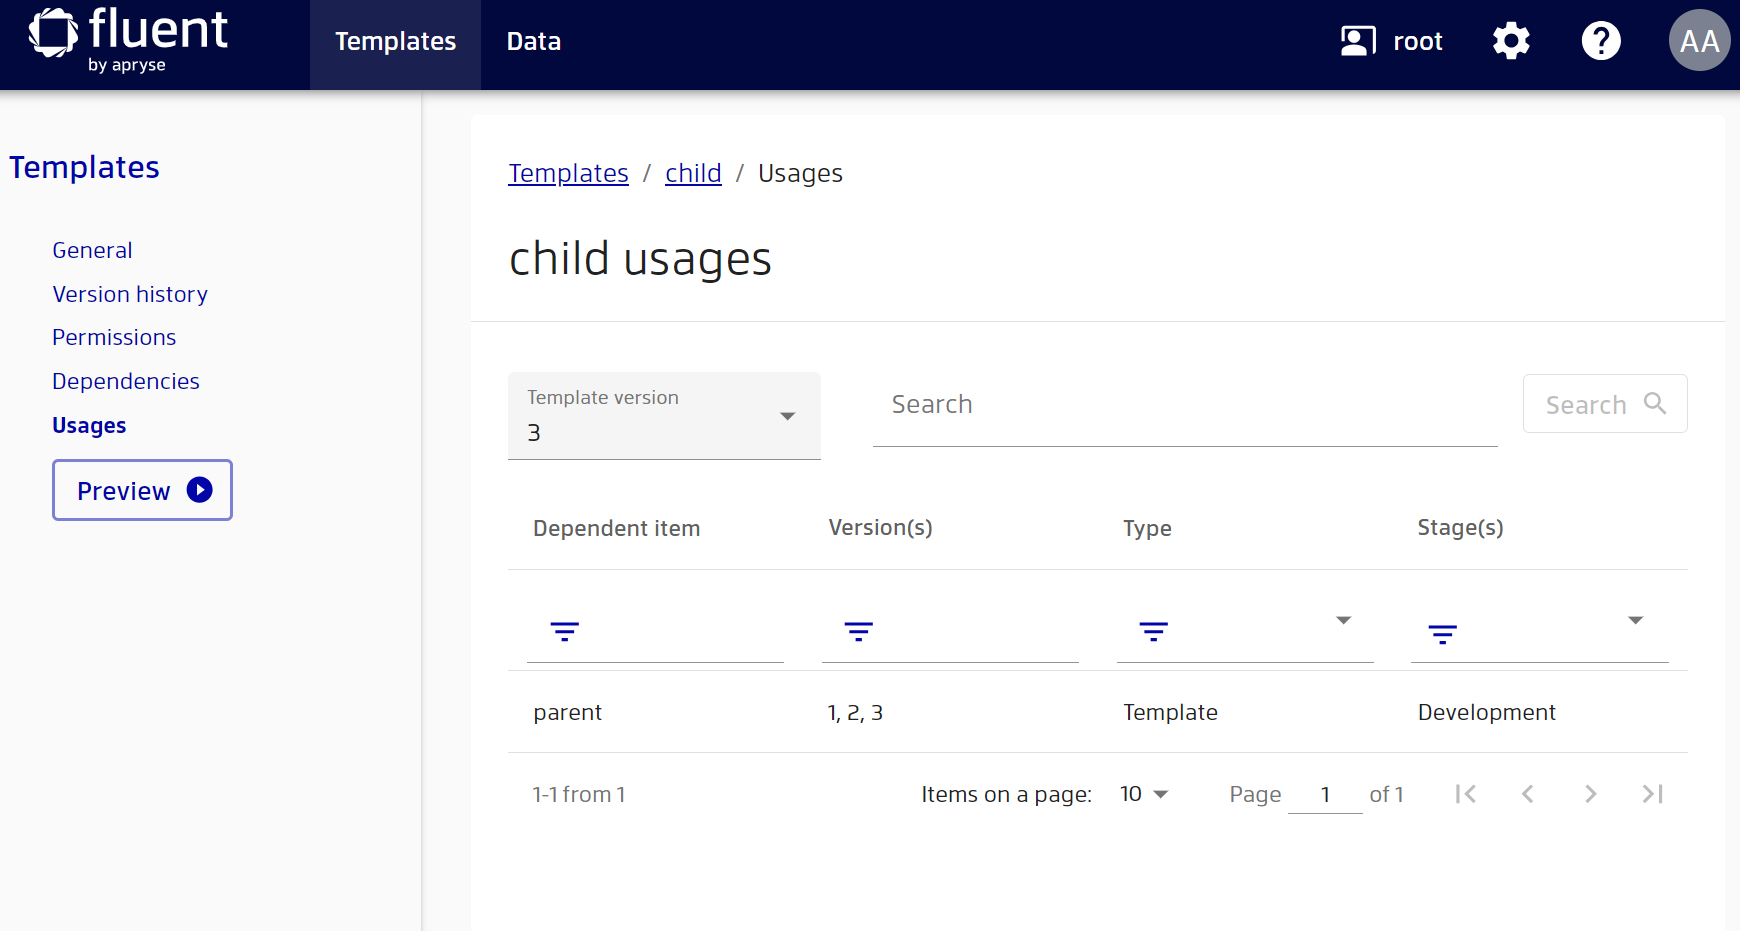
In both of these tabs, you can select the template version and filter the data according to the parameters presented in the tables.
How to export templates with dependencies
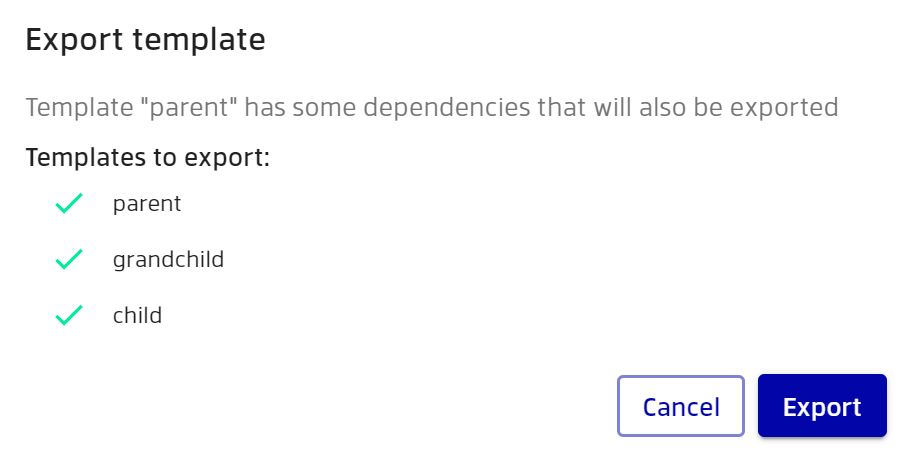
When you try to export a template with dependencies, instead of a regular Office file, you will receive a zip archive that contains Office files of the template and its dependencies. This makes it easy to work with the template on your local computer, as all the dependencies are in the same folder and can be resolved by Designer.
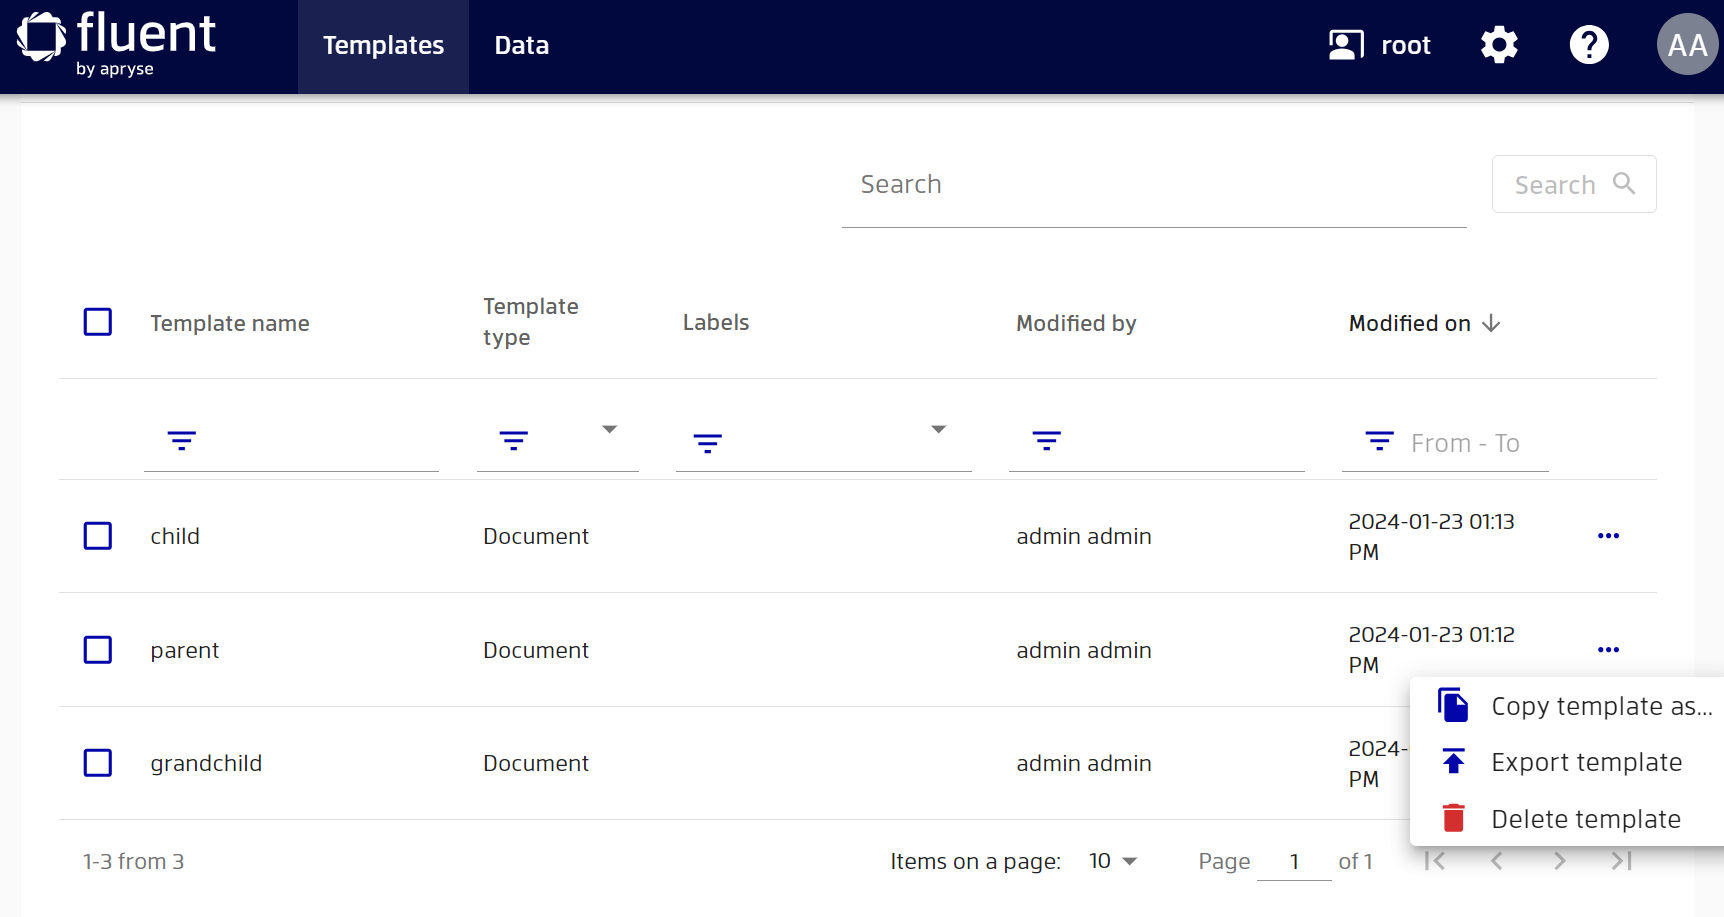
To export a template, click on the 3 dots next to the template name, and you will see a window with all the templates that will be included in the zip archive.
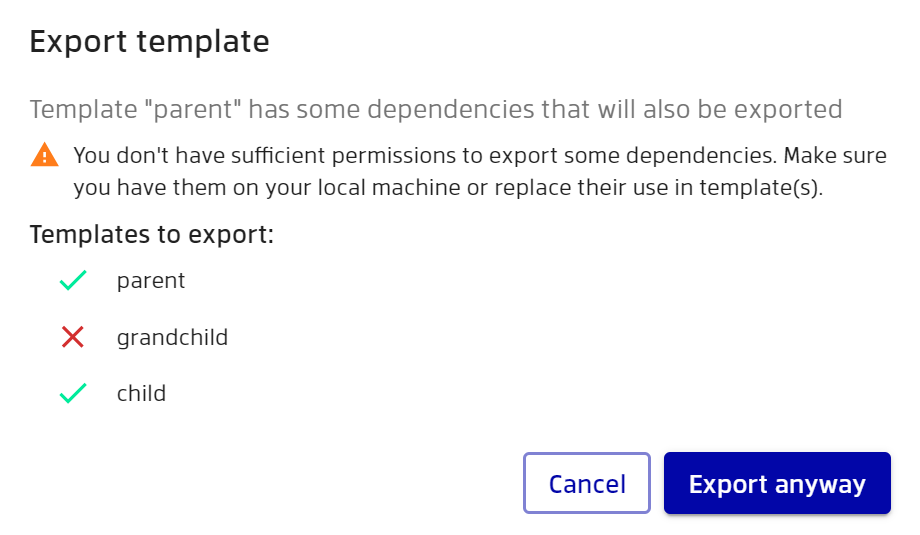
If you don’t have permission to export any of the dependencies, they will be excluded from the zip archive, and you will see a warning message in the export window.
How to delete templates with dependencies
You can easily remove a template that has dependencies using the regular deletion option. However, you can only delete a template that is not actively used by another template. This means that the template is not used in any non-default stages, or in the latest versions of other templates.
If you try to delete a template that is actively used, Manager will warn you that this is not allowed and show you the active usages. If you no longer need the listed active dependencies, you can delete them first, and then return to deleting the original template.

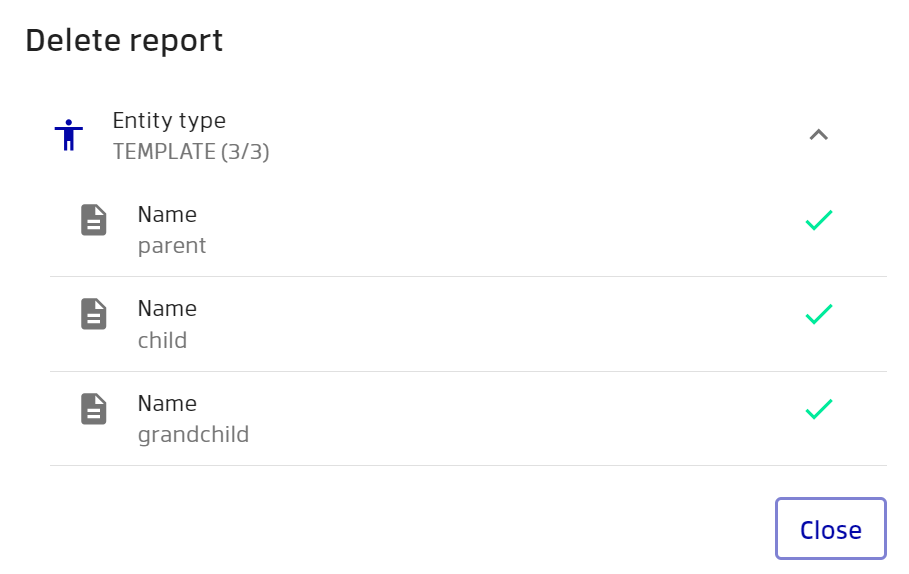
You can still delete a template that is used by other templates, but not actively. For example, if the parent template has a dependency on a child in the 1st version, but not in the 2nd, you will see the following warning when you try to delete the child template.
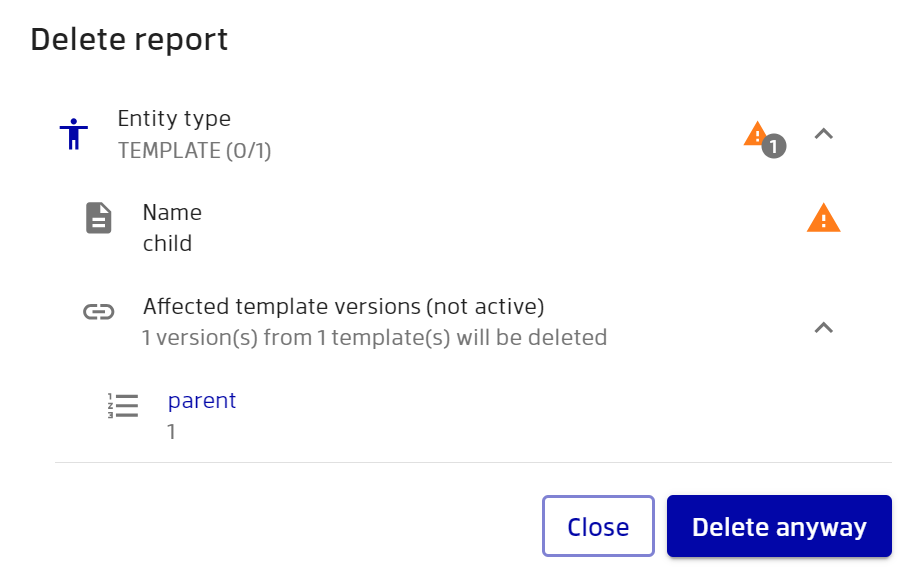
You can proceed with the deletion, but all the versions that depend on the child template will be deleted as well.
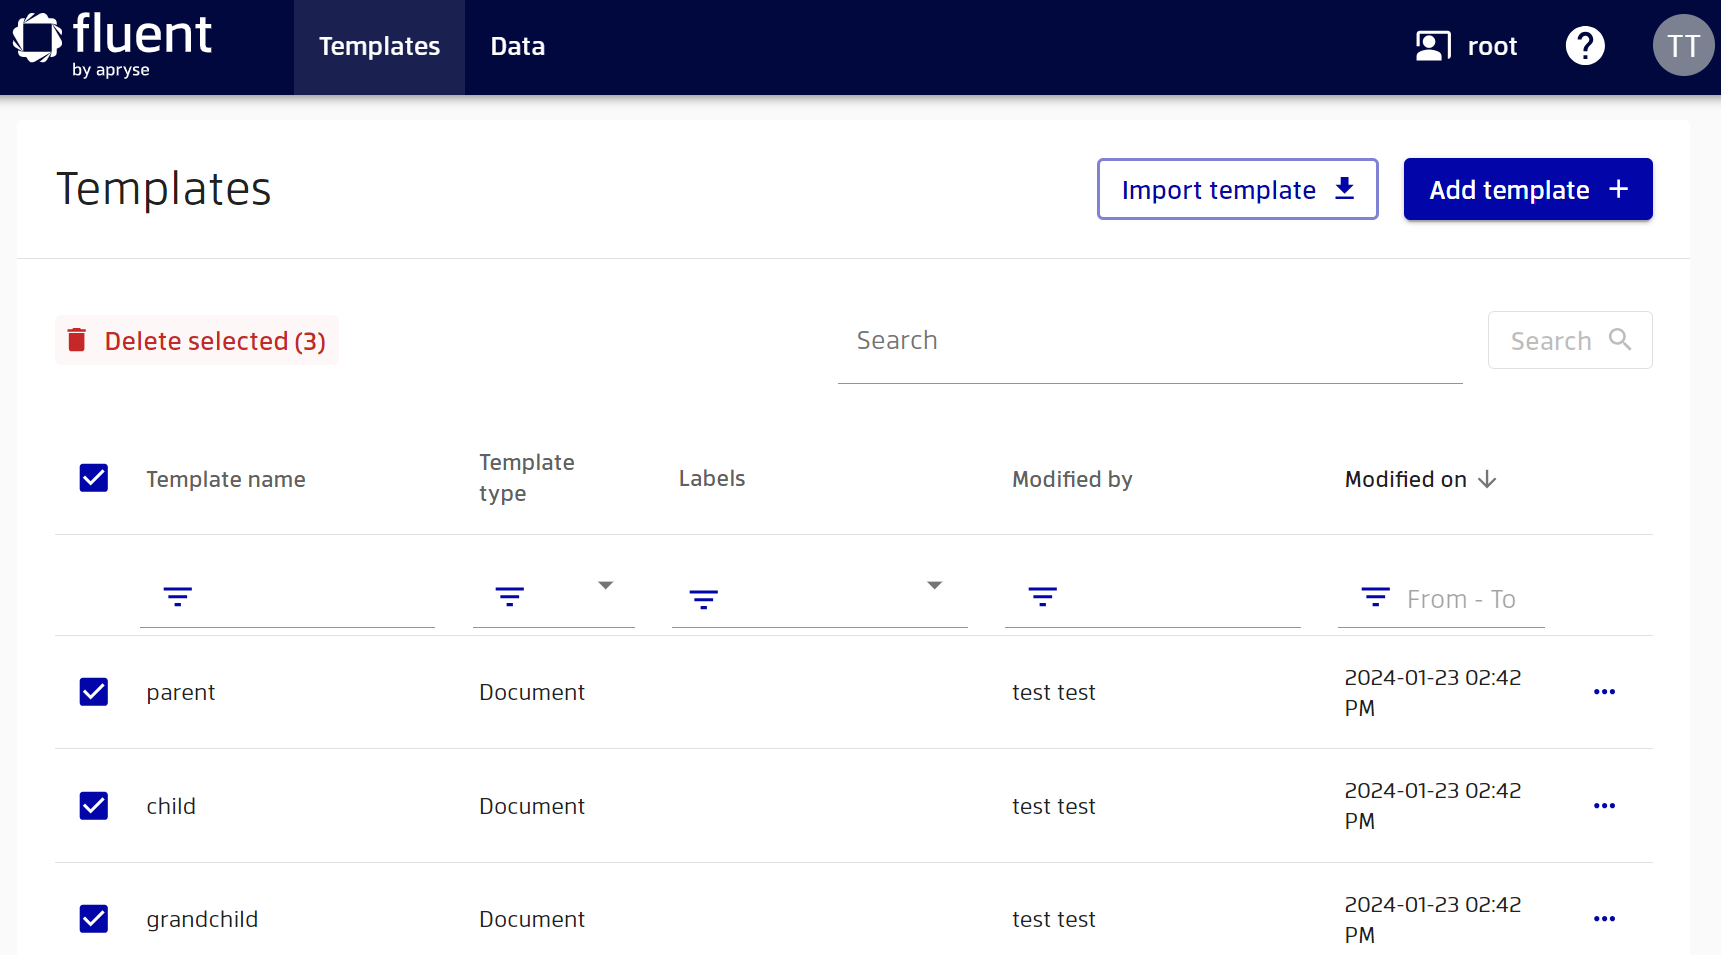
If you want to delete a template and all its dependencies at once, you can use the multiple delete option and select the templates you want to delete.
How to set up stages for templates with dependencies
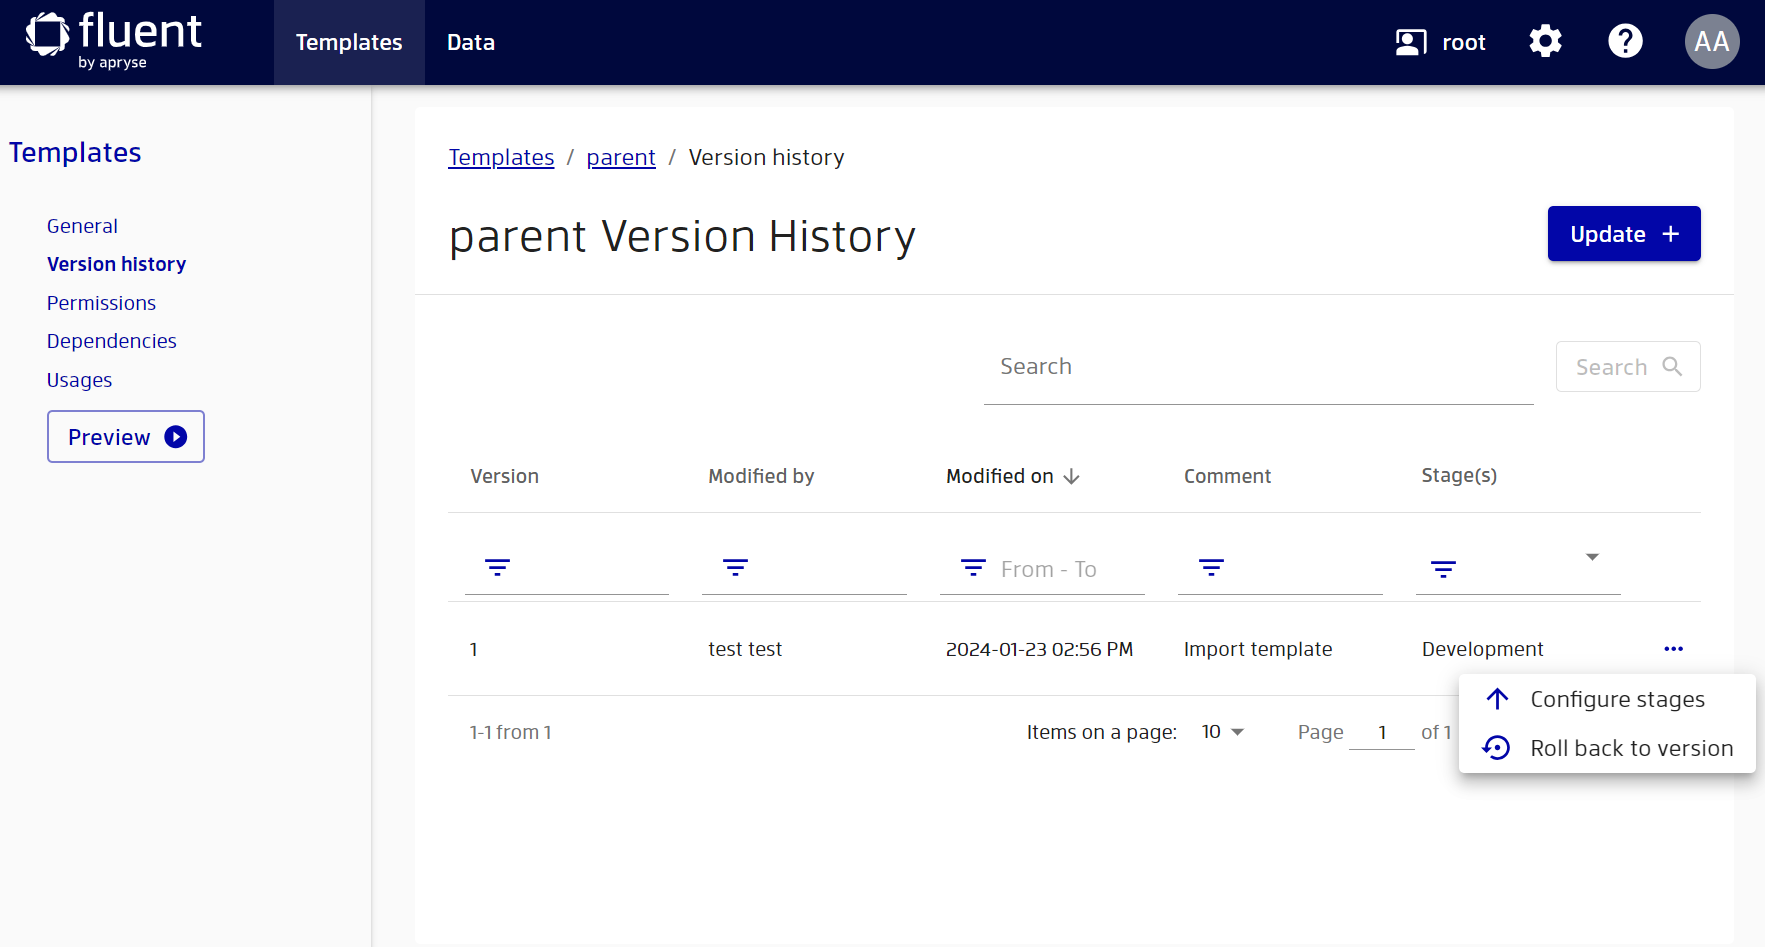
The main template and all its dependencies must be accessible to RESTful Engines when generating an output report. Manager helps keep track of the dependencies to avoid inconsistent stages of the RESTful Engines. When you are trying to configure stages for a template with dependencies, you will also need to select the appropriate versions of the dependencies, which will also be pushed to the selected stage. Setting up stages for a template with dependencies, as well as for a template without dependencies, begins with the "Version history" tab where you can select the "Configure stages" option.
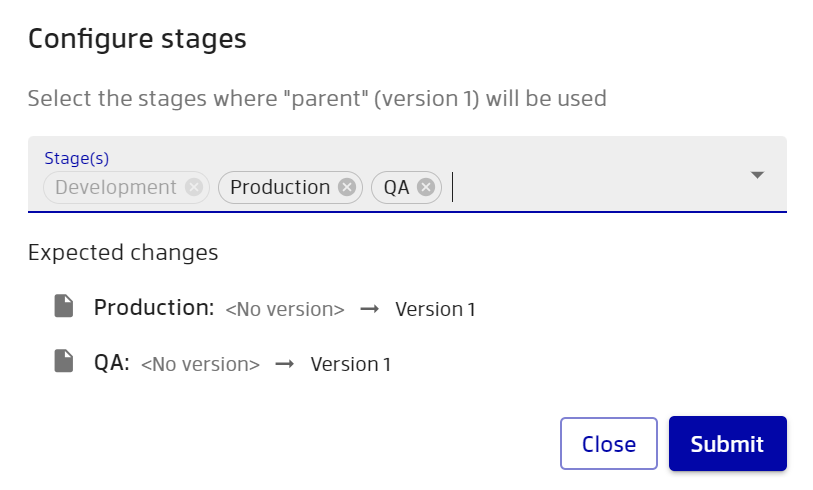
Next, you can select the stages to which you want to deploy the selected version of the template. You will see the expected changes and the current versions on the selected stages.
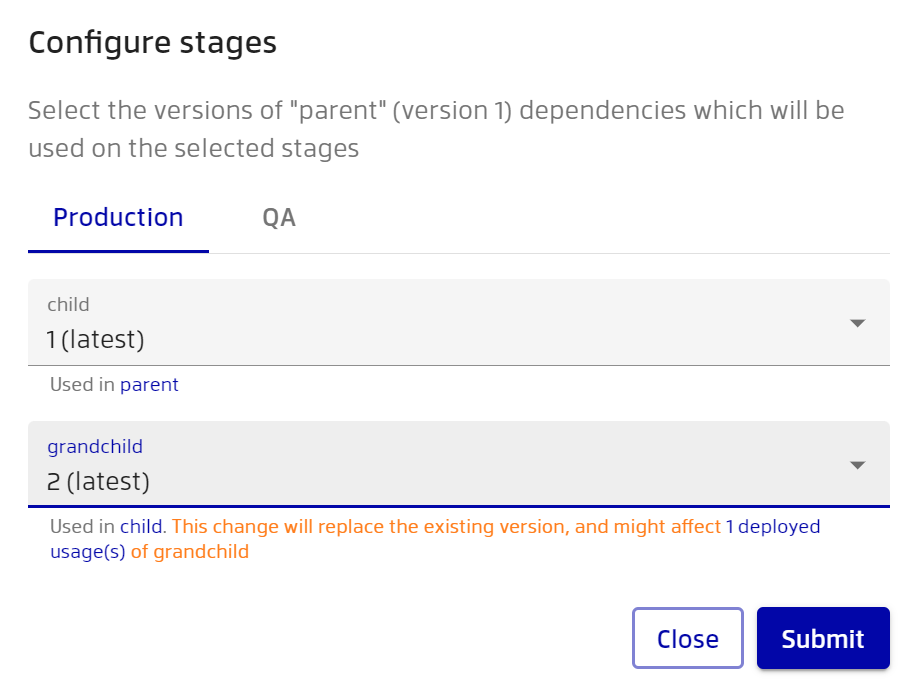
After pressing the "Submit button", you can select versions for the dependencies that you want to deploy along with the main template. You can select different dependency versions for different stages by switching the tabs. By default, Manager selects the deployed versions, and if there are no deployed ones, then the latest versions of the dependencies for each stage.

Versions of dependencies that are already deployed to the selected stage are marked as "currently deployed". Be careful when overriding the currently deployed version, as this will undeploy the version that is already in the selected stage and deploy the new selected version there. You can also see which templates will be affected by such a redeployment by clicking on the affected templates link.
After selecting all the required dependency versions, click the "Submit" button once again to deploy the template and selected dependencies to the appropriate stages. You will see a report of completed operations, which will show which templates were deployed and which templates were affected.

If during deployment of a template and its dependencies something goes wrong with at least one template, then all templates will return to their original state and the state will remain as it was before deploy.
When you remove a version from stages, you will also be able to see the expected changes before pressing the "Submit" button.

When you delete templates from stages, they also appear in the report and you can see any unused dependencies that remain after the undeploy operation.

You will not be able to remove a version of a dependency from a stage until you have undeployed all templates that use that dependency on this stage.

How permissions work for templates with dependencies
Permissions for templates with dependencies are built in such a way that it does not violate the permissions of the dependencies. This means that some actions may be restricted or unavailable depending on the permissions of the dependencies. There are a few special situations:
- You cannot preview a template with a dependency if you don’t have permission to preview the dependency.
- When exporting a template, dependencies for which there is no export permission will be excluded from the zip archive.
- When deleting a template and its dependencies with the multiple delete option, the dependencies for which there are no delete permissions will not be deleted.
How to deal with external dependencies
The templates may contain import tags with external dependencies, that is, dependencies accessible via http/https. When importing, Manager will tell you which dependencies are external and mark them with the info icon. If Manager cannot reach any external dependency, it will also tell you that it is not available. Note that it is not necessary for the external dependency to be available to Manager, but you must ensure that it is available to RESTful Engines.
You can leave external dependencies unresolved, but we strongly recommend resolving and moving them to Manager. As some specific examples, this will:
- Improve the performance of generating output reports.
- Allow you to better keep track of all dependencies.
- Enable versioning for the dependencies.
To resolve an external dependency, you can click on the "Edit dependency" button and upload the desired file or select from existing ones.
How to deal with unknown dependencies
In addition to external dependencies, templates may contain import tags that refer to resources which Manager cannot recognize. So far, Manager only supports templates as dependencies that appear as a result of using import tags. Images, HTML, PDF and other resources are not supported yet. When you import templates with these resources, Manager will notify you about them. You can continue importing, but doing so may break some of Manager's functionality. For instance, when generating a preview, if the resource is not available to the RESTful Engine, you will receive a report generation error. Therefore, you should cache all unrecognized resources yourself.

Such resources also include templates with import tags whose value is calculated based on data received from data sources or input parameters. To generate accurate previews for these templates, you must redefine the data sources or import tags so that the RESTful Engine can resolve them correctly.
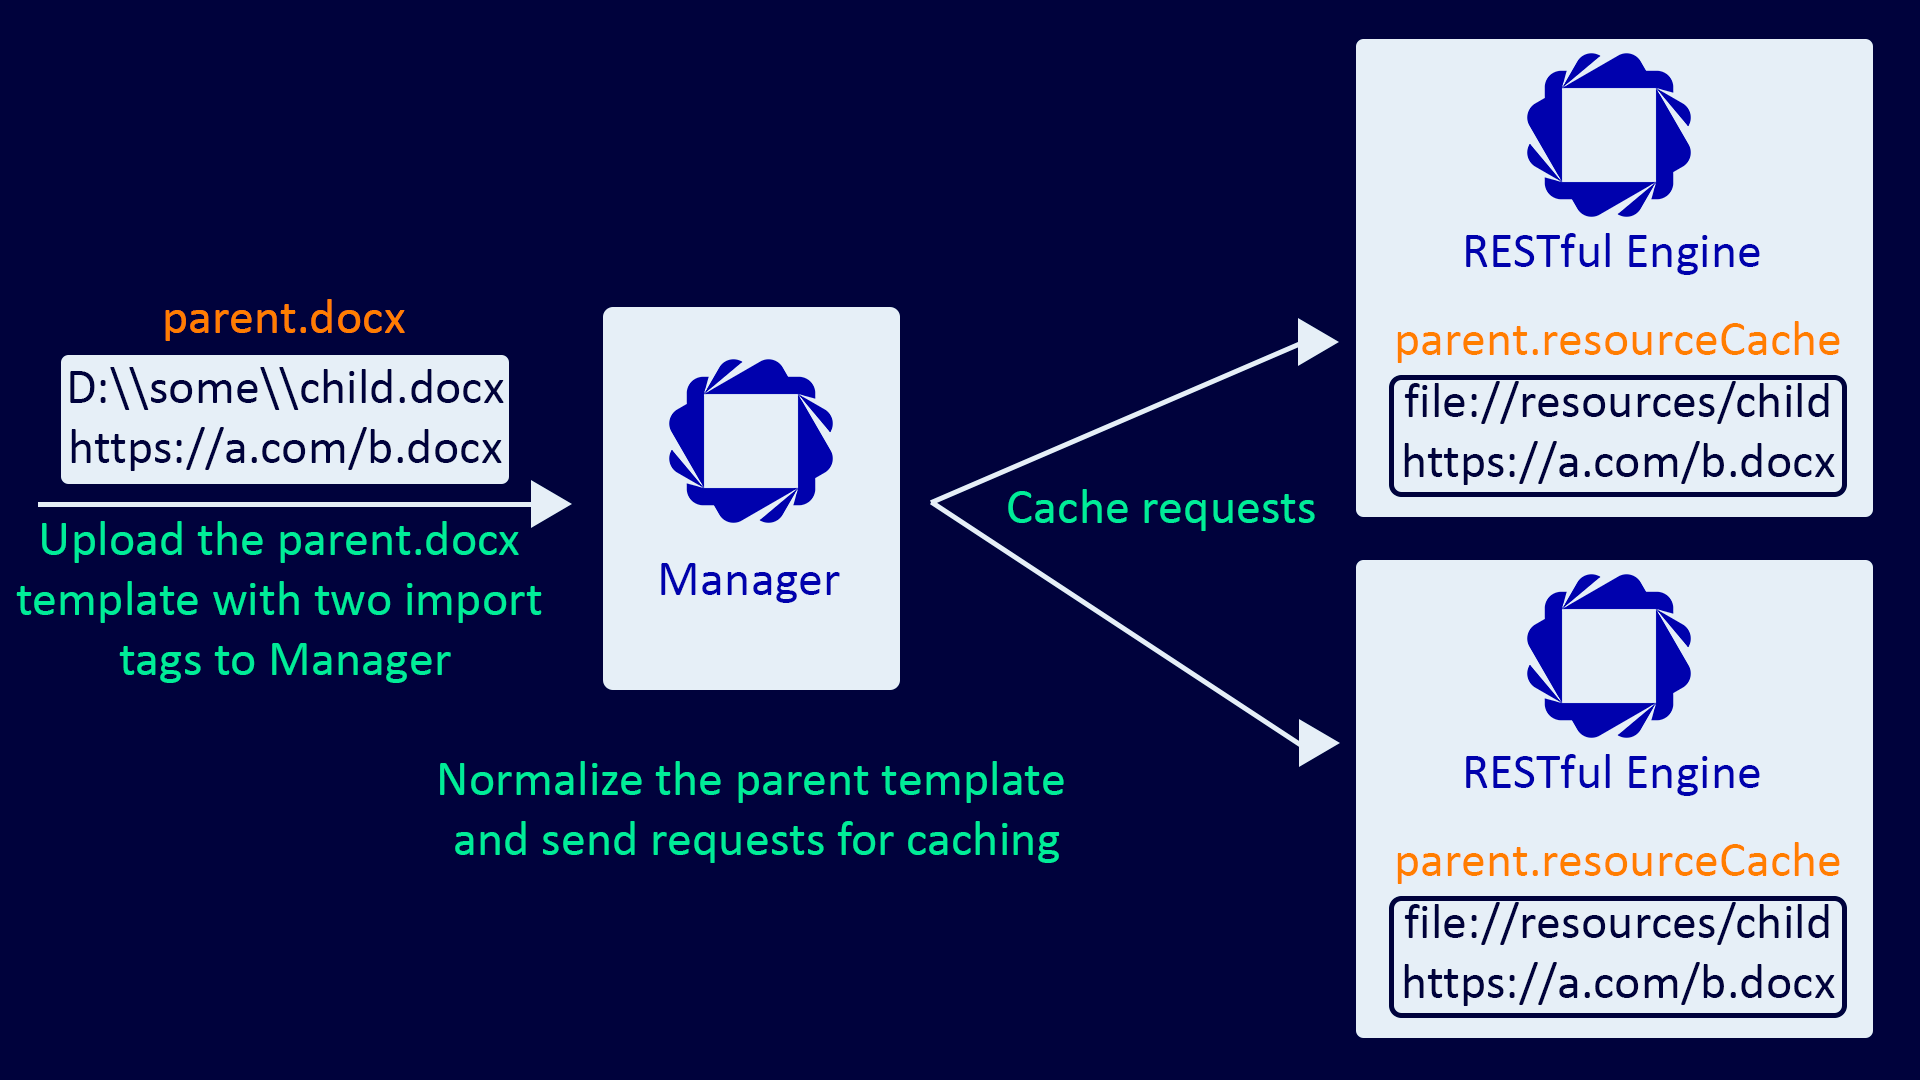
How Manager helps to normalize templates with dependencies when deploying to RESTful Engines
If you are not using Manager to deploy or cache templates with dependencies on RESTful Engines, you need to change the import tags to the file://resources/{RESOURCE_ID} format. You can find more information on this topic in the “Template Caching” documentation. Manager caches templates on RESTful Engines so that you can generate reports using the REST API. For templates with dependencies, Manager automatically adjusts the import tags to the correct format. You don’t have to worry about this and can focus on generating reports.