Basic Tag Editor Reference
The Basic Tag Editor was introduced in Version 25.0.0 of Fluent Designer.
The Basic Tag Editor is a simplified version of the Advanced Tag Editor. The Basic Tag Editor is designed to be more user-friendly and easier to use for those who are new to template design or who do not need the advanced features of the Advanced Tag Editor.
It also provides a more streamlined interface for creating and editing tags by utilizing a side pane, making it easier to work with tags in your templates without needing to jump between dialog windows and your document.
Accessing the Basic Tag Editor
The Basic Tag Editor can be accessed by creating a new tag from the Fluent Designer ribbon or by double-clicking on an existing tag in your document.
If the Choose Data pane is already opened, simply selecting a tag in the document will automatically open the Basic Tag Editor.
Basic Tag Editor Layout
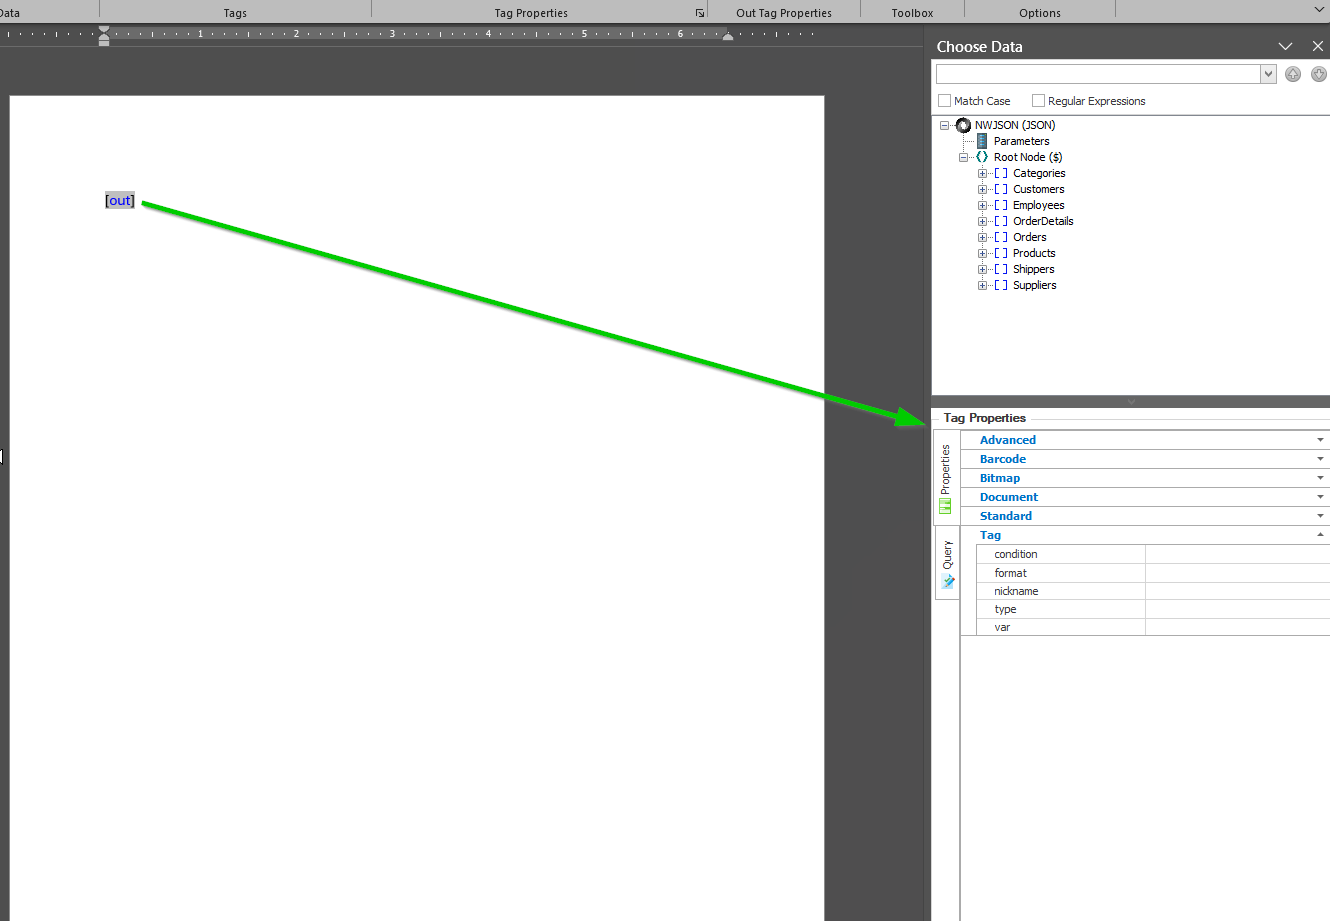
Similar to the Advanced Tag Editor's layout, the Basic Tag Editor contains two tabs:
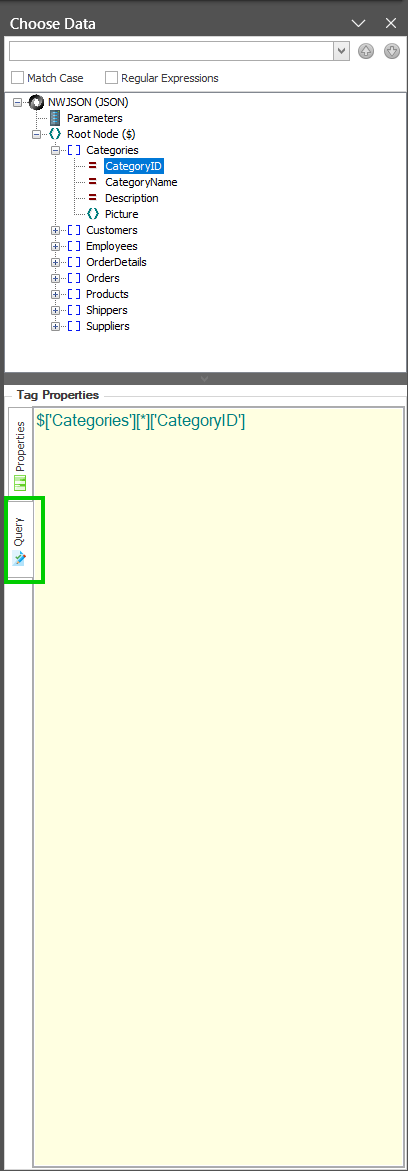
- The Query Tab
- This is where you specify a query for your tag to retrieve data from your data source.
- You can manually write a query or you can use some helpful actions to auto-populate the query which we will discuss below in the Auto Populate Query section.
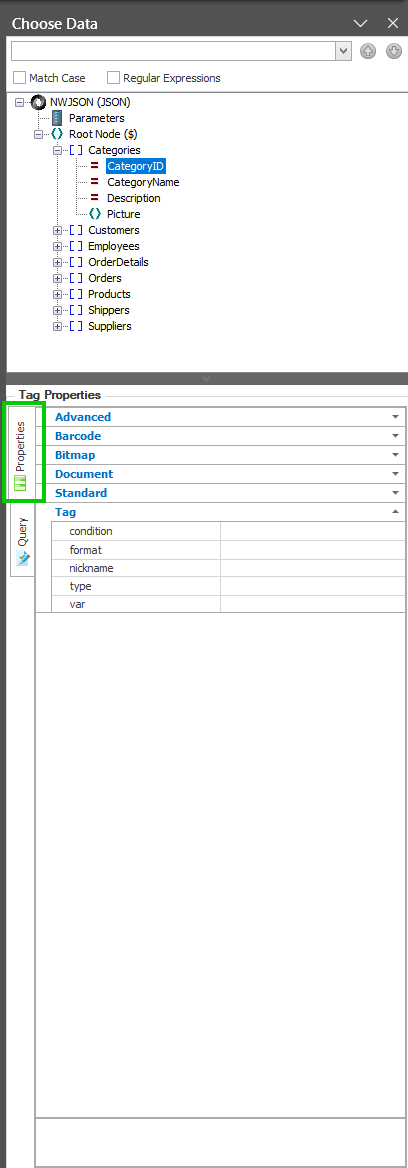
- The Properties Tab
- This is where you can specify specific properties for your tag just like the existing Advanced Tag Editor.
The Basic Tag Editor resides within the Choose Data pane that will provide helpful actions and info relating to your tag.
Basic Tag Editor Actions
There are a handful of helpful actions that the Choose Data panel provides in relation to tags and the Basic Tag Editor.
Create Tag from Choose Data
You can automatically create a tag from the Choose Data pane by double-clicking on a node or dragging and dropping a node into the document. There are a couple of different scenarios to create different tag types:
- If you double-click or drag-and-drop a single-value node (or a node with no children), it will create an Out Tag with an auto-populated query to the node you specified.
- If you double-click drag-and-drop an array node (or a node with children), it will prompt you to select which children you would like to include, and it will create a table with a ForEach Tag and End-Foreach Tag along with columns and Out Tags for all the children you specified. These tags will all include auto-populated queries as well.
Auto Populate Query
If you have a tag in your document that doesn't include a query yet, we've provided a simple way to auto-populate the query.
- Make sure the Choose Data bin is open.
- If you highlight a tag in your document, double-click on a node in the Choose Data bin and the query will automatically be populated with the node you selected. It will also automatically create a "nickname" in the Properties tab for you.
Highlight Data Node For Tag
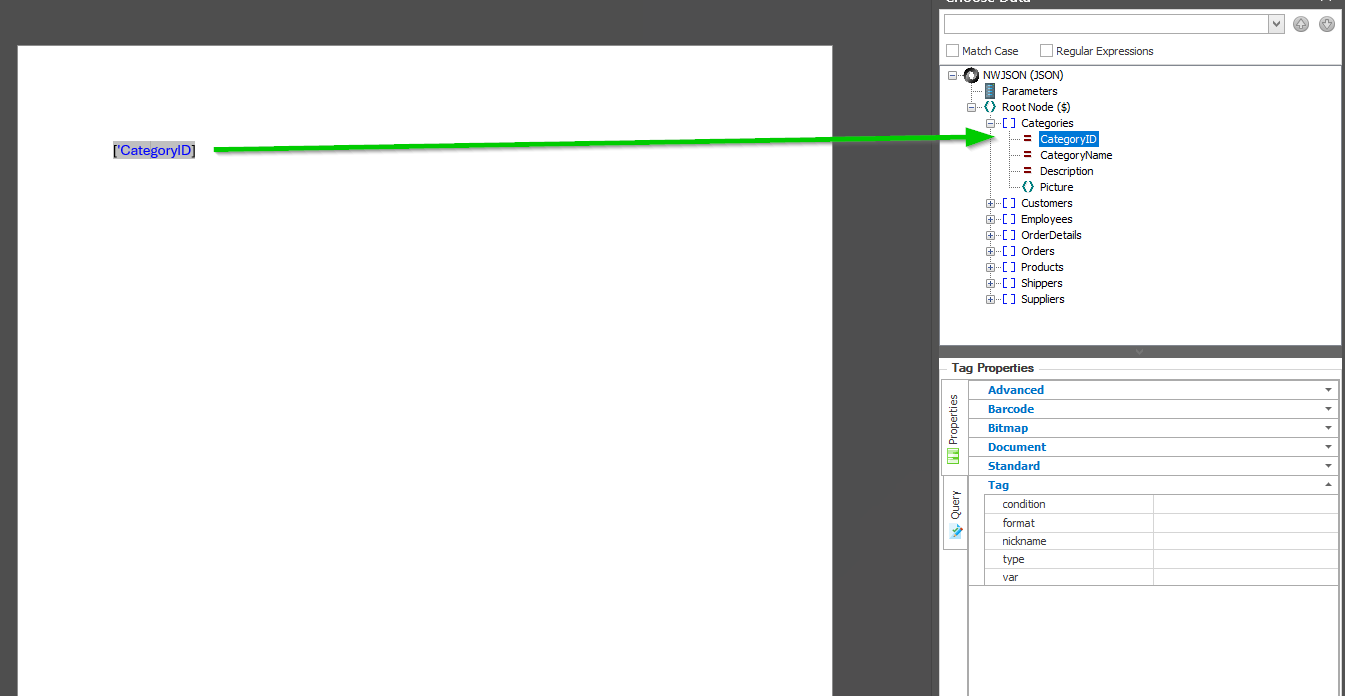
Another helpful feature added with the Basic Tag Editor is the highlighting of the data node in the Choose Data panel that corresponds to the tag you have selected in your document. This makes it easier to see which data node you are working with in your document.
If you click on any existing tag in your document (that contains a query to your data), the corresponding data node in the Choose Data panel will be highlighted.
Additional Info
The Data Bin and Data Tree have been removed in Version 25.0.0 of the Fluent Designer and their functionality has been combined into the Choose Data panel. The Choose Data panel is a more streamlined interface for working with your data and tags in your document.
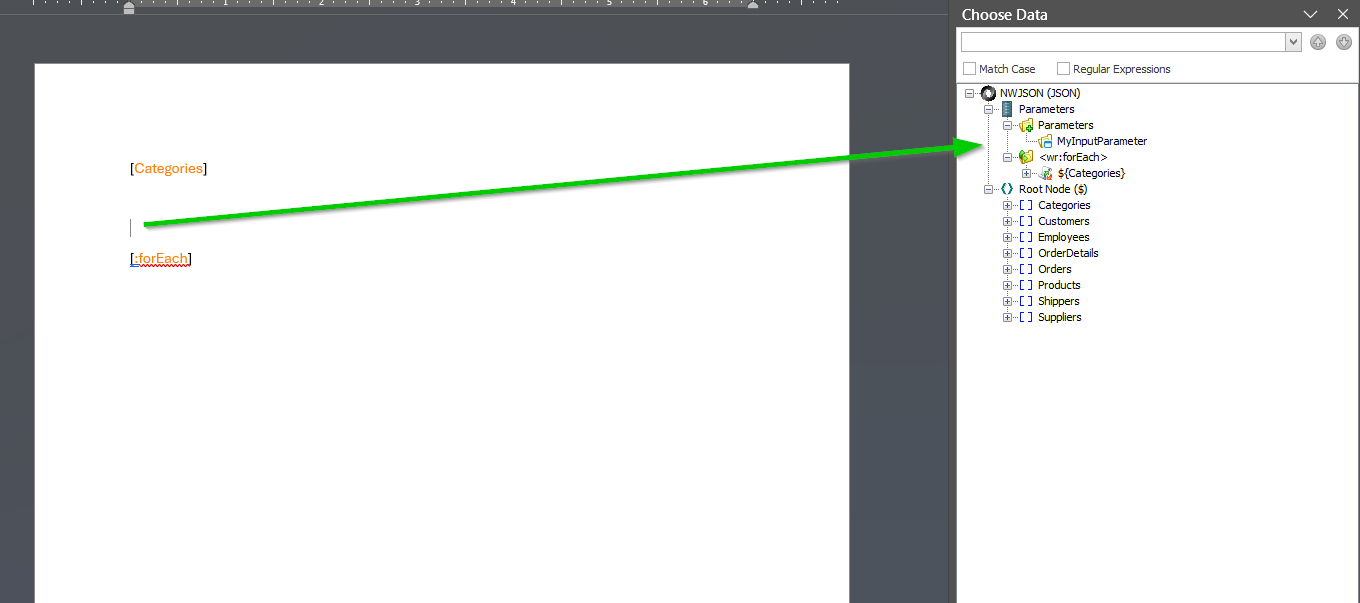
An additional feature added to the Choose Data panel, which was brought from the Data Tree, is the display of relevant Parameters and Variables in scope within your template based on your cursor's position.
For instance, if you have Input Parameters, those will be displayed under the Parameters section at all times since they are always in scope. If you have a ForEach Tag in your document, it will display the ForEach Tag in the Parameters section if your cursor is placed after the ForEach Tag and before the corresponding End-Foreach Tag. This will help you see what variables are in scope for your tags and help you create tags and queries more easily.
