Fluent Manager Child Workspaces
Child workspaces have been introduced to allow users to create their separate workspaces to manage all types of resources: templates, data sources, data groups, and so on.
This feature is useful when you have a team or multiple teams working on different categories of templates and you want them to be separated. For example, if you have a team working on marketing templates and another team working on sales templates, you can create two child workspaces under the root workspace and assign users to work in the respective workspaces. Thus, each workspace will contain resources of the selected type, which will allow users of workspaces not to interfere with each other and concentrate on resources of a certain type.
Another example could be if you have a team working on a project for the United States and another team working on a project for Europe. You can create two child workspaces under the root workspace and assign each team to their respective workspace.
Child workspaces also make it easier to control access. You can assign different permissions to different child workspaces depending on your needs. In addition, users have access only to certain workspaces assigned by the administrator. Thus, resources that are stored in inaccessible workspaces will be protected from unwanted views.
Another benefit of child workspaces is that they allow you to manage your resources more efficiently. You can allocate resources based on the needs of each workspace. For example, you can connect multiple RESTful Engines to a workspace whose templates are used more often to generate documents, and attach only one RESTful Engine if that's enough for a particular workspace.
All in all, child workspaces are a powerful feature that allows you to manage your resources more effectively, keep them organized and work more productively.
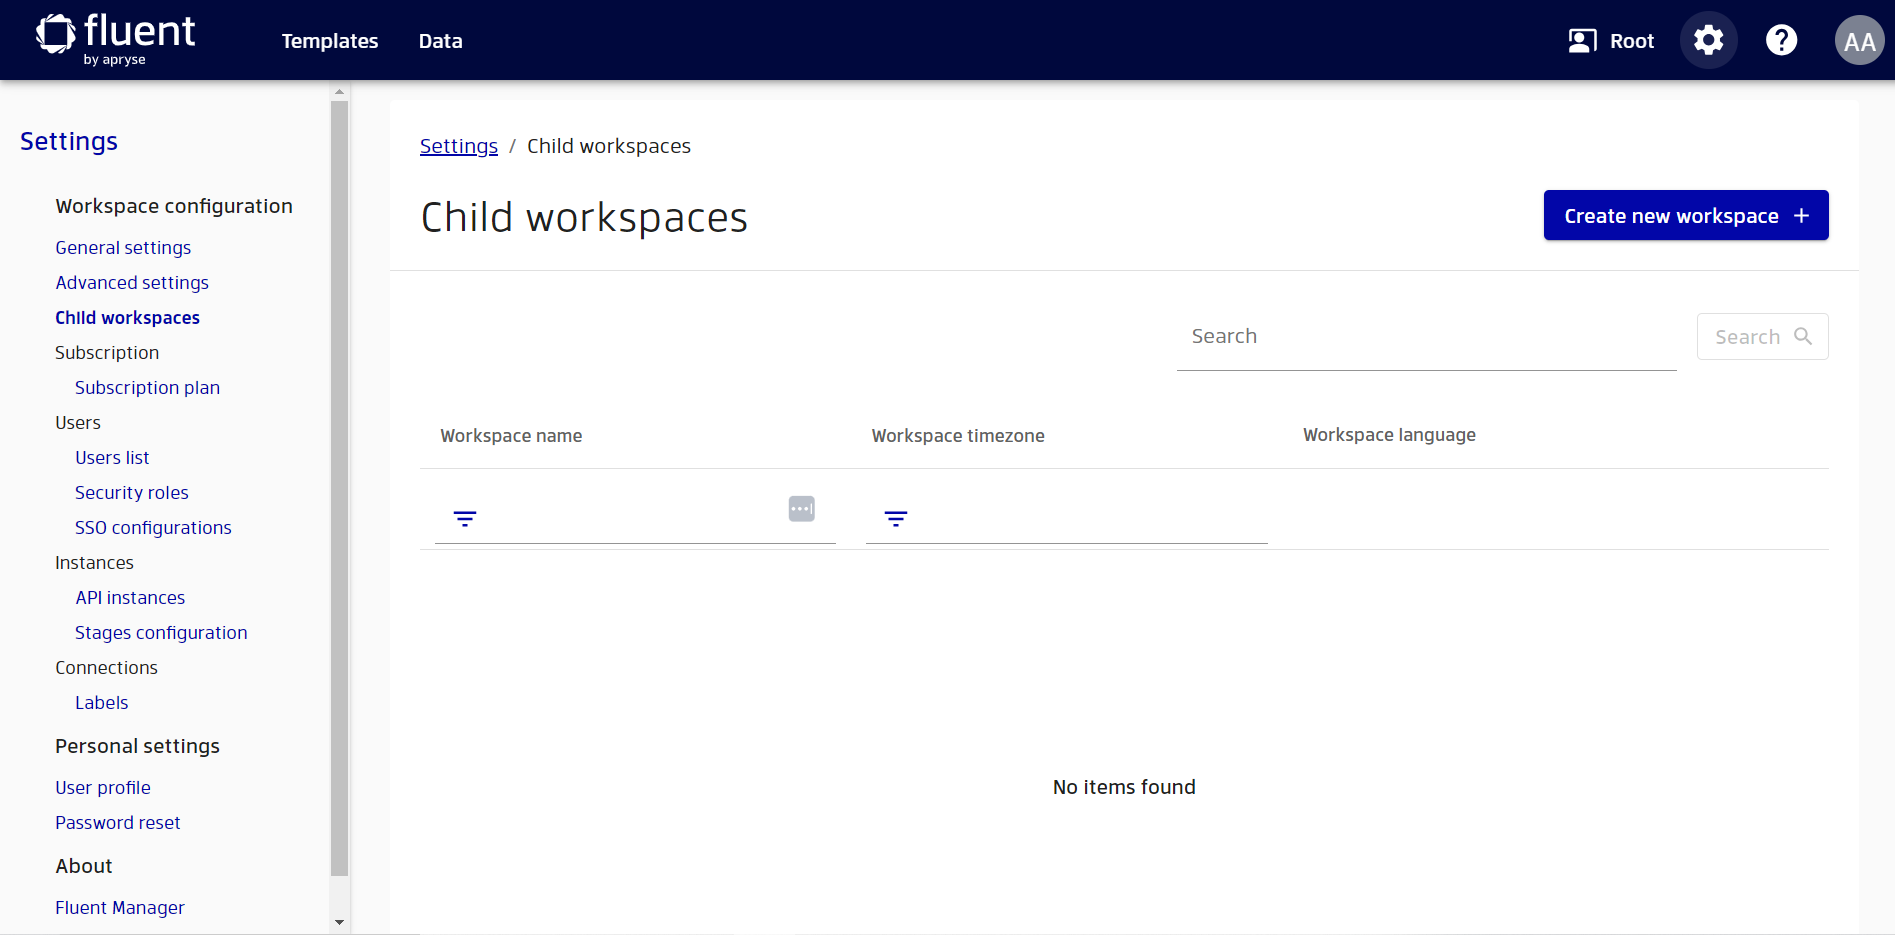
Child workspace creation
To be able to manage child workspaces a user must have certain permissions. If we go to the Settings → Users → Security roles and click Add role, we can choose which workspace permissions a user can have. In order for the user to just see and access Child workspaces settings option on the sidebar, the List workspace data permission must be added. For child workspaces creation the user will need the Add workspace permission.

A user with the Global Administrator role for the root workspace has the authority to manage all child workspaces for all users. Users with an Administrator role can create and manage only their own child workspaces. Users which have just a Template designer role have no access to the child workspaces management.
To create a child workspace, go to Settings → Child workspaces in the root workspace and click the Create new workspace button.
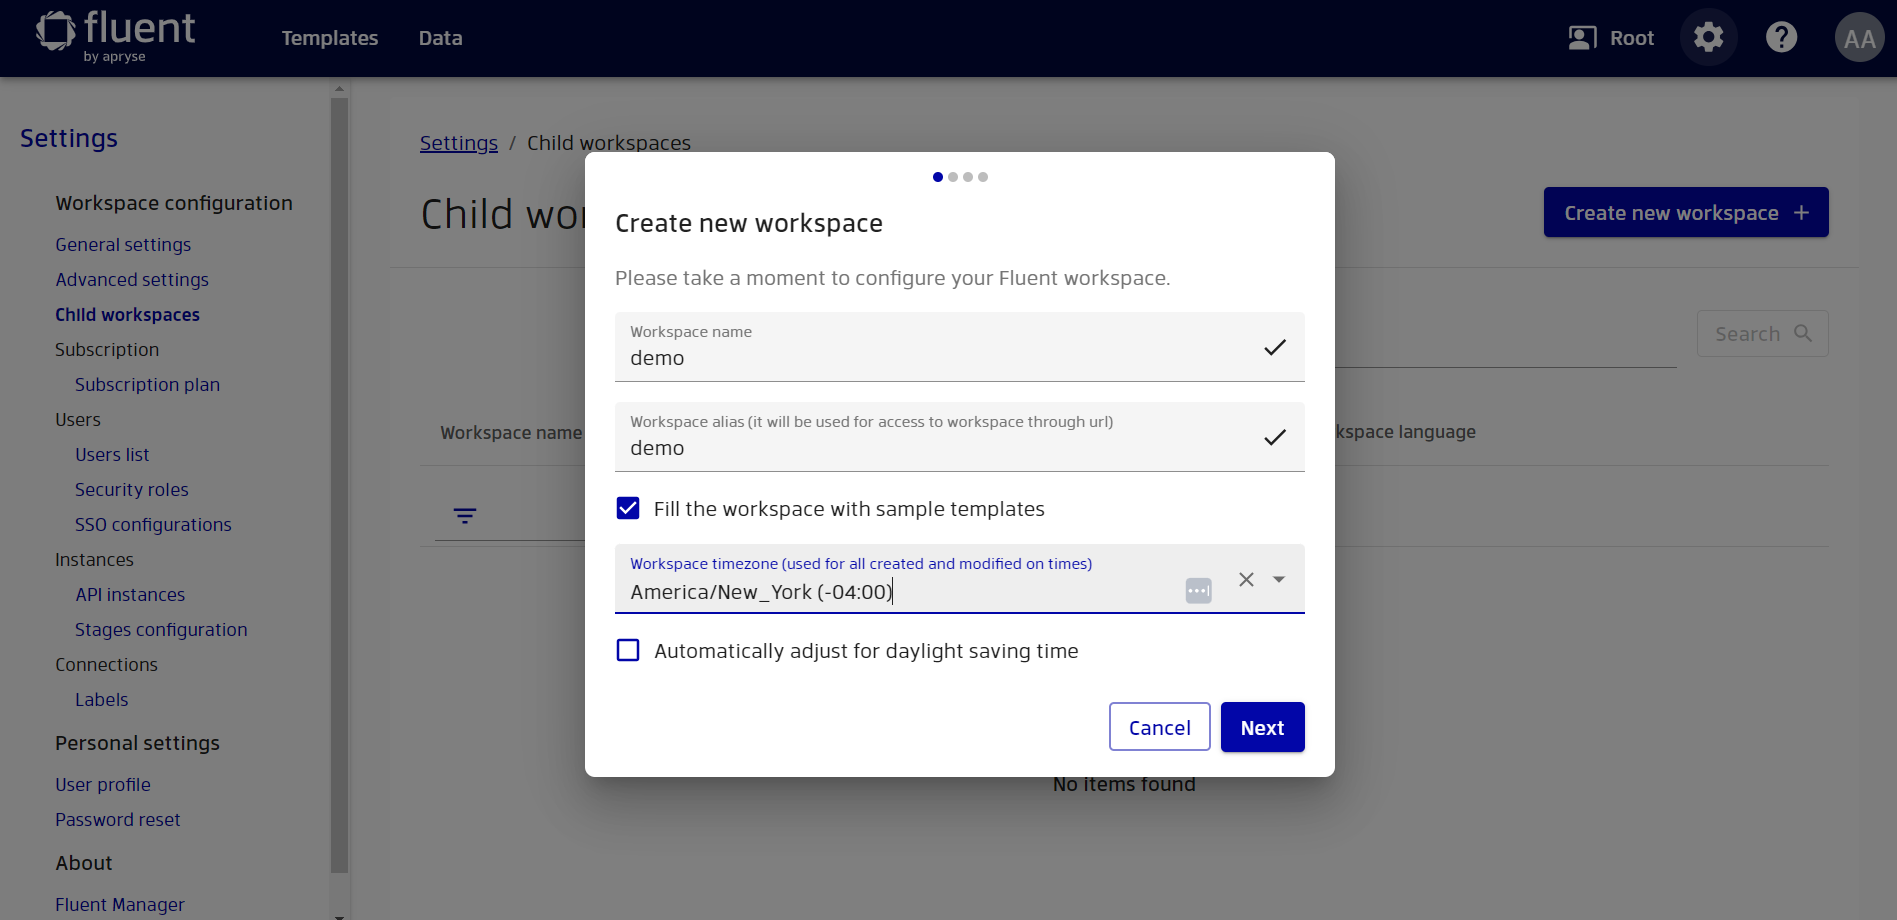
Then you’ll be asked to provide the child workspace name, alias and time zone. If you want to fill the workspace with sample templates to have possibility to explore the application, please select the corresponding option.
And in the next step, to provide a license:

Each child workspace must have its own API instance, so in this step you should provide the name and url of the instance.
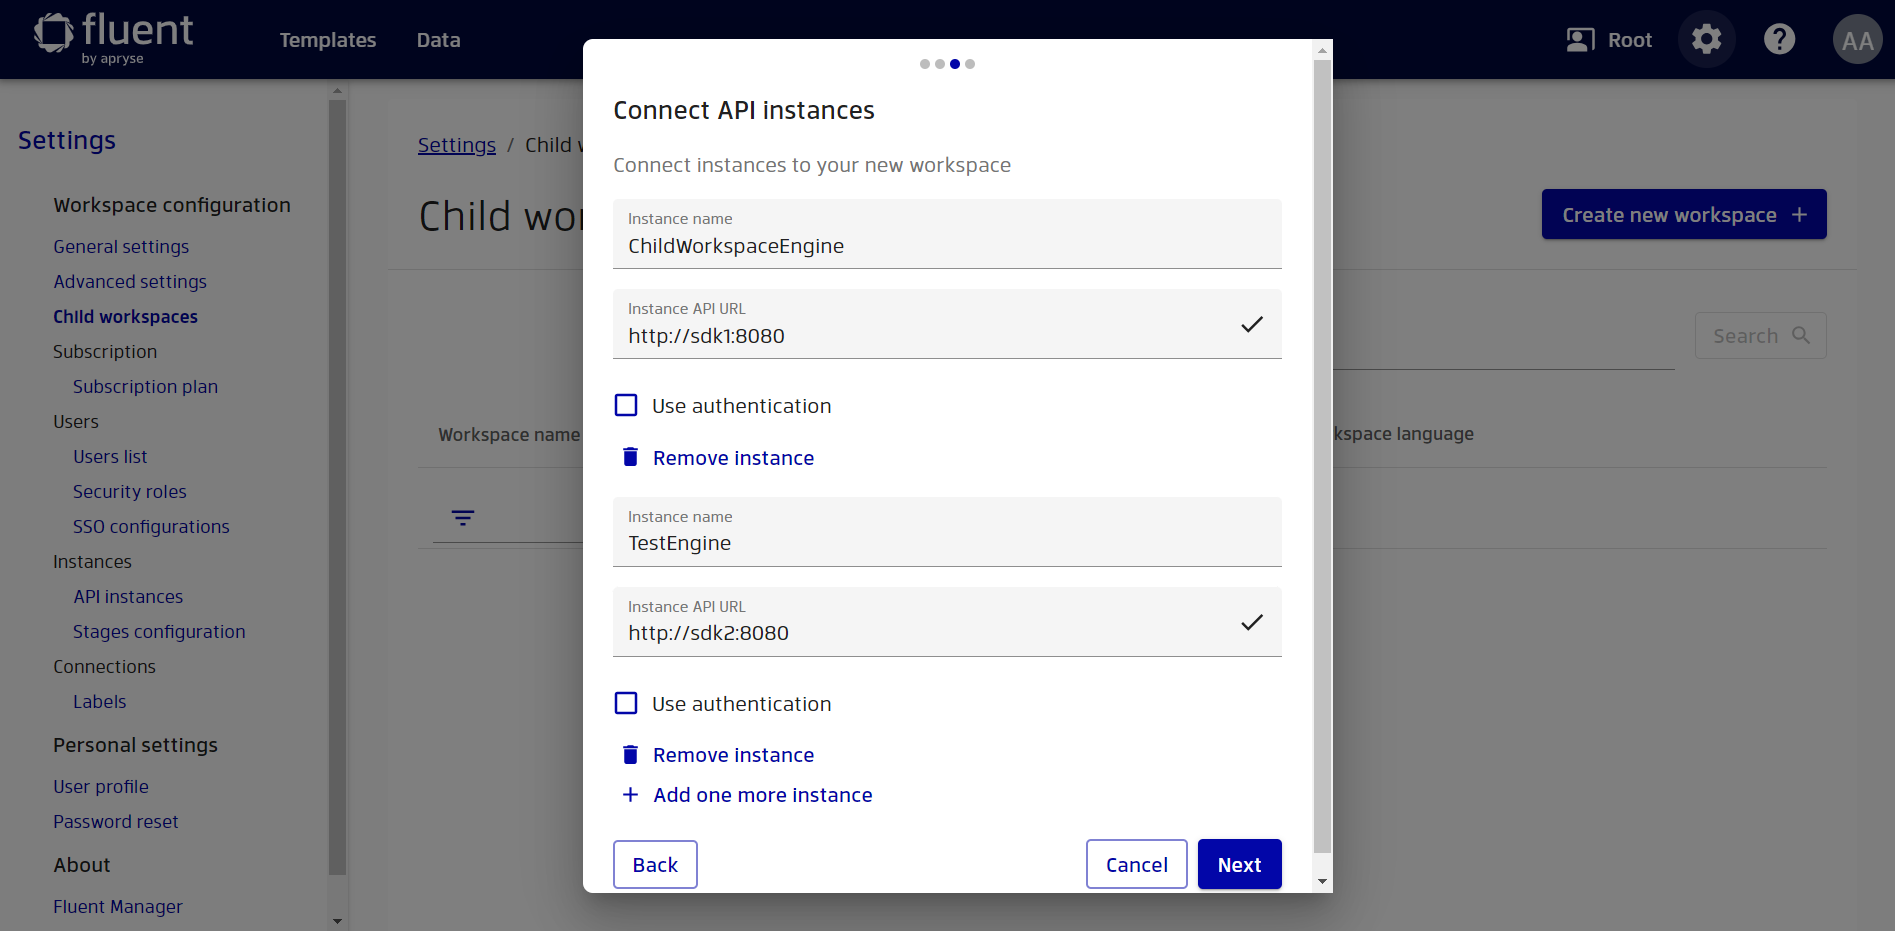
If a user has several instances attached, they should choose one that will be connected to the child workspace development stage. After the successful connection of the API instance, the child workspace creation process is completed.

We can open our new child workspace as soon as it's created.
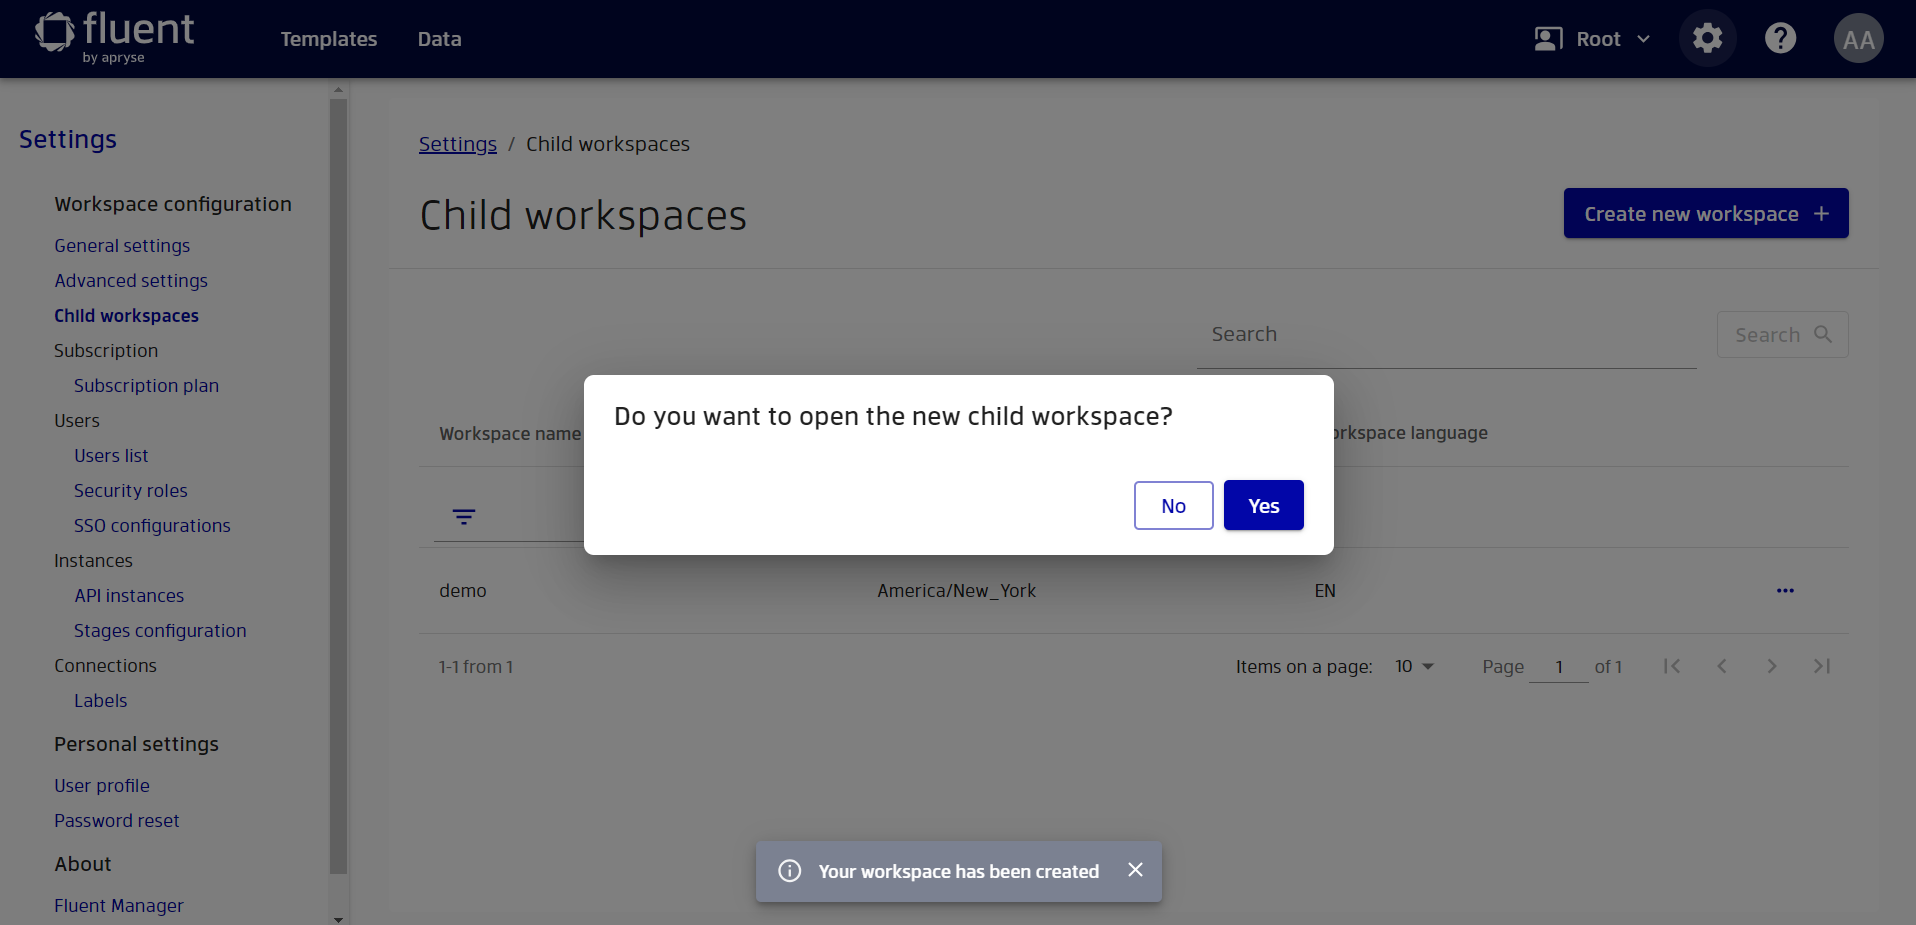
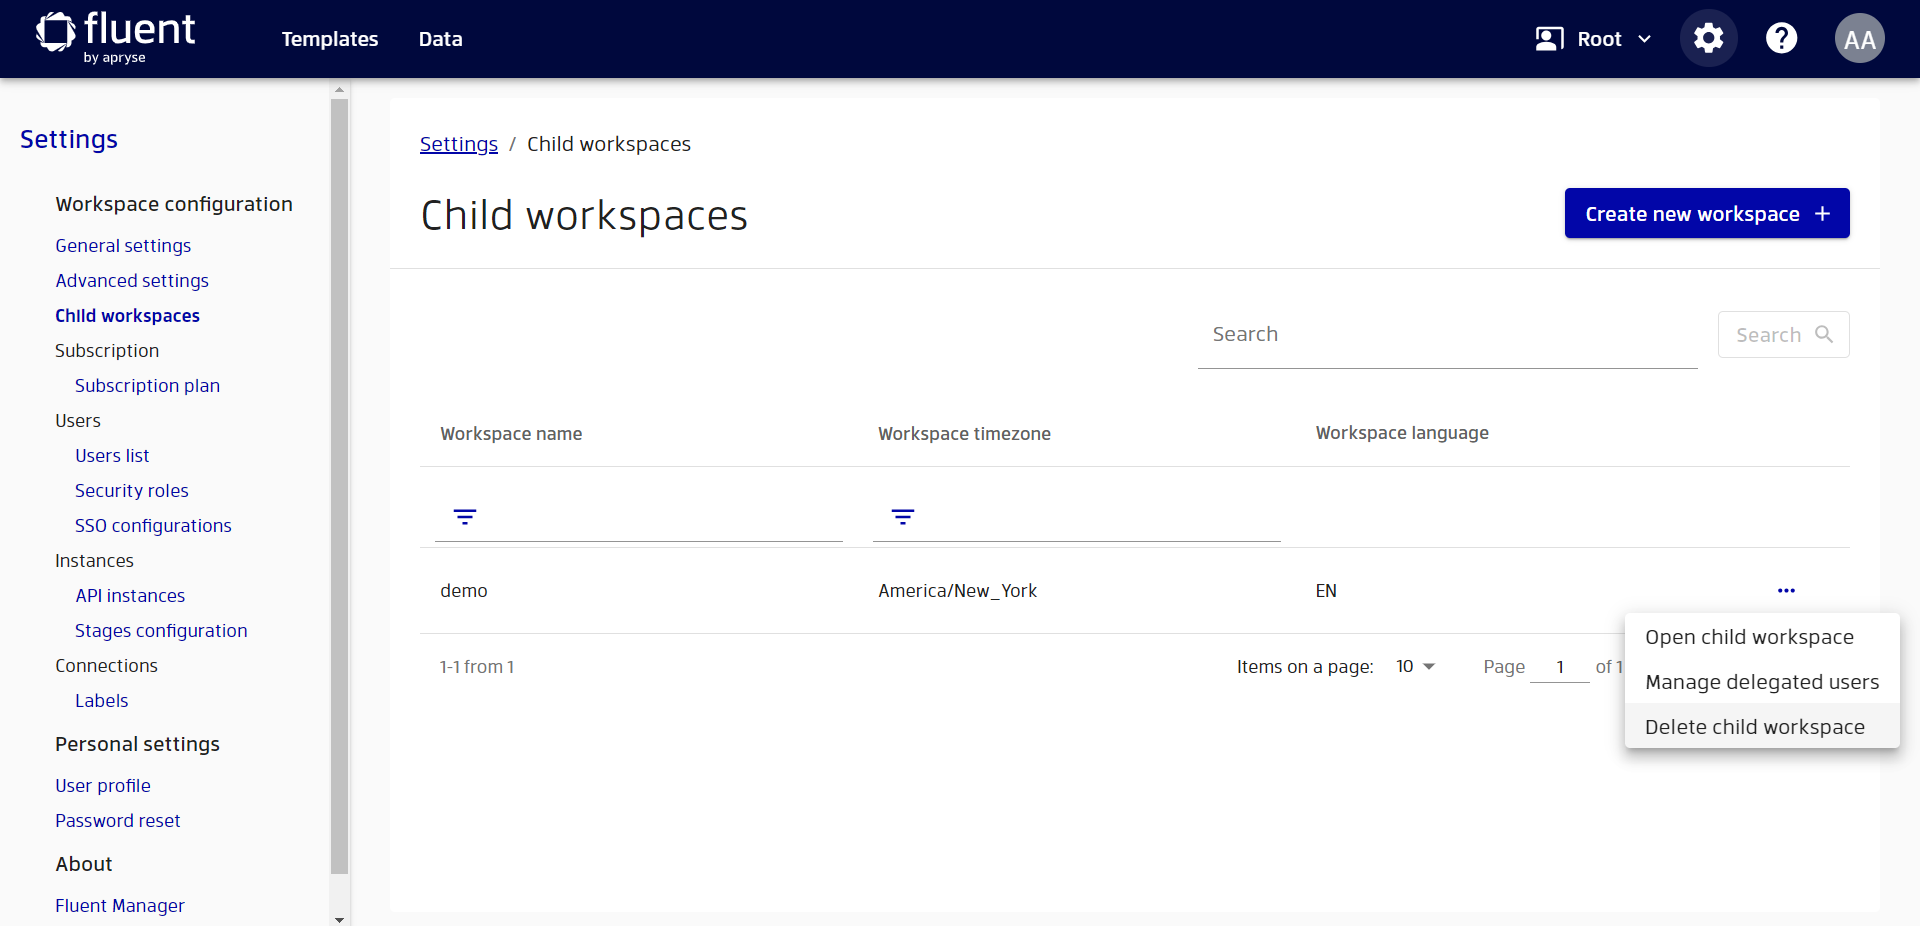
If we don’t want to open it immediately, we can access it later through the child workspace settings option Open child workspace.

Or by clicking on the main workspace name at the top of the page and choosing our child workspace:

Add users to the child workspace
The user who created the child workspace automatically becomes a global administrator of this workspace. As mentioned before, the global administrator of the child workspace can fully manage this workspace. If we want other users to be able to manage a workspace, they must have the Update workspace data permission for that workspace.
We can add users to the child workspace just as we did in the root workspace, by going to Settings → Users list and clicking Add user.
Additionally, we can delegate users from the root workspace by clicking the Manage delegated users option in the settings for the root workspace. To delegate users from the root workspace the user must have the Edit other users' workspace metadata permission.
Additional permissions can be assigned to the user in the root workspace in the Settings → Users → Security roles setting by the global administrator.

And then we can assign or unassign roles in the child workspace to the users from the root workspace.

Delete child workspace
We can also delete a child workspace by clicking Delete child workspace in the child workspace settings.
If a child workspace contains resources of any type: templates, data sources, and so on, it cannot be deleted. In this case, a corresponding message will be shown.
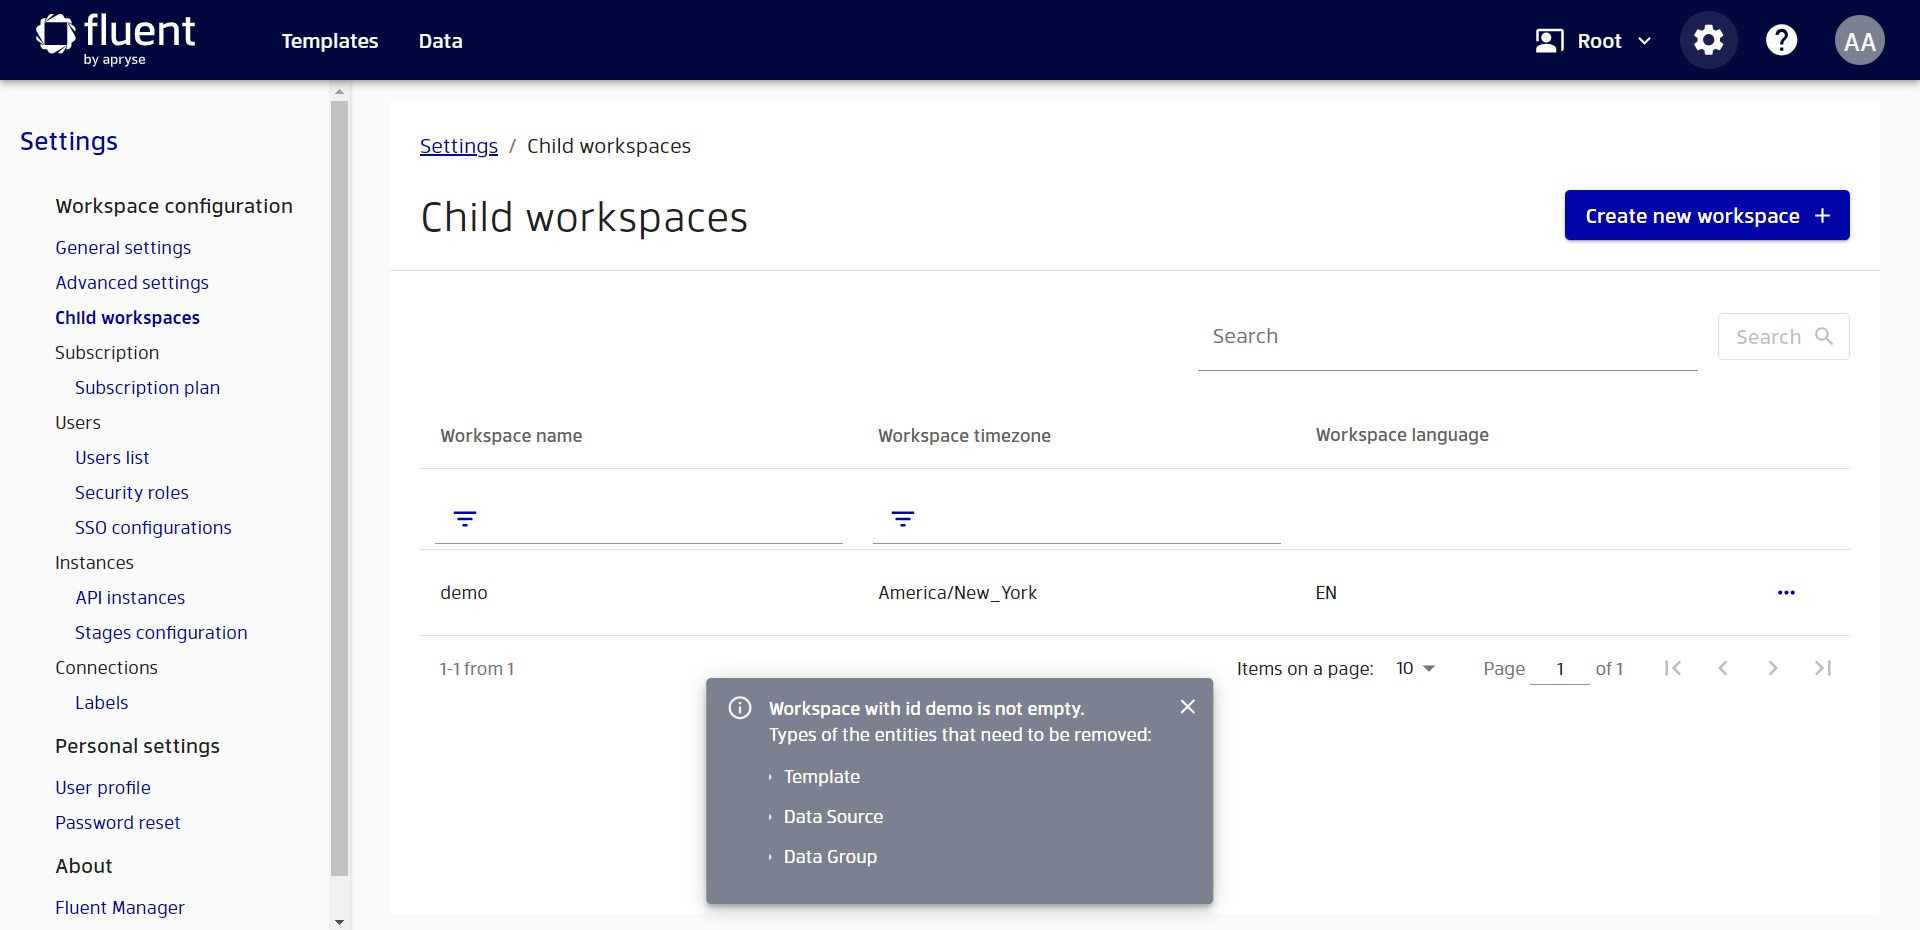
To delete such a workspace, a user must clear all such resources from the workspace.