How Do I Connect to the Jira Cloud API as a Datasource From Designer?
This article is a tutorial on how to connect to your Jira Cloud data through the Jira API using basic authentication.
Generate a Token in Jira Cloud
You can follow these steps in Jira Cloud to generate a token for your user. You will need this token to authenticate your connection from the Designer, so make sure once you generate it you have saved it somewhere for use.
Connecting from Designer
Now that you have a token for your user, we can connect to Jira from the Designer:
- In the Fluent Designer, open the Connection Editor

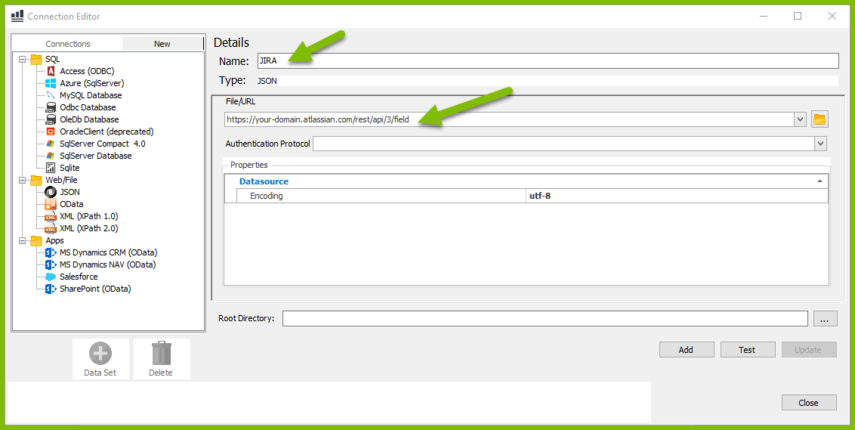
Go to the "New" tab and select the "JSON" Datasource type for your new Datasource
Give your Datasource a name, and specify an API endpoint you would like to call to query your data. For my example, I am calling the "rest/api/3/field" endpoint which will return data on the fields in our Jira instance.
You can use the same endpoint, just replace "your-domain" in the URL with your personal Jira domain:
https://your-domain.atlassian.com/rest/api/3/field

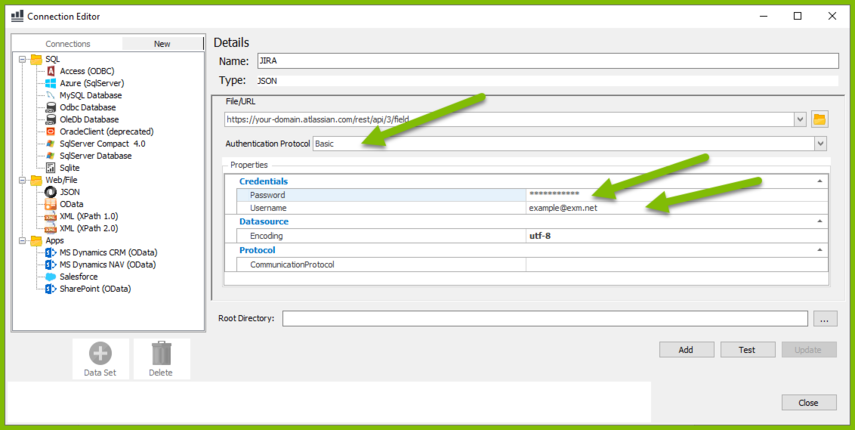
To authenticate our access to the Jira Cloud API, under "Authentication Protocol" select "Basic"
Under "Password" put the token you generated from inside Jira cloud.
Under "Username" but the email for your Jira account you generated the token for.

- Click "Test" to confirm the connection is set up correctly. If everything is correct, you will see "Connection Succeeded."

- Finally, click "Add" to add your Jira data connection to your template.
Now you are ready to start reporting on your Jira data with Windward!
Remember that your Jira account will only be authenticated for the data you personally have access to in Jira. If you don't have access to the data you are trying to report on, please speak to your Jira admin about getting added access in Jira.