How Do I Connect to an OData Data Source?
In this article we demonstrate how to connect a Report Template to an OData data source. For more details about the Connection Editor, see the Connection Editor Reference.
OData is a standard for building and consuming RESTful APIs. OData requests are made with a URL that uses HTTP to request data, using the returned data to populate the report.
A Universal Resource Identifier (URI) looks just like a URL and is the connection point for an OData service. The URI to request data is composed of two parts. First is the root of the URI, typically something like http://services.odata.org/Northwind/Northwind.svc. This root is constant for all requests against a specified OData data source. The "select" in each request is the part of the URL added to the root in order to filter the results. So a select of "Categories" will create the URI http://services.odata.org/Northwind/...svc/Categories. Fluent supports all valid OData requests.
What is Needed To Establish the Connection
- An OData service root URI (such as http://services.odata.org/Northwind/Northwind.svc)
- A good network connection to your OData service.
Please note, if you are inside a corporate network and you cannot access our Fluent cloud-hosted demo data source, your firewall may be blocking you from access. Please consult with your system or network administrator for assistance.
Connect to Your OData Datasource with Fluent
Connect Your Report Template to OData
From Microsoft Word, Excel, or PowerPoint, navigate to the Fluent Manager tab. Once on the Fluent Manager tab, click on the Data Sources button to expand the drop down, then click Data Sources, this will bring up the Connection Editor:

- In the Connection Editor, click the New button to create a new data source.
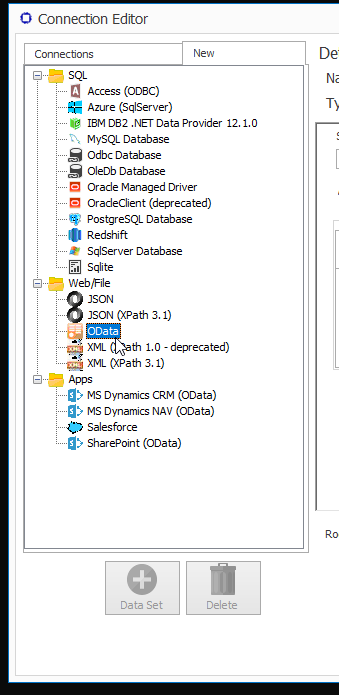
- Click on OData in the Web/File section. The Details pane will change to prompt you for your data source details
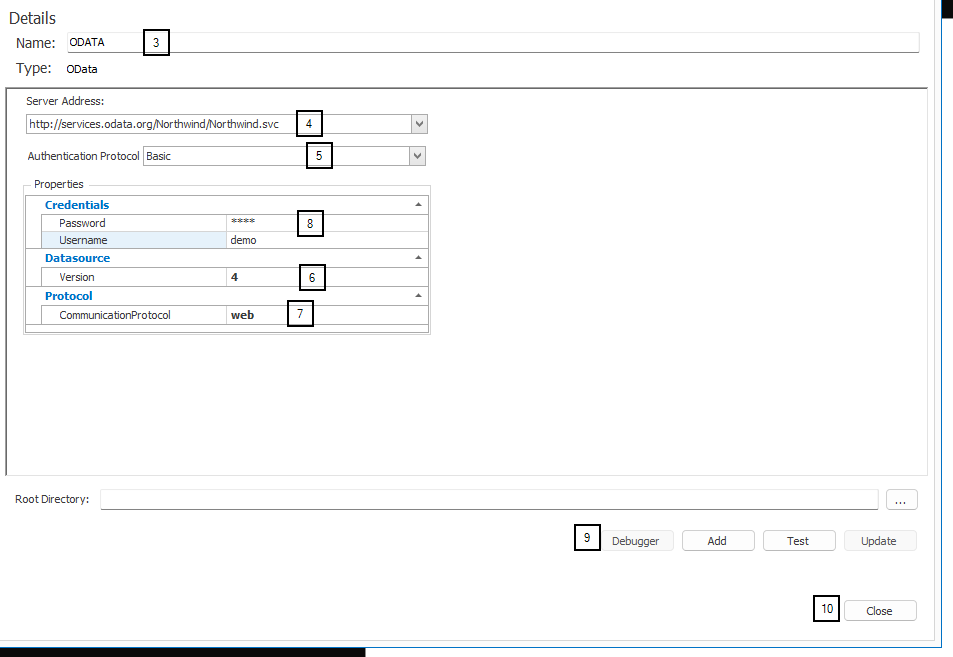
- Enter a Name for your data source connection.
- Enter the URI root to your OData service in the Server Address field.
- (Optional) Choose your Authentication Protocol. The Authentication Protocol you choose will set the contents of the contextual Properties window below. For additional information, see our article Data Access Providers and Authentication Protocols.
- (Optional) Choose the OData data source version. The OData version defaults to 3, but you can use the dropdown menu to select a different version.
- (Optional) Enter the Authentication Protocol Properties, based on the choice of Authentication Protocol above.
- Click Add, and then Test your connection. If all parameters and credentials are correct and a connection is made, you will receive a successful notification.
- Click on Close to save your information.
Other (Optional) Connection Editor Fields
Root Directory: This is the "default directory" for any Import Tag requests where the requested file does not have an absolute path. If left blank, Report Designer will use the directory where the data source file is located. If the data source is not a file it will use the directory where the template is located.
Notes
Connection String
When you set all the properties for OData you will get a connection string in the form
“Url=http://services.odata.org/Northwind/...data.Version=2;”
Use the connection string in your code as shown below.
| .NET Code | Java Code |
|---|---|
new ODataDataSourceImpl ( “Url=http://services.odata.org/Northwind/...data.Version=2;” ); | new OdataDataSource ( “Url=http://services.odata.org/Northwind/...data.Version=2;” ); |
Using https to Connect to OData
If you are using https to connect to OData, you may get an exception relating to lack of authority or invalid certificates. In this case you will need to add your certificate or your machine's "Trusted Root Certification Authorities" store. This can be done by following the steps here:
http://www.thewindowsclub.com/manage-trusted-root-certificates-windows
Troubleshooting
If there is a connection error, it will appear at the bottom of the Connection Editor when you click on Test.
Maximum Bytes Error
"The maximum number of bytes allowed to be read from the stream has been exceeded. After the last read operation, a total of XX bytes has been read from the stream; however a maximum of 10000000 bytes is allowed."
To raise the message size limit, set the "odata.max-message-size" property in the Report Designer configuration file, under the <WindwardReports> node.