How Do I Connect to Data Using My API Key for Authorization in Designer?
This article explains the process of changing your Authentication Protocol to Request Header in Designer. This new feature allows better security of your API key since you no longer need to specify the key a URL (which can be cached and shared).
Adding a New Data Source
To add a new API data source with Request Header Authorization:
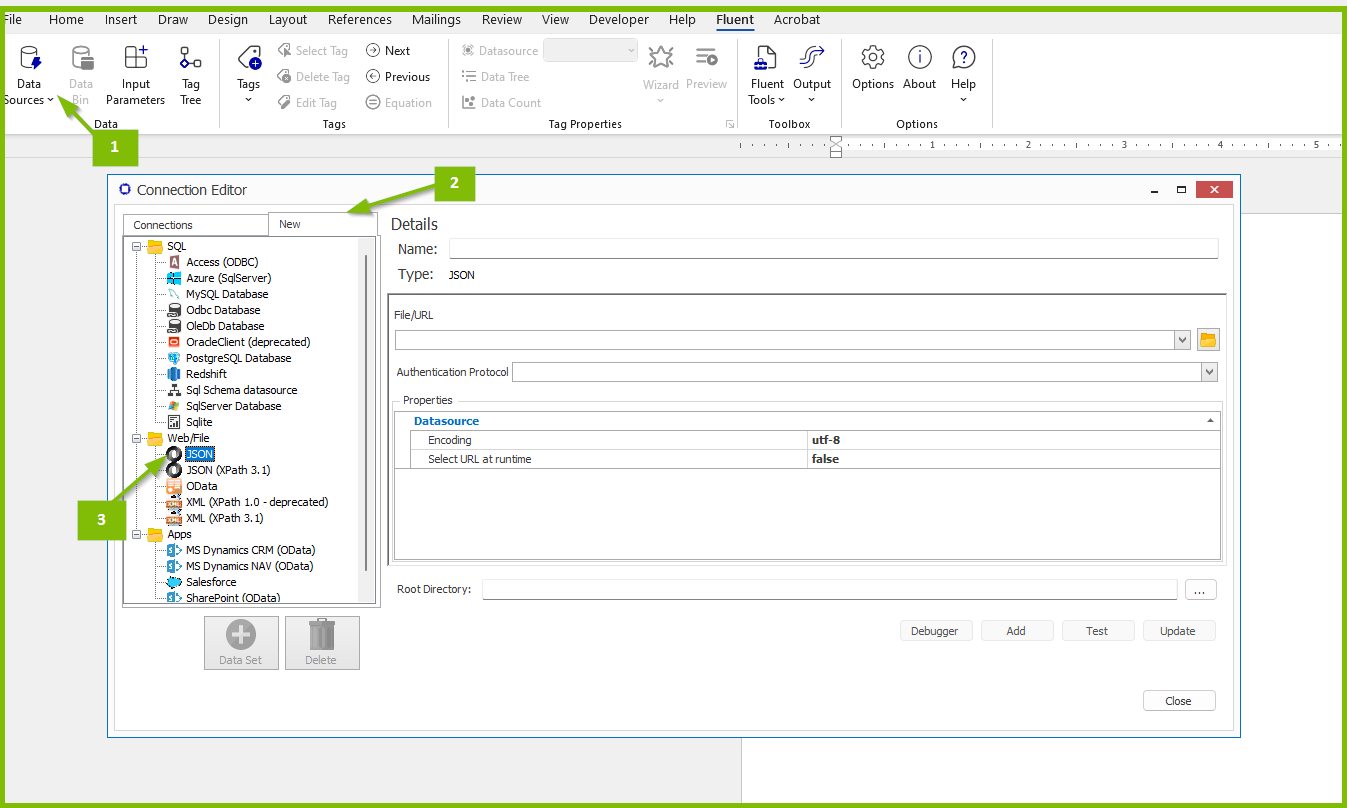
1. Open the Connection Editor.
2. Click on the New tab
3. Select a JSON connector to create.
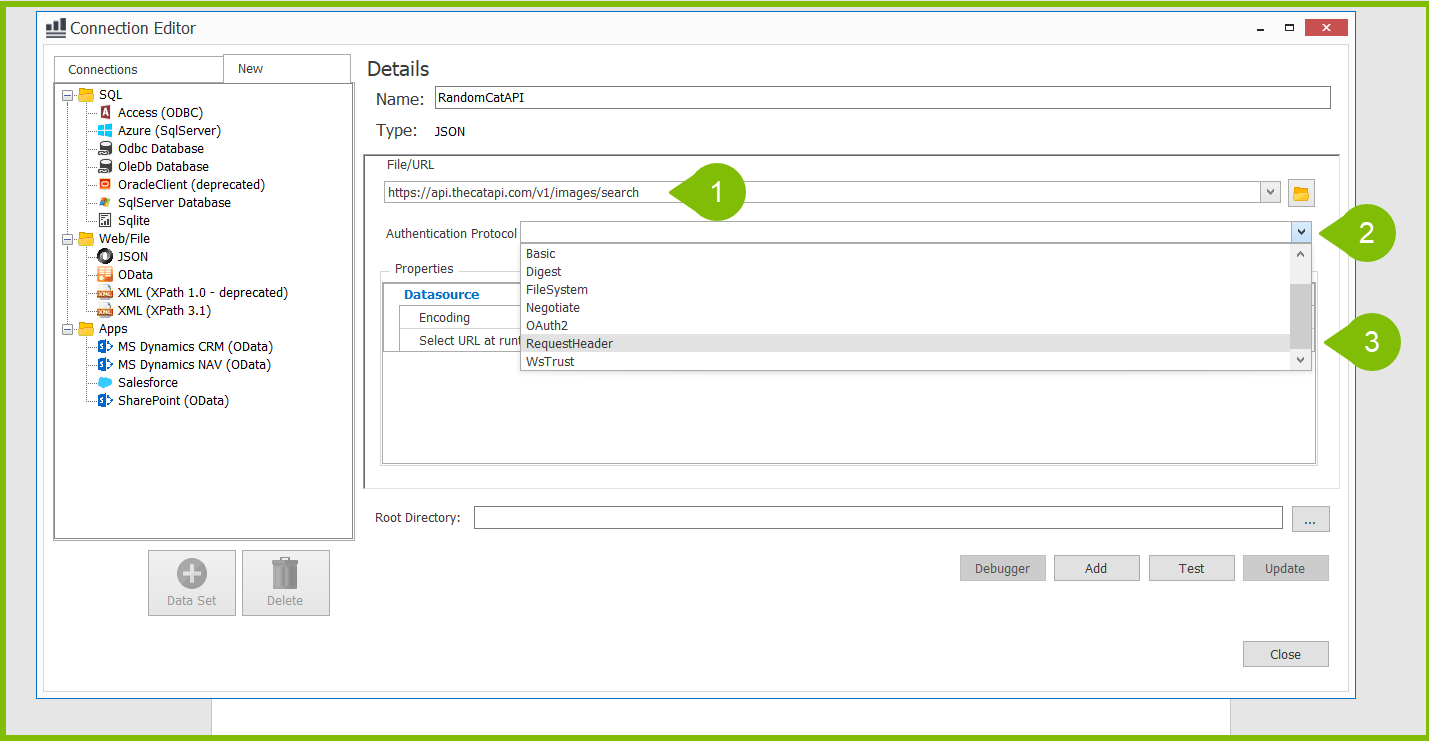
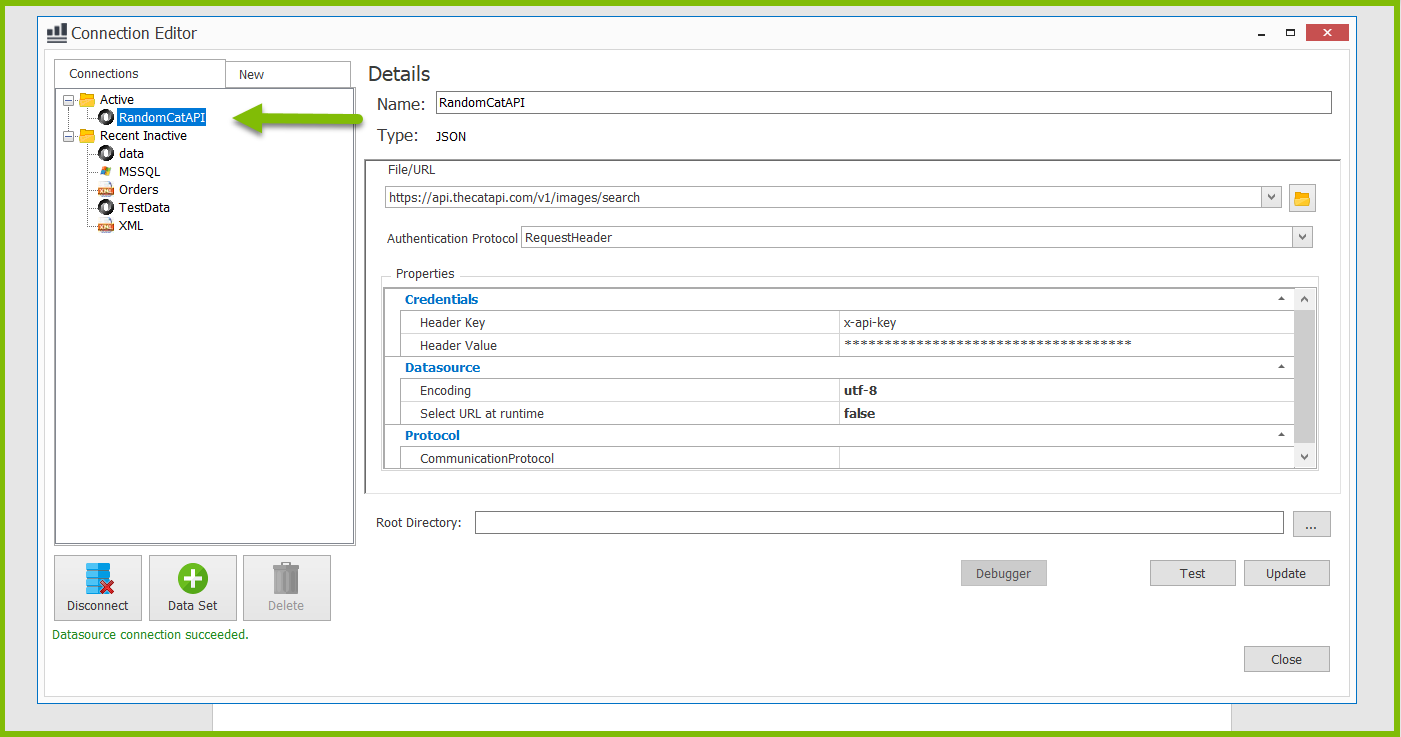
4. Enter your URL that connects to the API you found under File/URL. For this example, we will be using a Cat API that can be found on the internet.
5. Click the drop down arrow for Authentication Protocol and select "Request Header".
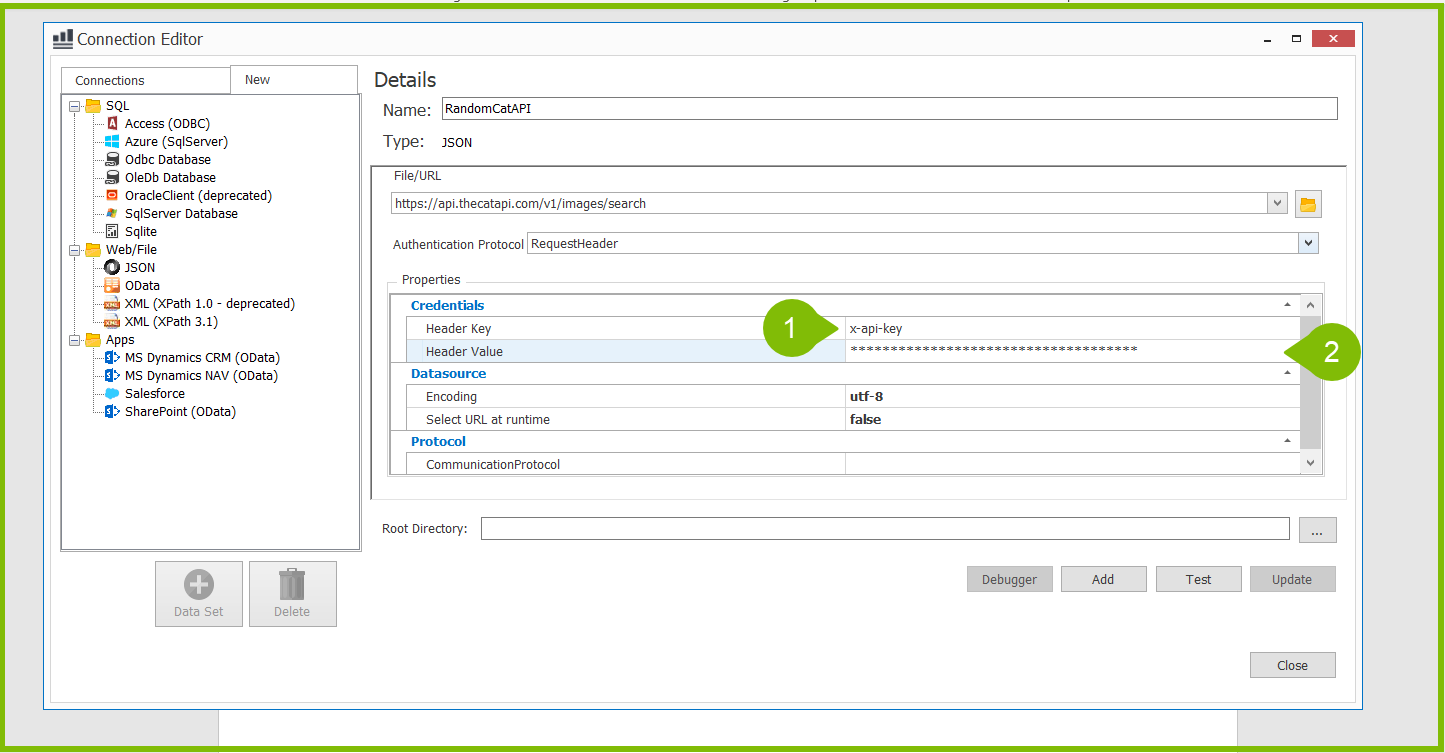
6. Enter your API's specific Header Key and Header Value in the Credentials.
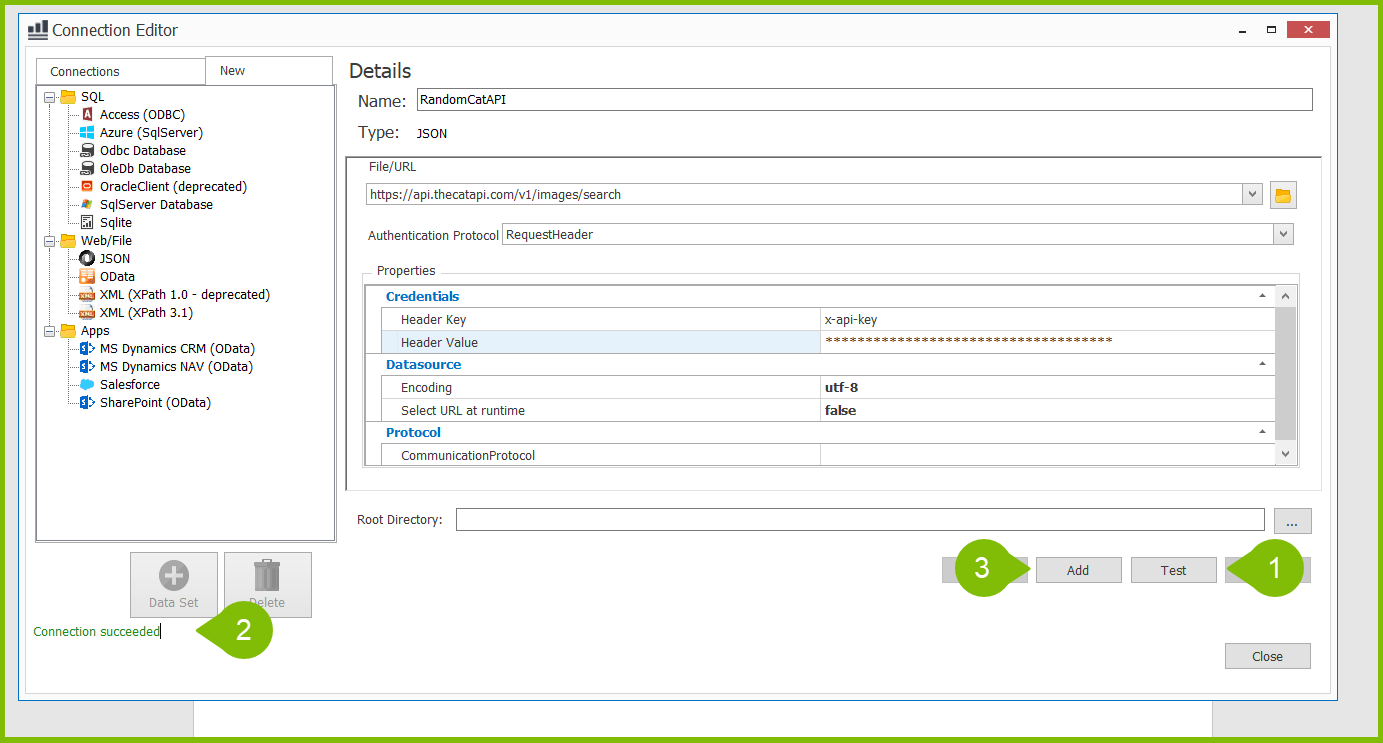
7. Click the "Test" button.
8. Check that your connection succeeded in the bottom left corner of the Connection Editor.
9. Click the "Add" button to add the data source to your connections.
You can now view the new data source under the Connections tab in the Connection Editor, and use it in your document.
Connecting to Data Using API Key for Authorization in the .Net Report Engine
See How Do I Connect to Data Using My API Key for Authorization in the .Net Report Engine?
Connecting to Data Using API Key for Authorization in the Java Report Engine
See How Do I Connect to Data Using My API Key for Authorization in the Java Report Engine?
Connecting to Data Using API Key for Authorization in the Report Engine for RESTful
See How Do I Connect to Data Using My API Key for Authorization in the Report Engine for RESTful?